Friday, September 30, 2011

Royal Treatment Makeover ~ Frosted Designs Fussy Cutting

This week's Fabulous Friday Challenge at Frosted Designs is to use a "fussy cut" in your project.

One of my friends nominated me for a Makeover at our local outdoor mall.  There were three of us who won!  We got to model clothes (mine were from Coldwater Creek) and have our hair and make up done at Ulta.  I was so nervous, but had so much fun!!
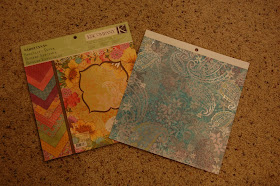
I love this paper from K&Co. and had to work it into my layout!!
Here was my original sketch.  I knew I wanted to hide some photos, but I changed the background a little bit.

I opened a 12 x 24 mat on my Gypsy and started my layout.  I put a fancy page from Elegant Edges on my mat at 12.01w x 11.46h and rotated it -90 degrees so the flourish/swirl was on the side.  I put the border on the mat at 11.06w x 2.38h and rotated it -90 degrees.  I moved both of these items to Layer 3.
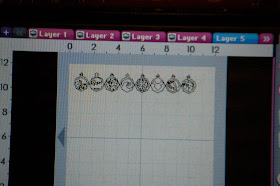
I found this flourish on Home Decor sized at 9.11w x 3.09h.  I copied a second one on, flipped it and welded it together to create this corner.  My good friend Sheila from ShesASassyLady first did this on a project a while back and I love the look!  I also copied a second border, sized it to 6w x 1.29h and welded a rectangle to it so I could sandwich it between a photo and photo mat.
Here is a close up.  I cut these pieces out in light blue shimmer cardstock.

I took a piece of 8x6 cardstock and folded it in half at the 4 inch mark.  I opened it up and adhered the two pictures I wanted hidden inside.  I sandwiched the blue border piece between the top photo and the cardstock to create a flap.
This is the photo I put on the top.  This young lady did a great job on my make up.  She graduated a year after my oldest son!
Here are the two inner pictures.


I found my title on Storybook and sized the letters to 2.23 inches and cut them out in silver paper.  I also found the word "beautiful" from Home Decor and cut it out at 1 inch.
I saved the negative piece of paper and used it as a template to adhere my letters down.
I accidentally threw this piece away and had to dig it back out!!!

I added some gems and flowers to my flourish.
I tucked in a few flowers by my photo.
I adhered the word beautiful right on my photo of the "after" shot.


Here is my before shot on the stage.  We went on stage before the concert started.

Here is my after shot after an hour of pampering.
Here is my fussy-cut layout all together.  Join us this week at Frosted Designs with a fussy-cut layout, card or project this week ~ we would love to see you!!

Thursday, September 29, 2011

Disney Cruise Autograph Pillowcases

Hi ~ today I am a Guest Designer for SweetSassyDiva and I have a Disney project to share.  I was in the Disney Hop with Sweet Sassy Diva last weekend and you can see my layouy HERE if you like.

We are getting ready for our first ever Disney Cruise!  We have been lucky enough to go to Walt Disney World several times with our boys, but I was shocked when my husband suggested a cruise.  He does not really like the water so I figured a cruise would be a girls vacation or no vacation for me!

Mike is a researcher and he read on the Disney Message Boards that you can bring a pillow case on your cruise and the characters will sign it while you enjoy the cruise.  I decided to decorate two of them and here is how I did them:

I opened a 12 x 24 mat on my Gypsy and used Disney Mickey Font for my letters to spell out APGAR FAMILY DISNEY CRUISE 2011.  My original plan was to letter the top of the pillow case on both sides so I sized my letters so the words would fit a 20" length (the width of the pillow case).

Then, I flipped the letters so they would cut out in reverse.
I took Freezer paper and cut a piece to fit my mat.  I cut it shiny side up.

I pulled the freezer paper "stencil" off of my mat.

At this point, I changed my mind and put all of the words on one side of the pillow case.  I put APGAR FAMILY at the top and the rest at the bottom and ironed the stencil on the pillow case.  I added in the center pieces for the D, R and A's and ironed them in.
I used fabric paint and a sponge brush to paint my letters.  ***Don't forget to put something in between the pillow cases so the paint doesn't leak to the back side.  I did not have any cardboard long enough, so I used the back of my cricut mat.
After the paint dried, I carefully peeled the stencil off the pillowcase.
Here is the pillow case all painted up!  I made the next one with blue paint.
Don't forget to peel out the center of the letters!
Here is the blue lettered pillow case.
I added Nemo ribbon (found at Wal-Mart) to the edge of the pillow case.  I don't sew very well so I am having my MIL sew the ribbon on ~ I just tacked it down for the photo.
I used this ribbon (also found at Wal-Mart) for the black lettered pillow case.
I can't wait to see it filled up with autographs!!  Thanks for having me here again Bobbi Jo!!

Sunday, September 25, 2011

Getting Goofy at Disney LO


Here is my layout for the Disney Link Up Party!  You can enter your Disney Layouts HERE if you want to share yours!

We have been to Disney several times since Tanner was 2.  Our boys are now 21, 16 and almost 6.  After the older two grew out of Disney I was super sad.  Then our surprise arrived and my first thought was "We get to go back to Disney!!!!"

Every time I scrapbook a Disney Vacation, I try to do something different.  This time Tanner and Kramer kept taking funny face photos and I thought what better way to remember our trip?!?
I used Makin' the Grade for the word "getting"  and the "@" and Disney Mickey and Friends for the rest.


I want to add that my project from the Disney Hop Day 1 was:
Sometimes when I find inspiration, I save the page to my favorites.  Sometimes I just sketch it down a day or two later.  Sometimes I remember right away where I saw it, but this time I did not.  I am so glad that Amy shared her link with me!   HERE is where I got my inspiration from.  I used her idea and put my own spin on it.  Thanks Amy for the inspiration (and a great layout idea)!!


Saturday, September 24, 2011

Accordian Card ~ Halloween Greetings

If you are looking for the Disney Pixar Blog Hop Day 2, go to DISNEY DAY 2.  If you want to see my Disney post from Saturday, go see DISNEY.

I saw this accordian card on Sassy Dude's blog The Cricut Couple the week he Guest Designed at ShesASassyLady.  You can see his tutorial HERE


Sheila has a linky challenge on her BLOG for accordan cards ~ be sure to check it out!!!

I used George for my square and Close to My Heart Art Philosophy to make my card.


I cut out the frame for the front of the card and the inside cover.
I cut out these flowers with K&Co. Halloween 2-sided paper.
Here is the inside of the card.
I used a Kinderstampo stamp on the front of the card.  I used black stickles on the edge of my flowers.

Thanks for stopping by!

Disney/Pixar Official Blog Hop (3rd) Disney Cruise Layout

Welcome to our 3rd Disney Pixar Blog Hop!!!  I am so super excited because we less than a month away from taking our first ever Disney Cruise!!!  Of course I had to make my project cruise related!

I have included the complete list below.  If you have found me first, please stop by Shawn's BLOG so you don't miss a thing!!

Lori ***HERE
Diane  ***NEXT
Amy
Now let's get started on my layout!  I typically create 2-page layouts and I usually start with the photos.  Since I do not have the photos yet, I started with the paper.
I used paper from this Nantucket DWCV Stack that I found on CLEARANCE at Michaels!


I sketched out my layout on paper. I saw two different non-Disney cruise layouts I wanted to incorporate, as well as some "hidden Mickey" suggestions from my friend. ****I would like to add that Amy's Cruise Layout was a big inspiration for me and you can see it HERE!!!  Amy ~ thank you for reminding me where I saw this as you deserve credit for the project inspiration!!

I open a 12x24 mat on my Gypsy to layout to plan my 2-pages together.  I put the life preserver from Life is a Beach in the center of the mat and sized it to 11.17w x 10.75h.  I only cut out the stripes from the layer (not the rope) as I wanted my life preserver as big as possible to fit a photo inside.
I cut out my life preserver and stripes and centered it on my two pages. 
Next, I wanted to make my own mermaid Disney Style.  I took the mermaid from Life is a Beach at 3 inches.  Because LIAB does not have individual layers, I just hid the extra pieces with Hide Contour instead of cutting out all of the layers in yellow, green and pink.

On the bottom layer, I welded Mickey Mouse ears to the mermaid.

I took some of the charms from LIAB and created a Mickey Charm of my own.  I sized them all to 1.5 inches.

I cut them out in black so they would be visible on the page.

Next, I opened a new layer on my Gypsy and shut all the other layers except the one with the life preserver.  I used Mickey Font for my letters and spaced them around the life preserver.

I cut them out in black cardstock.
I cut my life preserver in half and adhered them to the pages.
I used my negative piece as a template for my letters.  I ran the letters through my Xyron and stuck them down.
Once you start, the template stays in place.
I gently pull the template off the page.
My letters are perfect every time!
Here is my mermaid taking shape, but she needs a face and some sparkle!!
I gave her a Peachy Keen face and added lots of stickles!!
What do you see in the clouds??  I see Mickey!  I found this cloud shape in Pop-Up Neighborhood.
The sun is from Creative Memories Cheerful Seasons.  I cut an extra Mickey Ears for the sun!
I stickled up the charms and used some twine to create a banner.
I stickled up the sun and clouds.
I put my mermaid next to the life preserver so it looks like she is featuring my photo!
I added the silver anchor and some silver photo mats.  I added the year to the photo mat.
Here are my pages together ~ now I just need to go and get some photos!!!
I always take a special notebook when we go to Disney to record the little details that I want to remember after we get home.  This one is made from some Toy Story paper and stickers I got at WDW.  I used my Bind-It-All to assemble it.  I am including one of these in my Blog Candy today.
I also covered a composition book and threw in some Mickey buttons and acrylic Mickey Heads.  In order to qualify, you just need to leave me a comment with a favorite Disney memory (can be a trip, a movie, a halloween costume ~ anything)!


Don't forget about our linky party ~ you can join in the Disney Fun!!
Link up Party - September 26th


 All of you are welcome to join in this also. You can link up Disney Pixar
 scrapbook layouts, cards and other items at each of the following sites


 Shawn _http://craftychicsblog.blogspot.com/ Link your scrapbook pages

> Melissa _http://www.disneydreamerdesigns.blogspot.com/)link your cards

> Amy _http://www.lovetocrop.com/ link any other Disney projects (cakes, decor, anything that is not a card or scrapbook layout)


Your next stop in this hop is the fabulous Diane from Capadia Designs!