Wednesday, November 30, 2011

Trim The Tree (Sweet Sassy Diva)

I am the Guest Designer today over at Sweet Sassy Diva's blog.  For my Trim the Tree poject today I made a 3D ornament.  I love decorating Christmas Trees!  We have 4-5 trees that we decorate each year.
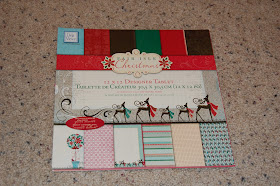
I started out with this reindeer paper that I got last year at Michaels.
I cut 6 circles at 4 inches.
I scored and folded them in half.
I taped a loop of ribbon to the top of one of the circles.
I ran 3 of the cicles through my Xyron.
I adhered the circles together one at a time.
I put some gold Stickles on the edges of the circles.  I did half of the edges and set the circle on its side to dry.  Then I finished the other half.
I tied a bow on the top of the ornament.
This is a fun way to make a 3D ornament with just about any shape!  I hope you have fun decorating your house for the holidays!!

Friday, November 25, 2011

Disney Tag Mini (Frosted Designs)

This week, our Fabulous Friday Challenge over at Frosted Designs is to use Metal in your project.  We just returned from our very first Disney Cruise.  I usually create a mini album before our trip for the character autographs.  This time I did something a little different!
I cut out these tags on my cricut and took them with us.  I had the character sign the tag.  Originally I was going to put the tags on the pages of the mini album I decorated, but changed my mind.
I had the photos printed out in the Wallet size at Wal-Mart (which gives you two photos) and matted the photos and adhered them to the back side of the tag.
I covered the front and back tag with Disney paper and cut out the Mickey Head, cruise and 2011 from Mickey Font.  I tied ribbon to the metal ring.

I hope  you like my project, and I really hope you create something with Metal and enter our challenge at Frosted Designs this week!!

Thursday, November 24, 2011

Happy Thanksgiving!!

Aren't these turkeys cute?!?  My daycare kids made these and had so much fun.  They painted the bottom layer, glued the feathers on and then glued on the heads.  These are from Create A Critter.

This year I am thankful that I get to do a job that I love, I am healthy, I have a great family, I get to craft most every day and I have a ton of friends!!!

I hope you celebrate everything you are thankful for this weekend!

Wednesday, November 23, 2011

Thanksgiving Centerpiece

We are celebrating Thanksgiving this week at Sweet Sassy Diva's!!!  Today I made a centerpiece for my Thanksgiving Party.
I used paper from this DCWV Autumn Splendor paper pad to cover these coasters.

I got these coasters in the dollar bin at Michaels a while ago.  I used the Crop-A-Dile to punch holes in the corners to tie the coasters together.

I found "grateful" on Gypsy Wandering an cut it out at 3.16.  I also found the pumpkin on Gypsy Wandering and cut it out at 3.75.  I wanted a stem for the pumpkin, so I copied the layer and scootched it way down on my mat so it only cut the top of the pumpkin.


I used cardstock for all of these cuts.

I found this turkey on Create A Critter (he is so cute) and I cut him out at 3.75.

I inked up the leaves with some Ranger inks and a sponge.


Here is Mr. Tom Turkey is all dressed and ready for dinner.

I grabbed this cornucopia from Paper Doll Dress Up and cut it (and the layers) out at 6.37 inches.  The layers will cut all of the fruits (in the same color papre) so I coped it two times and used hide contour to hide some of the fruits.

The faded lines are the hidden cuts.  This way I can separate the fruits and put my colored cardstock in the correct place on my mat.

After I cut everything out, I realized that I wanted the cornucopia more dimensial.  I copied one to another layer on my Gypsy and hid all of the inner cuts.  I cut that one out in darker brown.

I cut the opening of the basket with my scissors.  I inked the slits of the basket.

I inked the fruits as well and tucked them inside the basket a bit.

I adhered each decoration to a coaster and tied them together with gold sheer ribbon.
Here is my favorite side ~ Mr. Tom Turkey!!  I am grateful that Bobbi Jo invites me over to play!

Have a wonderful Thanksgiving Week!!!

Saturday, November 19, 2011

Sweet Happy Birthday Card


Yesterday I was asked to attend a Girl Scout Meeting and show the girls how to make cards.  Their meeting was a Service Meeting and they were making cards to give to someone else to give.  They also made bath salts, no sew blankets, ornaments, bookmarks and hanger covers.  I wanted to create a sample card that was simple, but did not look simple.
I was inspired by a card that my friend Amy Voltz sent me along with a prize I won on her blog.
I trimmed a piece of cardstock and ran it through my CuttleBug to emboss it.  I tied a ribbon around the cardstock before I adhered it to the card base.  I cut out an oval and a fancy shadow.  I used a Pink by Design sentiment stamp.   I added a couple of gems.
I am also entering this card over at Sheila's BLOG for her weekly challenge ~ using green and at least one gem.
Here are the cards that the girls made ~ aren't they sweet!!!  The had so much fun embossing!

Thank you girls for having me over to play!!!

Friday, November 18, 2011

Disney Pixar Blog Hop


Welcome to the Official Disney Pixar Blog Hop!!  You should have arrived here from Cindy.  If you found me first, please go to the BEGINNING so you don't miss out on the Grand Prize!!


We have a GRAND PRIZE for this Blog Hop donated by ContainYa Crafts! You can have YOUR CHOICE of a Scrap'n Tote or a Scrap'n Easel!  Each blog in this two day hop has a special letter, and when all of the letters are put together they spell out a secret phrase.


My letter is . . . . "r"


Once you have stopped at each blog in the hop and collected all of the letters, simply email the phrase they create to bloghopcontests at gmail dot com. All entries must be in by Midnight on Monday, November 21st. The winner will be announced on Tuesday, November 22nd at http://craftychicsblog.blogspot.com/

Here is a complete list of blogs in the hop:
Shawn http://craftychicsblog.blogspot.com/
Melissa http://www.disneydreamerdesigns.blogspot.com/
Tami http://tamiscraftconnection.blogspot.com/
Ellen http://cardmonkey-business.blogspot.com/
Madison http://www.funkycards.blogspot.com/
Cathie http://www.creativecutter.org/
Cindy http://www.snoflaks.blogspot.com/
Lori http://scrappinmystressaway.blogspot.com/****HERE****
Amy Chomas http://amychomas.blogspot.com/2011/11/disneypixar-blog-hop.html
Kathy http://kathyscozies.blogspot.com/
Amy Voltz http://www.lovetocrop.com/ 
 
 
We just took our Dream Vacation on board the Disney Dream Cruise Ship!  This photo was taken once we boarded the ship.  We went with Mike's parents and our three boys.  To say we had a great time was an understatement!

I wanted to make a special layout that I could display for a while in a 12x12 frame.  I started with some paper from the Disney Cruise kit I purchased on board and my Gypsy.


I used my Gypsy to set up my shot.  On Layer 2, I put a rectangle from George and Basic Shapes on my mat at 10x8 to represent the photo.  This makes placing the title and embellishments easier (not to mention I can get the right size).  

On Layer 1, I place my title and embellishments.  I usually change my mind a little as I create....as you can see here I initially had Dream Vacation on the bottom of the page. 

I welded the anchor borders (from Mickey and Friends) together so they would string across the entire page.
I then copy the images onto a separate Layer and arrange them on the mat in sections so I can place the paper colors where I need them.  I cut out two of the borders because I planned on layering them with pop dots.  The one Mickey Head was not doing much for me, so on a whim I cut out two more.

I cut out the anchors in silver cardstock ~ they are hard to see in this photo.

I used one Mickey head for the word Disney and tucked the other two heads behind the photo.  I put the title on the top.  I used Disney font and Pooh font for my title.  I used my negative paper to line up my words "Dream Vacation" on my page.
I tucked the second anchor border behind the one Mickey head and wrapped twine around both borders.  The Mickey in the lower left corner was printed on the photo.

I have some additional projects to share with you.


My Peace, Love and Mickey Hat:
I used vinyl to mask off where I painted my hat.  I adhered crystals on once the paint dried.

My Pirate Mickey T-Shirts:
I welded mickey ears to the skull and cross bones and cut out a template from freezer paper.  I ironed the freezer paper onto the shirts and painted with black fabric paint.
Here are my oldest boys and my in-laws at the Pirate Party.

My Autograph Pillow Cases:
I took these pillow cases on our cruise with us.  The wonderful cast members will take your items and have them autographed for you.  They deliver them to your room the last evening of the cruise.  I had our Hostess Suzana autograph them too.  She was stunned that I asked.  After asking me for the third time if I was sure, she grabbed the pen and signed before I could change my mind!  It was sweet!  We really liked Suzana!!
You can see how I made these pillow cases HERE.

Luggage Tags:

I also made luggage tags and used my YourStory to laminate them.  I was inspired by Sherri.  Ours are plain compared to Sherri's, but my family refused anything blingier!!!

My last Disney project to share is a digital layout.
I recently was asked to review My Memories Suite scrapbook software and once I got the hang of it I have surprised myself at how much fun I am having!!  If you are interested in this software, you can use this coupon code (STMMMS39803) for $10.00 off the program ($39.99 regular price) as well as $10.00 off your first purchase of additional pages and/or embellishments.  There is a ton of included pages and embellies, as well as a library of free downloads!!


Thank you so much for stopping by ~ this is one of my favorite blog hops!!!  Your next stop in the hop is the Awesome Amy!