Friday, September 26, 2014

May All Your Pumpkins Be Plump


Happy Saturday
and
Welcome to this months Blog Hop
with
The Creating Blog Hops Cafe'
This month we have made some wonderful Fall projects to share with you. If you have just stopped by to visit with me, thank you and welcome, but please start at the beginning of the hop with our Hostess, Robin Lane with
 Create-A-LatteWe would not want you to miss any of these wonderful projects.
So, grab yourself a Latte', sit back and hop along with us as we share our projects with you.


I just love printing on burlap right now!!  I purchased the 8 1/2 x 11 sheet of laminated burlap from Wal-Mart.  It comes in a 3- pack for just under $3.00.  I colored in the words of this design from the Silhouette store and printed it out on my computer.  I trimmed the burlap down to fit the 8 x 8 piece of wood that I painted black. 
I inked the edges of the burlap with Walnut Stain ink.  I used the sponge to ink the outer edge with Vintage Photo.  I used my ATG gun to adhere the burlap to the wood. 
I tied some light brown DMC floss through my brown buttons and glue-dotted them to the four corners.
I have a wonderful fall piece for my entryway table.  I just love fall and fall colors!!

This month we have a wonderful Sponsor, Lucy Kelleher with Close To My Heart, and she has a fantastic giveaway to share with you today. Lucy is giving away a $10 Gift Certificate to her store.


Close To My Heart


Your next stop will be with...

Jessica

If you get lost along the way here is the entire 

line-up of today's hop for you to get back on track and not miss a single project.

Thank you for hoping along with us today and I hope that we have inspired you to get your craft on.

Wednesday, September 24, 2014

Petting Sting Rays Layout

Hello and Happy Wednesday!! 

Today I am featured at Frosted Designs and Let's Scrap!!  Today begins our newest sketch challenge at Let's Scrap!

I typically catch up on my son's scrapbook in the fall and winter since our activities slow down. Today I created a two-page scrapbook using our newest kit (We Are Family) and a sketch.  We have an amazing zoo in Omaha, NE.  Our newest attraction is the Sting Ray Pool.  You can pet and feed the rays.  They are very cute and show a lot of personality!

I grabbed a few sting ray photos along with Skyfari photos (a slefie of Tanner and I and a photo of Mike and Tyler in the car behind us).
When I have several photos I like following a sketch - especially when I don't have a lot of time.
Here was my original idea designed on my Cameo.  All good ideas evolve!  I wasn't sure what to do with the leaves until I looked a little further into my kit.

I used Carta Bella SCRIPT DOTS paper from our We Are Family kit.  I order an extra set of papers each month so I can put together 2 page layouts.
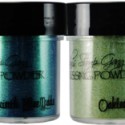
I used brown and green Miracles mixed with Glossy Accents to paint the wood tree branch.  Above I mixed the green powder. 
I accidentally broke off a piece of the branch - no worries I will adhere it down in place. 
I used Glossy Accents to adhere the tree branch to my layout. 
I used my Cameo to cut out some more branches and painted Miracles on them as well. 
I used the Miracles once more.  I thinned them down a bit with extra Glossy Accents and painted the banner flags.

I cut out my titles, City Zoo fence and tabs with my Cameo.  I inked my papers with my black PITT artist pen big brush.  I used a couple of stickers from the kit and a bit of washi tape. 
You can find the supplies I used below:


 photo Lori_zpsea64f050.jpg

Saturday, September 20, 2014

Sarpy County Fair Layout

Welcome to the Barnyard Bash Blog Hop Day #2
Old Mac Donald had a farm E..I..E..I..O
With lots of barnyard critters and tons of fabulous inspiration!
We are so glad you came back for our 2nd day of the Barnyard Bash.

Connie Can Crop is playing Old Mac Donald for this hop and is the first stop on this super fun Blog hop so if you missed out on yesterday please start at Connie's blog for the day #1 projects. 

This is a two day blog hop and we appreciate your leaving a comment for all of these talented friends who are here sharing their ideas and creations.

We have two awesome sponsors and giveaways for this hop!

Connie Wallenbrock
You could win an awesome package of  Prima Goodies from Connie's Crafty Cart. 

AND
Lucy Kelleher
is giving away a $10 gift certificate to CTMH
  
What do you need to do to win? Easy... become a follower of each of the fabulous blogs in this hop and leave each of them a comment letting them know what you like best about their projects.

You will have until 12:00 am Monday to finish the hop and leave your comments.

Winners will be announced on Wednesday at Connie Can Crop.

Be sure to follow everyone and leave a comment along the way!

 Grab your pitchforks and your overalls because this hoe down is about to begin!!

My nieces have horses and a pig, as well as chickens, dogs and a cat.  They live in the country and are also part of a horse club.  Every year they are in the Sarpy County Parade and we go watch.

I thought this would be the perfect layout for today's blog hop!
I followed this sketch from Let's Sketch where I am a DT Member.  We have weekly challenges HERE if you want some motivation to get your photos scrapped!
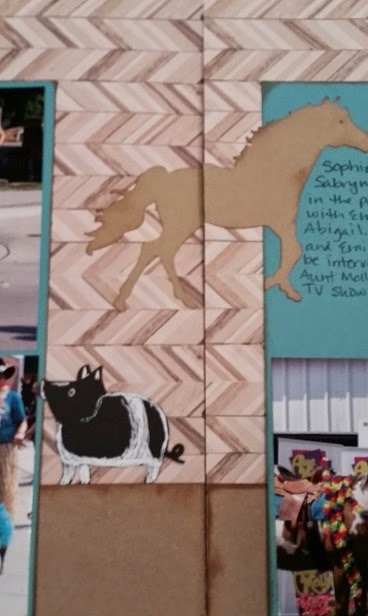
I used my cameo to design my title and border.  I added a pig (trimmed off the piglet), a horse and the rope frame. 

I welded 6 horse heads together to create a border for each page.
I cut the horse out of brown paper and inked the edges.  I cut the pig out of black cardstock and used my white gel pen to add some details to her. 
I saved the negative space from my title to use as a template.  I ran the letters through my 1" Xyron. 
I stuck down the letters in my template.  I rubbed the letters a bit to get the extra adhesive off (I call them glue buggers). 
Once the letters are stuck down, I gently peel up the template.
And the title is on! 
I added a bit of journaling.  My niece Sophie was interviewed by a local tv celebrity - Aunt Molly and Friends TV Show.  Emily kept trying to eat the hay backdrop!!  I was very proud of Sophie as she really did not seem excited to give an interview!
I tied a bit of twine around the horse borders.  I really like how this one turned out!  

Thanks for stopping by.  I love horses!  What is your favorite Barnyard Animal?

Up next is MELISSA 

Here is our complete line up for day #1 in case you get lost along the way:

2. Debbie - http://craftydeb-ddscrafts.blogspot.com
3.Pam - http://lovebugcreations3.blogspot.com/
4.Darlene (The Crafting Journals)-http://www.thecraftingjournals.com
5.Alicia http://goldengoddessdesigns.blogspot.com
6.Lisa - http://honeybearzdesigns2011.blogspot.com/
7. Jenny - http://crazyaboutcricut.blogspot.com/
8.Linda - http://www.lindascreativity.blogspot.com
9. Jessica- http://craftinandstampin.blogspot.com
10.Lori - http://scrappinmystressaway.blogspot.com/****HERE

Thanks so much for joining us for such a fun day!


Wednesday, September 17, 2014

Wine Glasses

I started selling my wine glasses at Twisted Vine - a paint and sip place that also sells handmade crafts and antiques.  It is a very cozy shop located in downtown Papillion where I live.  I decorate wine glasses, mostly with vinyl.  I custom make them if requested.

If you are interested, leave me a message and I can give you pricing.

Some of these were sold in the store, and others were orders for friends and lovely people I met at my craft shows.

These stemless wine glasses were hand painted. 
I made them as a set and love how fun they look! 


I love Halloween and made some fun glasses.  These are a sampling of the glasses I made.
I can put popular sayings on wine glasses using many colors.  Black shows up very well when the glass has wine in it! 
I made these for a craft show in the fall last year. 
I made some personalized wine glasses and a Celebrate Today glass.  The colors are picked out upon order. 


This is a popular one.  I usually use black but the multi colors were requested! 
Natalie is a Husker fan, but I can not use the Husker logo.  I improvised! 
Jingle Juice is yummy!  This was a Christmas gift last year. 
I had a request for martini glasses.  I loved how they turned out! 
This one made me giggle! 
Another fun saying put on a glass.

I have many more that I did not photograph.  If you are local to Papillion, Nebraska please stop in at Twisted Vine.  If not, you can leave me a message here for additional information.


Tuesday, September 16, 2014

Blinged Out Pumpkin

Halloween is my favorite holiday!!  I love the fall colors and decorating my house and daycare.  I found two different pumpkins on Pinterest that I loved - so I combined the two designs together.  I put my "L" on the front and gems on the top.

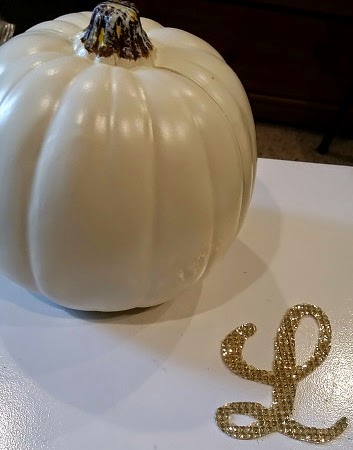
I purchased a 5 inch creamy white foam pumpkin from Michaels. 
My "L" was cut from a piece of gold Buckle Boutique Rhinestone Resin Self-Adhesive Sticker Sheet.  You can find these HERE (some colors are on sale right now too)!

I used my Gypsy with my cricut expression.  I got the "L" from Quarter Note.  I measured my pumpkin and determined the "L" should be around 3.5 inches.  I sized my "L" to 3.59 inches.  

I flipped the "L" to cut it out in reverse. 
The Rhinestone Sticker Sheets cut best face down on a sticky mat.  My mat is not as sticky as I would like, so I taped the edges down too.

Here are the instructions for cutting with a Cricut:

Cricut
  1. Use a deep cut blade
  2. Place your blade depth at 6
  3. Use a mulit-cut of 3 or 4 depending on how new your blade is
  4. Put your speed on slow
  5. Place the product face down on the Cricut cutting mat, making sure it is in a very sticky spot.  I usually run my hand over it to really make sure it is stuck down.
  6. Use Flip Mode on your Cricut  (since you have the product upside down, you need to flip the cut for the image to be correct when you flip it over)

Here is the "L" cut out.  I peeled the backing off and stuck the "L" on the flattest side of the pumpkin. 
It looks pretty, but I wanted a little more sparkle!! 
I purchased these gems from Michaels,  The pack includes clear, gold, dark grey and black crystals in 3 sizes.  I used Beacon 527 glue to adhere them to the top of the pumpkin.

I put 5 or so dots of glue on at a time and stuck the gems on. 
I am so happy with how this turned out!!

I hope you have a Blingy Fall!!


The Buckle Boutique's Link Listing
The Buckle Boutique's Website . . . click HERE
The Buckle Boutique Blog . . . . click HERE
Facebook Page . . . click HERE
Twitter Page . . . click HERE
Pinterest Page . . . clickHERE