I created a really great box and welded and embellished it with images from Heritage. I bought new paper just for the box....I bought just the right ribbon....I test cut the box....I cracked my Gypsy screen...I panicked....then I remembered something that Pam recommend we do a while back. I saved my files to my computer!!! I am so glad that I listened!!
So, the good news is I still have the file. The bad news is I don't have a Gypsy to cut out the file. My G is all packed and ready to go to her "spa" appointment for a face lift.
Well, I am not going to let a little set back keep me from creating, so off to plan B. I came up with a layout design using the Heritage cartridge.

I turned on my E and then drew a blank. I forgot that I need the actual cartridge to cut my images out. So, I went to my rolling tote that serves as a storage closet for my cartridges and dug out Heritage. I am glad that I am not using more than one cart!!
I also forgot to load my mat! I just hit cut like we do on the Gypsy ~ silly E didn't understand!!
I made a layout about my dad since Father's Day is coming up. I used 12x12 Metallic cardstock from Michaels. I used bronze for the tree and used the fit to page feature since I did not want to waste an entire sheet of paper trying to get the size right.

Because I can't really tell how large a 2" charm tag really is in relation to my tree, I have to experiment (aka waste paper). I used a piece of 8 1/2 x 11 gold metallic cardstock and remembered to repeat last. I cut out a 2" 2 1/2" and 3" charm and tag set. I forgot to set paper size so I cut off the mat. You can see that I wasted quite a bit of paper (I really miss my G). I cut out the word FATHER at 2". I started at 3" but my E told me it was too big for my paper, so I reduced the size until it cut!

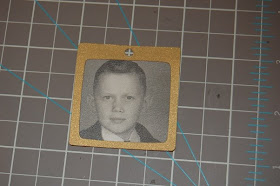
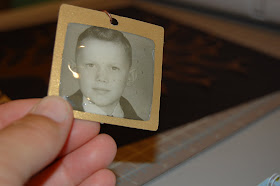
Now for the fun part!! I had a photo proof of my dad that had writing on the photo. I trimmed it down to fit inside the charm. I glued the photo to the tag and then glued the frame on top.


I took Glossy Accents and squeezed a layer over the photo.


The tag started to curl a bit so I took two packages of index cards and layed them down on each side to hold it flat.

I let the tag dry overnight. You can see the dimension and shine.


I put a jump ring through the hole at the top of the charm and tied gold ribbon to it. I hung the charm from the tree.

I took one of the extra charms that I cut out and wrote in my dad's name, birth date and death date. I wanted the photo to stand out more than this charm, but this one seemed too bland. I thought about inking the edges, but decided to trace around the inner square with a fine tip black marker instead. I put a jump ring through the hole and tied some ribbon and hung on the opposite side of the tree.

Because I am a 2-page scrapper, I will make a coordinating page that will be filled with journaling (as I have no place to hide any journaling here). I plan to write him a letter, but it is a little too soon for me just yet, so maybe a place to tuck that letter I will be able to write in a few years.

Thank you Pam!! It is quite an honor to be a Guest Designer on your blog!
Wow, Lori!!! Great job as usual!!!
ReplyDeleteI love the idea of Glossy Accents!!!!! TFS!!
ReplyDelete