Copyright Information

Thank you for stopping by my blog! I hope you enjoy the things that I create and share! I do have a copyright on my original creations (see logo on my sidebar below).
If you create and post a creations based off of mine, please refer (with a link) back to my blog. Please do not use my ideas for files, profit or for contests. Thank you!


My Craft Goals for 2015

My Goals for 2015:

1. Update my goals for 2016 in January of 2016 :)
2. Maximize my crafting time!
3. Keep plugging away at scrapbooking photos!!
4. Learn how to Heat Press!!
5. Have fun!


Tuesday, July 27, 2010

Cartridges organized and boxes re-purposed!


I got this awesome CGull tote from SmartBuyGal from the Cricut Messageboard.  I started out on ebay and did not realize it was her at first!! 


It holds 72 carts with plent of room in the middle for the booklets and overlays!  Both sizes unzip.  The hard part was how to organize them knowing I am going to continue to add to my collection.  I put the Fonts together, the Solutions & Lites together and then the shapes on the other size.

They sent me the wrong bad on accident ~ this is the Expresssion tote.  This was resolved very quickly as I decided to purchase it ~ seriously the customer service was quick and I received a return label immediately!  I just decided not to send it back LOL!

Now what to do with all of those empty boxes.  Hmmmm....let's put them in the Block Area of my in-home daycare!  The kids had so much fun with them!  At first they filled up the boxes with Potato Head pieces and shook them.  Then they started building with them.

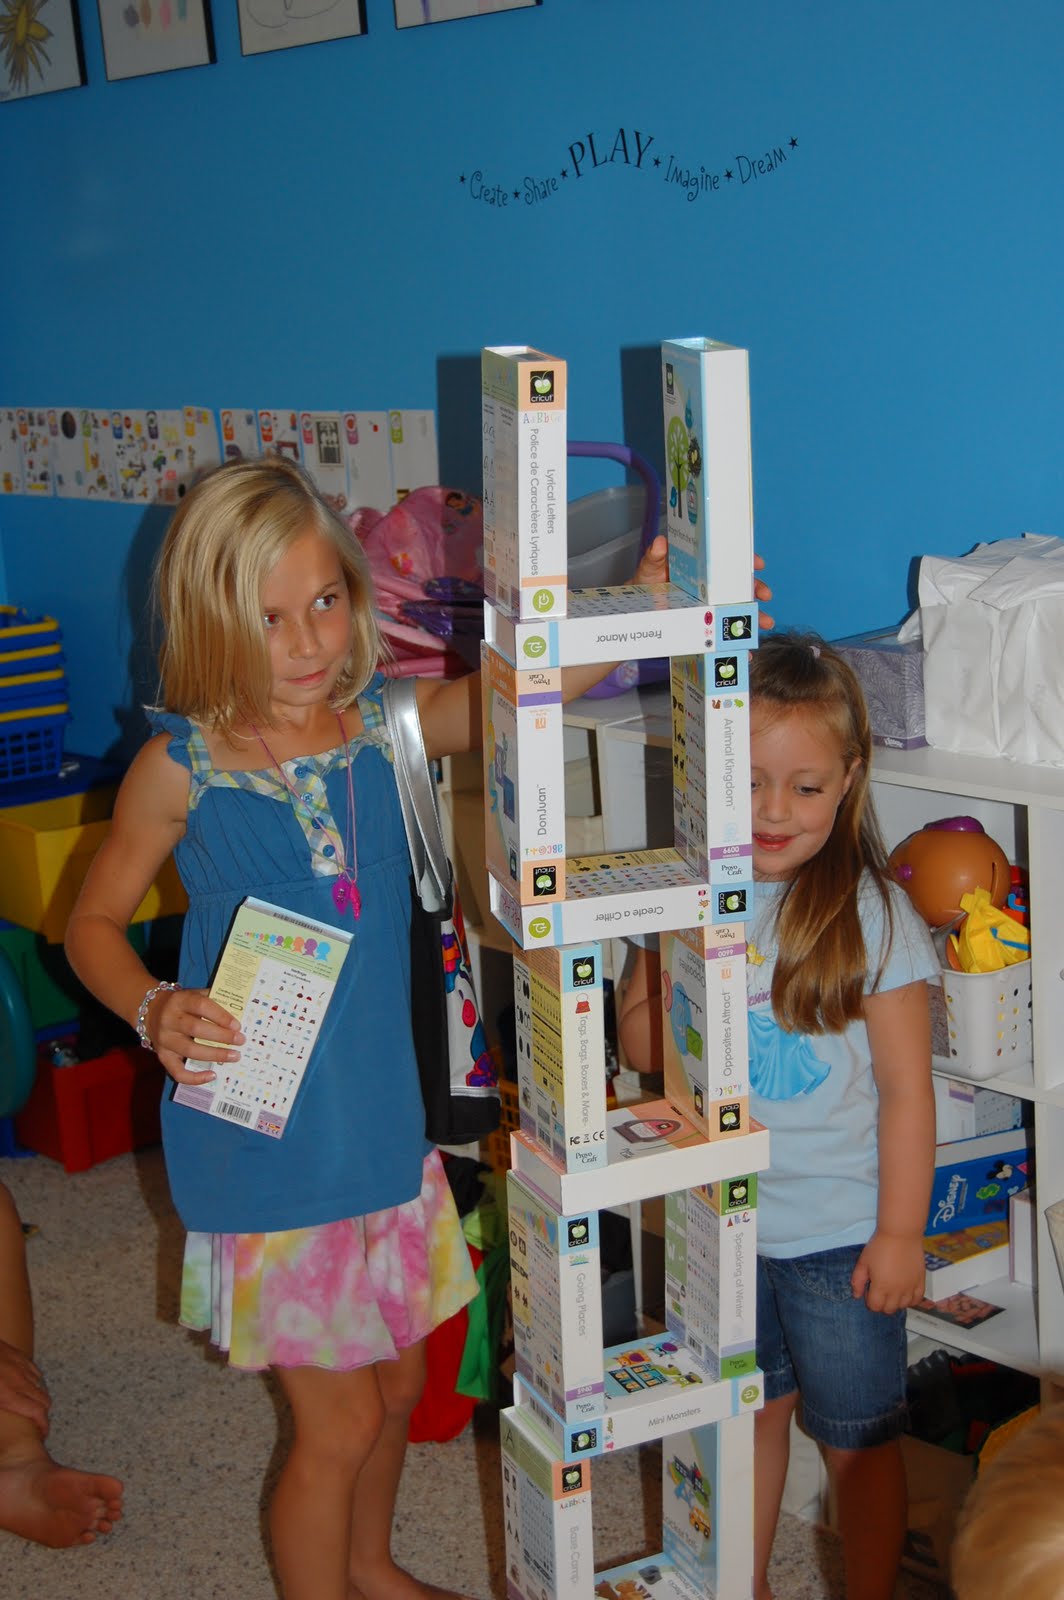
I recycled the inserts and I kept my Lite boxes.  Those will come in handy when I loan out a cartridge or two.  I just had an idea to decorate the Lite boxes....

Sunday, July 25, 2010

Vinyl Can Hugs

I bought plain Can Hugs at Michaels for $.66 each and jazzed them up with vinyl.
I decided to use some cartridges that I have not used yet.  Now, be nice....I would have used them sooner if my Gypsy were back!!  I used Cricut Lite Cherry Limeade for the font.  I cut out the letters at 2".  I made a kiss cut with my settings at 3, 3 & 3.  That is:  meduim speed, medium pressure and the blade set on 3.  This cuts only the vinyl, not the backing.

I use my dental tool to weed away the extra vinyl.  If you roll it up as you weed, you won't accidentally stick the extra pieces to the letters (don't ask how I know that!!).

The dental tool is also very helpful in pulling out the extra pieces inside the letters.  You can poke a little hole in it and just gently pull.
I use clear contact paper as my transfer tape.  I de-stick it a bit on my denim shorts because it is soooo sticky!!  This is much cheaper than transfer tape!
I use my scraper to burnish the letters to the contact paper.
Then, I turn the vinyl over and burnish again.  This helps the letters stick to the contact paper.
Then I gently pull the contact paper off the backing.
Next, I position the letters on the can hug.
Burnish it onto the can hug.  The vinyl doesn't stick to the foam as easy as it does to other things, so this is a very important step.
I gently peel the contact paper off.  Vinyl is very forgiving, so if a piece is not sticking, rub it a little with your fingernail or burnish again with the scraper.
Here is Tanner's can hug.
I cut out my name from a 12x12 sheet of lime green vinyl.  I did not want to waste any vinyl, so I trimmed out my name after I cut the letters.
I followed the steps above and put my name on the purple can hug.  I wanted to add a little something, so I dug out more cartridges!
I added the skater boy (2") from the Cricut Lite Dude for Tanner's can hug.
I added a 3" butterfly from Wall Decor & More to mine.
We added our favorite drink ~ Diet Dr. Pepper!
And here we are with two very cool can hugs for under $1.00 each!!

Friday, July 23, 2010

Journal Note Pads (BIA)

I am finishing up my very first Scrapbook Design and You (SDU) class next week and I wanted to make a little something for my students.  This is my first time teaching this class and I am finding my groove!  One of the classes is all about the importance of journaling and I wanted to make a journal for each of the ladies to keep with them in their purses.  I am still without my Gypsy,so I had to remember how to use the Cricut the "old" way.

I took an inexpensive pad of watercolor paper and cut two sets of 3 1/8 by 5 1/8 rectangle for each notepad.  I also cut the same size (two sets each) of paper from a K&Co. paper pad.  I left the insides of the covers white, but sometimes I cover them as well.
To embellish the cover, I used Storybook for the accent frame.  I wanted "Once upon a Time" since this journal is for writing stories and tidbits that will help with journaling later on.  I guessed at 2 1/2 inches and got lucky!

I used my MS  glue writing pen to glue the frame down onto the accent blackout piece. 
I left the blackout pieces on my mat until the accent frames were glued on.
I inked the edges of the covers with StazOn black ink and a fantastix.  I got this technique from MakeupGirl217.
I got out my trusty Bind It All.  I used my new Space Bar so the holes are punched a little closer to the edge.
I centered the cover and back (flipped the way it will be once assembled) and pushed the lever down.  I have to stand up in order to do this!!

The pages of the note pads are 3x5 blank index cards.  I just stocked up on several packs as the back to school supplies are everywhere!  I use 40 sheets per note pad.
To assemble, put the note pad together the way it goes, then flip the back cover over the top as if the binding is on **the back cover is the top, the cover is the middle and the pages are on the bottom of this photo. 
You put the o-wire in so that the loose pieces are threaded through the back, front and then the pages.  You want the connected pieces to end up in the back of the note pad.
You stand up the note pad with the o-wire down, then push the lever down.  This will bend and close the wire.
If you are not careful, you can cut too close to the edge!!  I am glad I did not glue on the embellishment yet!!

Here are the finished note pads!
A close up!!

Wednesday, July 21, 2010


I have six students in my first SDU class at Michaels!!  Our last class is next Tuesday and we are all getting together in August for a crop!

I have a new set of classes starting on August 10th at Michaels on L Street.  For additional information on SDU click HERE.

If you are in the Omaha area and would like more information, please leave me a message and a way to contact you!

Monday, July 19, 2010

Having a Blue day...

I made this monocromatic layout for my Scrapbook Design and You class to use as an example.  The colors fit me today!!

This photo was taken last summer on our last day of vacation.  We go to the Ozarks in Missouri every August and last year we brought our friends with us.  We stopped in Kansas City to watch a KC Royals baseball game on the way home.  This is my friend Suzi and her daughter Danielle.  Danielle is the owner of my baby bug and my surrogate scrapbooking daughter!!

I used Wall Decor and More for the font and got very lucky when I guessed the size of the letters on my cricut!

I am a little down today for a couple of reasons.  My son's baseball season ended last night with a second place finish in districts.  We were tied going into the bottom of the 7th......so close but yet so far!  This is very bittersweet!  No more baseball 4-5 times a week.

That would be great if I had my Gypsy as I will have tons of time on my hands!!  Maybe today will be the day she returns....

Monday, July 12, 2010

Grandma's Pond


I have been working on some layouts to use as samples for my Scrapbook Design and You classes at Michaels.  Here is a layout of my son Tanner and my niece Sabryna feeding the fish in Grandma's pond.  I am using the colors purple, green and orange and I followed a sketch I saw on the LID challenge on the Cricut Layout forum.  This sketch was from last month so it is too late for me to enter it!!

These two are just precious ~ they are 6 weeks apart and I take many photos of them together.  Someday I want to make a cousins album of them!!  Also, just before this photo Tanner fell into the pond!  At 4 1/2 I did not think he would need an extra outfit for a visit to Grandma's!!

I used Storybook for the font.  Since my Gypsy is still on vacation (she just extended her stay) I was forced to use my Cricut without her.  This is challenging for me now as I have a hard time guessing what size of letters I need.  I only wasted a little paper....

Wednesday, July 7, 2010

Stars & Stripes Challenge

The Gypsy challenge on the Gypsy ChitChat Message Board was to use your Gypsy and stars and/or stripes. 


I am still waiting for my Gypsy to return home from her "spa" trip.  I borrowed my friend's Gypsy and found a star that worked on Home Decor.  The star has a swirl coming down one end.  I used Hide Contour to erase the inner star.  Then I copied the star and flipped it.  I welded the two together lining up the x axis.  I repeated the copy and flip (this time flipping upside down) and welded together.


Layer 2 had a 4 x 6 square on it to represent the photo.  I ended up tilting the frame because it looked better with the actual photo.


My layout was missing something, so I added Tanner's name and used the same star for the "A".  I used San Serif for the font.


I added some faux stitching around the edges of the paper.  Then I added a little bling:  red stickles and star shaped gems and here is the final layout.