Copyright Information

Thank you for stopping by my blog! I hope you enjoy the things that I create and share! I do have a copyright on my original creations (see logo on my sidebar below).
If you create and post a creations based off of mine, please refer (with a link) back to my blog. Please do not use my ideas for files, profit or for contests. Thank you!


My Craft Goals for 2015

My Goals for 2015:

1. Update my goals for 2016 in January of 2016 :)
2. Maximize my crafting time!
3. Keep plugging away at scrapbooking photos!!
4. Learn how to Heat Press!!
5. Have fun!


Saturday, December 31, 2011

New Year's Resolution Blog Hop

Every year I try to come up with One Little Word inspired from Ali Edwards Design as my Word for the new year.  This year I almost came up with one......
Welcome to the New Year's Resolutions Blog Hop!!  You should have arrived from HERE.  If you found me first, please go to the BEGINNING.


For 2012 I wanted to come up with ONE WORD to describe my resolutions, but I couldn't do it!  I thought about Simplify but that did not apply to everything.  I thought about Five because I have five members in my family and I really like the idea of doing 5 things to organize or spend 5 minutes each day but that did not really seem like a good resolution.  I also have given up on ever being organized because every time I organize, I loose things!!

  So instead I came up with 3 words:  Live, Laugh and Love.  I want to Live life more fully, Love more openly and Laugh every day!  I spent last year losing 80 lbs and getting healthier so it is much easier for me to LIVE life versus WATCH life pass me by.  I also want to keep those pounds off so I can continue to LIVE!!!  I plan on LAUGHING a lot this year because when I laugh, my mood gets so much happier (plus it burns calories)!!  I also don't always show LOVE.  I am not a touchy~feely person and don't always say what I feel so I am going to work on that in 2012!  

I saw on Pinterest a set of 3 painted wine bottles decorated for Christmas that said Peace, Love and Joy.  I loved this idea (even though I hate wine) but I wanted to keep my bottles out all year long though so I changed the words to Live, Laugh and Love.  I spray painted a primer on three wine bottles (thanks to my wine-drinking friends).  When that dried, I spray painted black Krylon paint on the wine bottles.


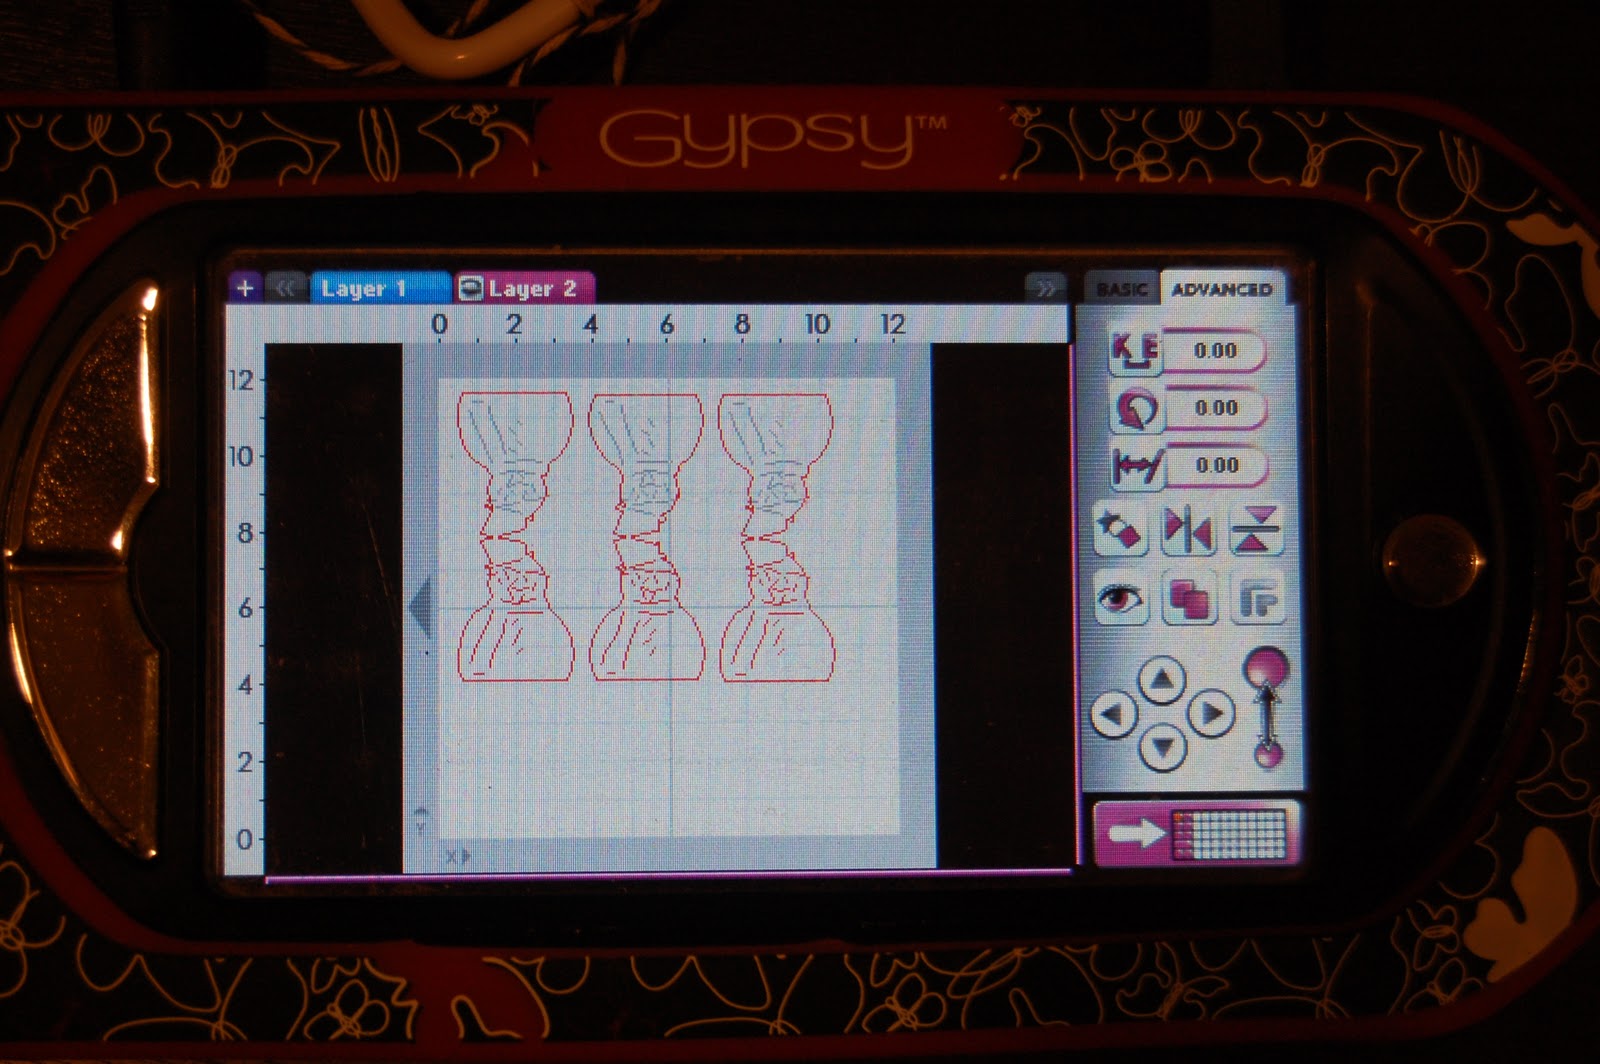
I found the words on Home Accent and cut them out  at 3.12 inches.  I wanted to conserve my red vinyl, so I copied the Live Laugh and hid Laugh on one and hid live on the other.  I lined them up at the top of my mat and trimmed 2 inches of red vinyl.

I set my Expression to Pressure 3, Speed 3 and Blade Depth 3 to cut through the vinyl only.  I also use a new blade when cutting vinyl.

I use clear contact paper to transfer the words from the paper backing to the wine bottle.


For interest, I put laugh a little lower than live and love.

My kitchen has red walls and black appliances.  I placed the bottles in this spot so you can see the red and black, but moved them to a different spot so I could put the toaster back :)


I am also cleaning out my craft room and will put a fun package together to give as blog candy!  Just leave me a comment on ONE to THREE words that describe how you want your 2012 to be!

Your next stop in this hop is HERE!


Friday, December 30, 2011

Tuesday, December 27, 2011

Crafting With Natasha 1st Blogiversary


Welcome to the celebration. If you've arrived here from Janet then you are in the right place. If you just happened upon this post, please start at the beginning over at Crafting with Natasha to join in. Each stop along the way has a "secret word" that you will need for a chance to win the prize. After you've hop to each stop, you will need to email Natasha (natashacrafts@gmail.com) the answer to the "secret phrase". You have until 11:59PM EST on January 6th to enter to win. Winner will be announced on January 7th.


Lorraine: http://www.glittergluepaperart.com  ***NEXT***

For my "NEW" project, I created a 2-page layout showcasing our New Year's Eve Family Game Night Tradition.
In order to lay out my 2 page design, I opened a 12x24 mat on my Gypsy.  This is one feature that I wish worked with Cricut Craft Room!!  I typically scrap 2 pages at a time and this helps me size my cuts.  I put GAME ON on the left side from Hello Kitty Font sized at 2.08 inches.  I put a circle from George sized at 4 inches for my spinner base.  From Hannah Montana I put New Year's Eve at 1 inch and the shadow Tradition also at 1 inch.


In order to make the spinner, I wanted 6 sections so I needed 6 circles in different colors.  I opened Layer 2 and grabbed a circle from George sized to 3.75 inches and copied it 5 times.
I put the cardstock colors on my mat and cut out the circles.
This part was a little tricky for me, I folded the circle in half and then thirds to get 1/6 of the circle.  I then traced the piece onto the other circles.
I adhered them to the black base and used a Tim Holtz game spinner brad in the center.
I cut out the words of our games that we play (Hannah Montana sized .42 - .54 inches to fit the triangles) out of dark blue cardstock.
I adhered the words to the triangles using the negative paper piece as a stencil.
I needed some additional embellishments, so I went back to my Gypsy and found some tickets, the banner and star borders from Carousel, and I found the dice from Indie Art.
I cut everything out of cardstock using colors that matched the colors in the spinner.
I wanted some game controllers and found these from Wrap It Up and Boys Will Be Boys.

I cut these out of cardstock also.  Instead of traditional colors, I used colors to match the layout.
I found some papers from this paper pack for my background papers.  I bought this at Michaels.
I added some twine cord and on the side of my layout.
I tucked the tickets behind one of the photo mats.
I picked this background paper because it resembled a game board and I glued button "game pieces" around the board.
On the banner I put the date for this upcoming New Year's Eve.  I used twine to attach the banner to my title.
I trimmed the ends of the paper and put them together to create the game board look.  I trimmed 2 inches of the orange paper to make up for the part I trimmed off and also provided a background for Game On!  I adhered the background papers to white 12x12 cardstock.

Now for the Blog Candy ~ you could win this Smash Book!!
In order to be eligible to win this prize, you need to add the word "CELEBRATING" to the list of words you are collecting.

Please leave me a comment with your favorite game to play on Game Night for a chance to win some Mystery Blog Candy from me as well!

Your next stop in the hop is the Lovely Lorraine!!

Thanks Snow(man) Much!

 I am delighted to be the Guest Designer today at Sweet Sassy Diva's blog.  The theme this week is Thank You cards.  I do not make my own Christmas cards because I send out photo cards.  I do, however, make my own thank you cards.  I typically make snowman cards as I love snowmen!!!
 I used Smiley Cards (for the first time) to create my snowman card.  I put a snowman on my gypsy mat at 3.94 inches.  I copied a second snowman and used Hide Contour to hide the inside cuts.  I flipped the second snowman and stacked it on top of the first snowman.  I added the layers (also at 3.94 inches).  I copied the hat layer twice so I could cut out the mouth in red.  I hid the mouth from the hat, buttons and glasses on the first (black cardstock) and hid the hat, buttons and glasses from the mouth on the second (red cardstock).

 I moved the hats, mouth and scarves to layer 2.  On Layer1, I copied the snowmen two times.  This way I can cut out three from an 8 1/2 x 11 piece of white cardstock.  I tend to make several cards at one time.
 Here are my cards cut out.  I folded them in half while the rest of the pieces were cutting out.
 I copied enough pieces for six cards and grouped them into colors on my gypsy.
 I used black, red, purple and blue cardstock for my pieces.
I put the adhesive on the card (not the hat) as the hat hangs off the card at the top.  This way it won't stick to  your envelope.  I used my Xyron to adhere the other pieces to the snowman.
 I added some stickles to the hat, scarf and the side of the snowman.  I thought about adding a stickle nose, but decided I liked them better without a nose.
My 6 year old son Tanner helped me with the stickles on the snowman body ~ he is such a good helper!

I opted to leave the inside blank as the cards are not very big and I write big!!

****This just in!!!  Sweet Sassy Diva is looking to add to her design team!  If you are looking for an opportunity to guest design 2-3 times a month on her blog, please let her know HERE!!!