Copyright Information

Thank you for stopping by my blog! I hope you enjoy the things that I create and share! I do have a copyright on my original creations (see logo on my sidebar below).
If you create and post a creations based off of mine, please refer (with a link) back to my blog. Please do not use my ideas for files, profit or for contests. Thank you!


My Craft Goals for 2015

My Goals for 2015:

1. Update my goals for 2016 in January of 2016 :)
2. Maximize my crafting time!
3. Keep plugging away at scrapbooking photos!!
4. Learn how to Heat Press!!
5. Have fun!


Showing posts with label Indie Art. Show all posts

Tuesday, July 30, 2013

Shot Book


I recently turned 21.

Well, 21 times 2 plus 3!!

My friend Kylie has a friend who is turning 21 in August and asked for my help making her Shot Book.  Silly me, I thought she meant an immunization book or even a photo shot book at first.

When she told me about all the shots and activities they had planned and wanted scrapbook pages made - I was like YES that sounds like fun!!!  Then I felt a little tipsy just thinking about all that alcohol!!

I designed and cut out the paper and vinyl, but Kylie put everything on paper (including the gems and stickles) except for the vinyl on the cover.  I have Kylie's permission to put the pages we designed and made on my blog.

I used my Gypsy, Cricut and my Cameo!


The fireball is from the Silhouette store and is a baseball with flames.  We deleted the "laces" layer.

The font is Hannah Montana for all pages unless noted.


The hand came from A Child's Year.  I did a search on Pinterest for Spanking looking for an image of a hand to trace.....found a lot of interesting images but none were appropriate!!!


Scooby Snack was fun!  The bone is from  A Child's Year and the peace signs are from Disney/Pixar Cars.  Loved the bright colors - our inspiration was the Mystery Machine!


Kylie put individual gems on the letters!!


The lips are from Tags, Bags, Boxes and More 2.  There is a giant set of lips under the photos.  Kylie pop-dotted the smaller lips around the page.


This page was challenging.  This is the page where she will take a picture with the bouncer and her ID.  We searched for a body-builder image to represent the bouncer with no luck.  

We created a Security shirt instead - totally Kylie's idea.  We used Impact font (with the Cameo) and the shirt from the Silhouette store.  The drivers license is from Locker Talk.  


The bomb came from Indie Art (the third time I have ever used this cartridge). 


The beer mug is from the Silhouette Store.  I embossed the foam!!  The font is Blackletter.


I welded a border with a camera image from Makin' the Grade.  The cursive font is from Quarter Note.


This font is Liquidism from dafont.com and cut with my cameo.  The shot glass was purchased from the Silhouette Store.


I used vinyl to decorate the cover of the album.  The font I used is from Art Philosophy.


On each page
The F: stands for FROM
The T: stand for TIME
and the X: is for Dana's signature

Kylie created half of the album.  Dana's sister made the other 10 pages.  I am happy to hear Dana's mom will be the designated driver!!  I sure hope it is a birthday to remember!!!

My sister-in-law is turning 40 next month....I told her I would make her a Shot Book.  She politely declined, especially after I suggested 40 shots for 40 years.  Clearly I am not a drinker!!!!


Tuesday, December 27, 2011

Crafting With Natasha 1st Blogiversary


Welcome to the celebration. If you've arrived here from Janet then you are in the right place. If you just happened upon this post, please start at the beginning over at Crafting with Natasha to join in. Each stop along the way has a "secret word" that you will need for a chance to win the prize. After you've hop to each stop, you will need to email Natasha (natashacrafts@gmail.com) the answer to the "secret phrase". You have until 11:59PM EST on January 6th to enter to win. Winner will be announced on January 7th.


Lorraine: http://www.glittergluepaperart.com  ***NEXT***

For my "NEW" project, I created a 2-page layout showcasing our New Year's Eve Family Game Night Tradition.
In order to lay out my 2 page design, I opened a 12x24 mat on my Gypsy.  This is one feature that I wish worked with Cricut Craft Room!!  I typically scrap 2 pages at a time and this helps me size my cuts.  I put GAME ON on the left side from Hello Kitty Font sized at 2.08 inches.  I put a circle from George sized at 4 inches for my spinner base.  From Hannah Montana I put New Year's Eve at 1 inch and the shadow Tradition also at 1 inch.


In order to make the spinner, I wanted 6 sections so I needed 6 circles in different colors.  I opened Layer 2 and grabbed a circle from George sized to 3.75 inches and copied it 5 times.
I put the cardstock colors on my mat and cut out the circles.
This part was a little tricky for me, I folded the circle in half and then thirds to get 1/6 of the circle.  I then traced the piece onto the other circles.
I adhered them to the black base and used a Tim Holtz game spinner brad in the center.
I cut out the words of our games that we play (Hannah Montana sized .42 - .54 inches to fit the triangles) out of dark blue cardstock.
I adhered the words to the triangles using the negative paper piece as a stencil.
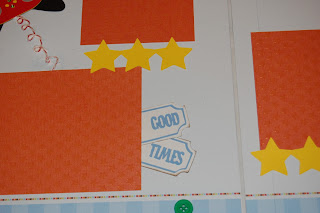
I needed some additional embellishments, so I went back to my Gypsy and found some tickets, the banner and star borders from Carousel, and I found the dice from Indie Art.
I cut everything out of cardstock using colors that matched the colors in the spinner.
I wanted some game controllers and found these from Wrap It Up and Boys Will Be Boys.

I cut these out of cardstock also.  Instead of traditional colors, I used colors to match the layout.
I found some papers from this paper pack for my background papers.  I bought this at Michaels.
I added some twine cord and on the side of my layout.
I tucked the tickets behind one of the photo mats.
I picked this background paper because it resembled a game board and I glued button "game pieces" around the board.
On the banner I put the date for this upcoming New Year's Eve.  I used twine to attach the banner to my title.
I trimmed the ends of the paper and put them together to create the game board look.  I trimmed 2 inches of the orange paper to make up for the part I trimmed off and also provided a background for Game On!  I adhered the background papers to white 12x12 cardstock.

Now for the Blog Candy ~ you could win this Smash Book!!
In order to be eligible to win this prize, you need to add the word "CELEBRATING" to the list of words you are collecting.

Please leave me a comment with your favorite game to play on Game Night for a chance to win some Mystery Blog Candy from me as well!

Your next stop in the hop is the Lovely Lorraine!!

Tuesday, November 23, 2010

Ice Cream Cone Card with Video


Here is a card I made from the Indie Art Cartridge.


Notes from the video:  The ice cream cone and pieces are sized at 4".  I rotated the left shadow piece to 32.00.  The sentiment "For You" is from Gypsy Wandering and sized at 1.35 height.

An afterthought....I should have cut a shadow of the ice cream only as the cut outs in the ice cream allowed the brown paper to show through.  I solved this by using pink stickles to cover (shown below).

I loaded my paper and cut out the pieces.

Here are the pieces.  I placed the pink paper (on the right) a little bit too low and cut off the bottom of the drip.  I did not have any more of that paper, so I used a lighter pink and re-cut.  When I have to re-cut one piece, I open up a new Layer and copy the image(s) onto it.  That way I am only cutting the piece(s) I need.

I ran the pieces through my Xyron.  I scored the card in half with my Martha Stewart Score Board.

Here you can see the background paper that is showing on the ice cream.

Here is the sentiment inside the card.

Here is the card with stickles on it.  I hope you enjoyed this tutorial and can't wait to see your cards!!