Copyright Information

Thank you for stopping by my blog! I hope you enjoy the things that I create and share! I do have a copyright on my original creations (see logo on my sidebar below).
If you create and post a creations based off of mine, please refer (with a link) back to my blog. Please do not use my ideas for files, profit or for contests. Thank you!


My Craft Goals for 2015

My Goals for 2015:

1. Update my goals for 2016 in January of 2016 :)
2. Maximize my crafting time!
3. Keep plugging away at scrapbooking photos!!
4. Learn how to Heat Press!!
5. Have fun!


Friday, February 28, 2014

Winner Winner Chicken Dinner!!!


The winner of this Amazing book written by my friend Michelle Homme is.........

Drum roll here......

Random Number Generator picked #6:  Stephanie who said: 
Your tiles are just perfect for these quotes. Beautiful job.
Thanks for the kind words Stephanie!!  Please email me your address so! I can send you your book!  lori.apgar @ gmail . com

You can find out more about Michelle's book, blog posts, quotes, book signings and speaking events:


Thursday, February 27, 2014

How Many More Days??

Hello!!  Today my project is featured at The Buckle Boutique Blog!!

I made a fun sign to help my kids count down the days to various events.  I took a piece of White Board paper from DCWV and trimmed it to fit this 8x10 frame from the Dollar Tree.  I took the frame apart and put the paper on top of the glass.
I added the vinyl image from the Silhouette Online store to the White Board paper.
I took some Self-Adhesive Resin Rhinestones (clear) and trimmed them to fit on the frame to bling it up!! 

Add a dry erase marker and you have a fun sign that can be used over and over!!

Thanks so much for stopping by!!!

The Buckle Boutique's Link Listing
The Buckle Boutique's Website . . . click HERE
The Buckle Boutique Blog . . . . click HERE
Facebook Page . . . click HERE
Twitter Page . . . click HERE

Pinterest Page . . . clickHERE

DCWV's Link Listing

****LAST CHANCE TO ENTER my book giveaway HERE!!


Friday, February 21, 2014

Christmas 1974


Welcome to the last stop in this month's blog hop with...
The Creating Blog Hops Cafe'

Love is in the air this month, so we wanted to show a little love to a our Fur-Babies.

Here we are in our second month on the last Saturday of the month to inspire you with some wonderful projects. This month's theme is..."Pet's"
So, grab yourself a Latte' and hop along with us while we proudly show off our projects and our Fur-Babies.


Your first stop on the hop will be with...

Robin Lane from Create-A-Latte

For my project today, I created a layout.  I don't currently have any pets as I developed allergies in my 20's.  My children have not forgiven me for that one!!  I found this picture of me and my brothers with our dog Hugo and cat Mittens at Christmas in 1974:
The pets looked thrilled to be in the picture!!!  We had Hugo first and he was such a picky eater.  Then we got Mittens and Hugo ate EVERYTHING including the cat food!!!  Silly dog. 
I created a layout with papers from Lost and Found Christmas from My Mind's Eye.  I cut several pieces to mat my photo.  I used my cameo to cut the clock faces and gears to represent time (past) and added some washi tape to ground everything together.  I cut the title with my cameo as well.


Now, for some candy. This month we will be giving one lucky person two Becky Higgins Project Life Themed Kits, one is the Dogs Kit and the other one is the Cats Kit. For your chance to win this amazing blog candy you must hop through each one of our talented crafters blogs, be sure to leave everyone a little blog lovin', and if you are not already a follower please become one to each of ladies so that you do not miss a single project that they make.


Your next stop will be with...

If you get lost along the way here is the entire line-up of today's hop for you to get back on track and not miss a single project. And don't forget to leave everyone a little blog lovin' and become a follower for your chance to win some blog candy.


10. Jearise ~ http://lorbysworld.blogpsot.com

11. Here ~http://www.scrappinmystressaway.blogspot.com/ 


Thank you for hoping along with us today and I hope that we have inspired you to get your craft on.


Baseball Bag Tag

Hi!!  Today I have a fun little vinyl project to share.

If you are looking for my Constant Change Giveaway, please go HERE.

  My youngest son is getting ready for baseball with indoor practices.  Every player on the team has the same bat bag and I thought it would be fun to make the boys zipper pulls (bag tags).

I purchased some 2 1/2" round acrylic shapes online to make some personalized bag tags.

For the baseball bag tag, I created a 2 1/2" circle and placed it on my silhouette mat.  
I used the font Arial from my computer for the letters and number.  

I used this baseball file that was shared in one of my facebook groups.  I sized it to fit the circle.

I cut the laces in red and the name and number in blue to match Tanner's team jersey.
I put the laces on the back and the letters and number on the front using clear contact paper from the Dollar Tree.

I added a piece of baseball ribbon - he loves it!!

I used the same acrylic shape to make myself a keychain!
I put polka dots on the back and my monogram on the front using my two favorite colors - lime green and purple!!

These things are addictive!!!

Wednesday, February 19, 2014

100th Day of School Layout

Hello - I am pulling double duty today!!  I am featured at She's A Sassy Lady as well as Let's Scrap.  This week at Let's Scrap, our challenge is a card sketch.  I rarely make cards, so I turned mine into a scrapbook layout.
Here is the sketch.

For Tanner's 100th Day of school, his teacher made 100 pancakes! 
I created a title using my cameo and a font from my computer. 
I used circles to represent the pancakes.  I sprayed the background paper with Heidi Swapp teal color shine.  I added a strip of paper and some twine.

The paper is from Frosted Designs - Hey Kid!
I am so grateful the teacher sent me this picture as volunteers were not needed.  The kids had such a fun day!!

If you are looking for some scrapbook motivation, join us at Let's Scrap.  We provide sketches and tons of inspiration!!!

Thanks for stopping by!!

If you are looking for my Constant Change Giveaway, please go HERE.

Tuesday, February 18, 2014

Constant Change

I don't have ads on my blog, but every now and I come across something I really want to share with you.  My friend wrote a book once she realized she had a purpose in life that was separate from being a wife, mother, daughter, friend and employee (among other wonderful things).

I have known Michelle for years.  Our children went to the same schools, played baseball in the same town, played in the same neighborhood - but none of our 6 boys are the same age.  We crossed paths often - mostly on the baseball fields and at parent-teacher conferences.

My middle son made National Honor Society as a junior in high school, and Michelle was the featured speaker at the induction ceremony.  I was so moved by her words.  The next time I saw her at the baseball field, I told her how much her speech meant to me.  I was shocked to hear it was her very first speaking engagement!!  She also told me she was writing a book.  That was 2 years ago.

Our paths crossed again a few months ago when she asked for help - something most women have trouble with.  She now leads a women's group and her book signings are taking off as well as her speaking engagements.  She also wrote a lot of quotes as they came to her (they are on her website) and someone asked if she would consider putting them on tiles and selling them.  She contacted me when she saw other vinyl projects I made and asked for help.

What started as a "teach me how to do this" conversation quickly switched to "would you do this with/for me" conversation.  Here are a few that I made for her to sell:


I made this glass block for Michelle to take with her to her events.  Love this question!!!

The first chapter in her book is titled Embrace the Journey.  This book is filled with inspiration, tough questions and lots of insight.  This is a book I will refer to again and again!!!  I encourage you to check out her website and facebook page.

I am giving away one SIGNED copy of Michelle's book.  You can earn a chance by #1 leaving me a comment here, #2 subscribing to her YouTube Channel and leave me a separate comment that you did here, #3 "like" her facebook page and leave me a separate comment that you did here. #4 subscribe to her website/blog and leave me a separate comment that you did here, and #5 follow her on Pinterest and leave me a separate comment that you did here!

I will draw a winner February 28, 2014!


Order Her Book
Facebook Page
Website
You Tube Channel
Pinterest

Friday, February 14, 2014

Love is.... (A Challenge and A Tutorial)

Happy Valentine's Day!!!
Today I am pulling double duty - my layout is part of the challenge at Frosted Designs and I am including a tutorial for Let's Scrap.  I am on the Design Team for both groups and happy that I could make this work for both!!

The Challenge is "Love Is..." using the following colors for inspiration:
I used yellow, blue and pink in my layout - very different from most of my Disney Layouts!!

I also followed this Let's Scrap sketch:


For my Let's Scrap Tutorial, I am going to show two techniques for putting titles/words on your project.  It is easy to pick the words you want to use, but not always easy to get them on your project straight and centered.  Before my first Cricut machine, I purposely would put my letters on my layout slanted back and forth because I knew I could not get them on perfectly straight!!

For my first example, I used my Cameo.  I lined up my letters and words on my screen so they cut out the way I want them to appear on my project.
I cut the words at the bottom out of yellow cardstock.
After I pull the paper up....
I have a ready-made template!
I simply lay my template on my page right where I want it.
I use painters tape to hold it in place.  I run my letters through my 1" Xyron to turn them into stickers.  Sometimes I use my fine tip glue pen.
Then I put the letters right in their cut out spots.
Once the first letter or two are in, your template will stay in place.  When the letters are all in, gently pull up the template.
Here is the first line - looks just like I wanted!

Normally, I continue on but I realize that not everyone uses an electronic die cutter with software, so I will move onto technique #2.
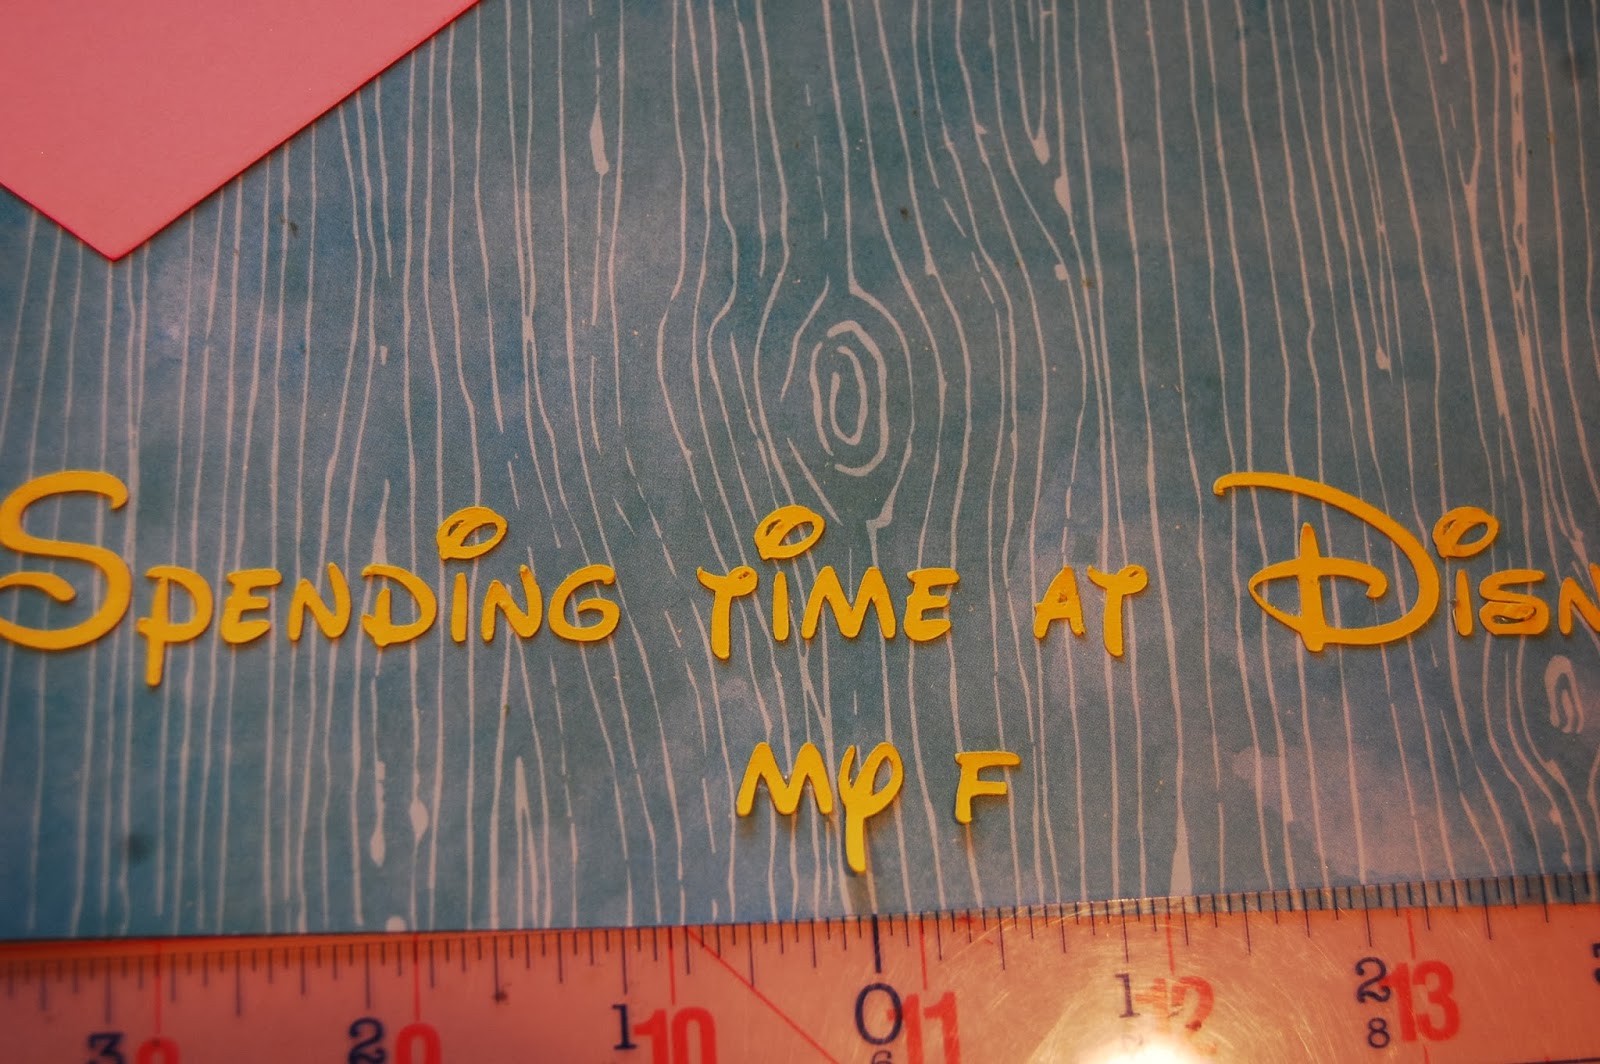
I have a centering ruler that works well with stickers or cut letters that are not nicely arranged on the paper.  Once you know your designated space for a title (or sub-title) you can start at the center and work your way out.
Once you find the center of the space you are putting your words, start in the middle of the title/sentence and put the bottom of the stickers right on the ruler.  I will say that the larger the letters you have, the easier it is to do this!!

Since I am adding the second line, I find the center point of the first line to determine my center.
Gently bend the ruler so the top of the stickers touch the page.  With one hand on the ruler, the other hand holds the letters in place as you gently pull the ruler away (my other hand was on the camera in this shot!!).
This way is a little awkward for me and does take practice but it does help line up the letters straight - something I can not do on my own!!
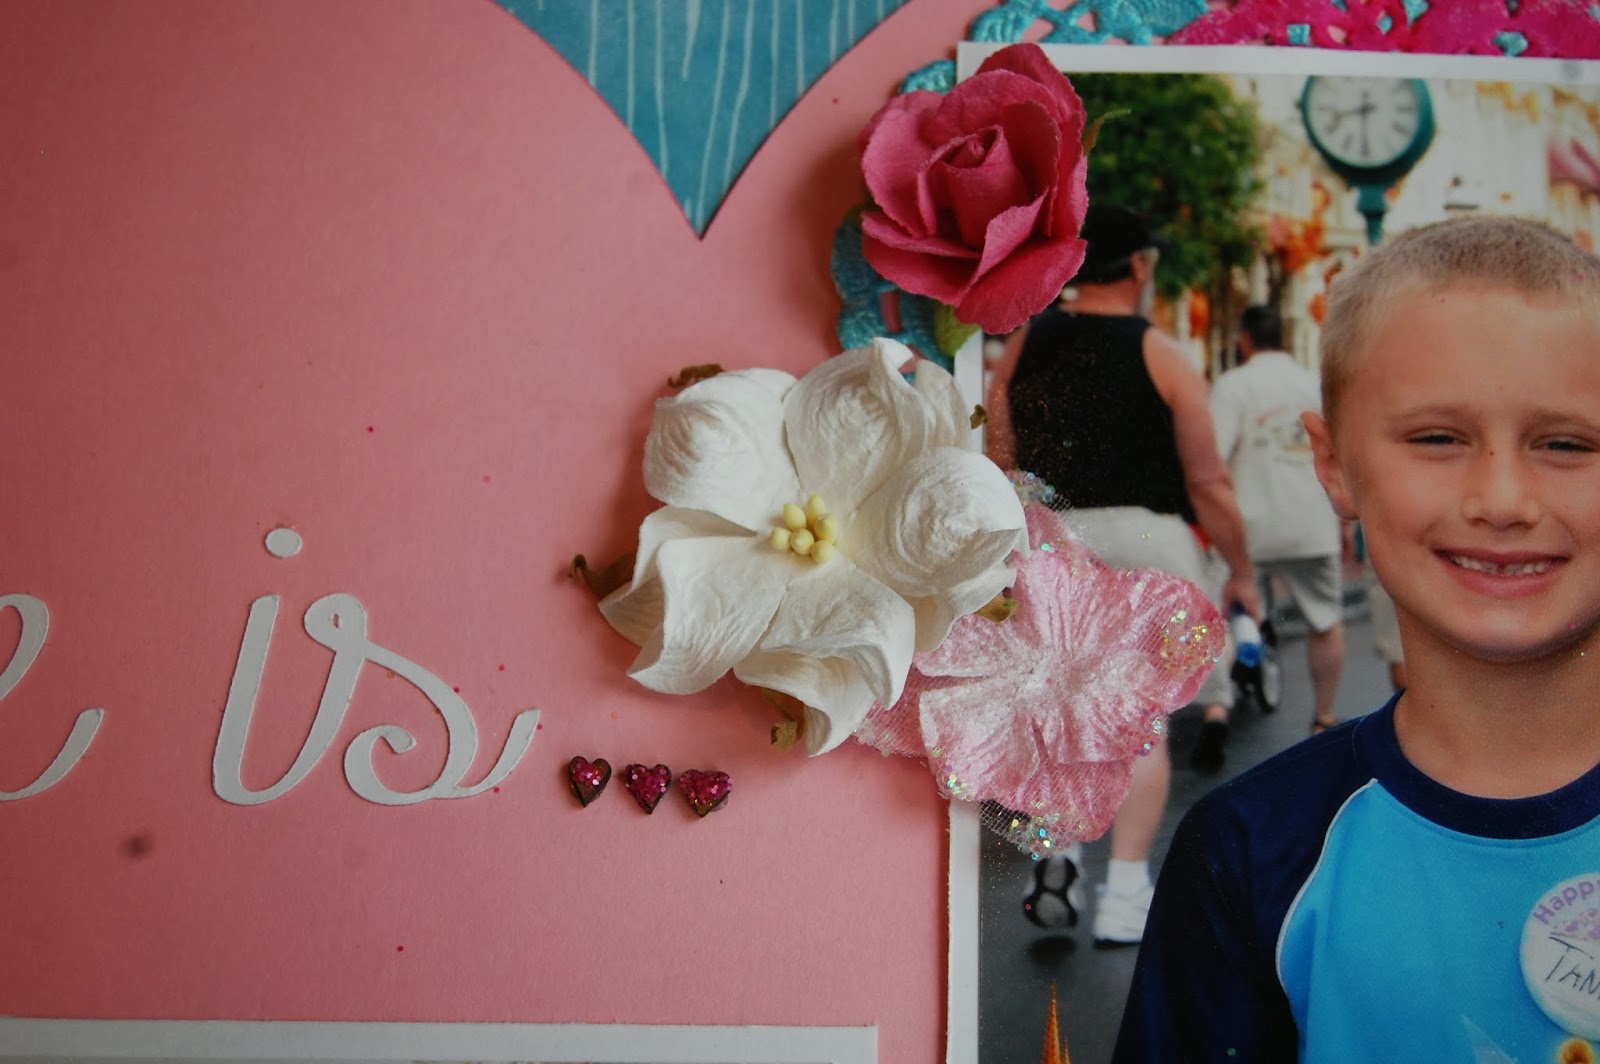
Here I am using the centering ruler to determine the center of my space.  Then I can adhere the "Love is" in place.
Once I got my words on my layout, I added the rest of my pieces.
I inked some doilies with Dylusions Ink (Bubble Gum) and Heidi Swapp mist (teal).  I added some ribbon behind the heart.
I take so many photos at Disney that I had to include this camera paper clip.  I glittered inside the heart using glossy accents and picked raspberry distressed glitter .
I added these flowers and wood hearts with some picked raspberry distressed glitter adhered on top.
Happiness to me is spending time at Disney with my family.  We are currently planning a trip next December and I am super excited!!!  We have never been to Disney at Christmastime!

I hope this tutorial helps!


Thursday, February 13, 2014

Alphabet Love

Happy Valentine's Day Eve!  I have always wanted to make one of these Alphabet I Love You projects!  Today I am featured on The Buckle Boutique Blog!

I have the perfect piece of Chalkboard paper from the DCWV Chalkboard Paper Stack.

  I framed the page in a 12 x 12 metal frame from Michaels.  I added some rhinestones from The Buckle Boutique for my I Love You!

I used my Gypsy to cut some letters and the heart. 
In order to get the size right, I first cut the letters out of paper and set them on top of the frame.  The first set was a little big, so I just reduced the size a bit and tried again.

Once I got the size I needed, I reversed the images on my Gypsy and cut them out of a red Rhinestone Sticker Sheet.
The "U" is from Varsity Letter, The heart is from George and the "i" is from CTMH 
I peeled off the back and stuck them down! 
This currently hangs in my daycare and I think I will leave it up year round!!

The Buckle Boutique's Link Listing
The Buckle Boutique's Website . . . click HERE
The Buckle Boutique Blog . . . . click HERE
Facebook Page . . . click HERE
Twitter Page . . . click HERE

Pinterest Page . . . clickHERE

DCWV's Link Listing

The Buckle Boutique would like to show our love for our customers by offering you a discount on a SPECIAL PURCHASE of Pink Ombre rhinestone sticker sheets!!!!!
Pink Ombre Rhinestone Self Adhesive Sticker Sheet – Various shades of pink bling makes a statement on scrapbook pages, favors, apparel, phones & personal electronics, anything that needs sparkle! The stones are continuous and butt up against each other on the entire sheet. No spaces! They are great if you wish to cover an entire surface quickly and easily.
This SPECIAL PURCHASE Pink Ombre Sheet has a beautiful transition of shades of pink all in one sheet!  Each 10″ x 20″ Sheet is only $7.00!!
These awesome sheets can be cut with scissors as well as a paper cutter, Cricut (deep cut blade), Big Shot, Vagabond, Pazzle, Sizzix, Klick-N-Kut, AccuCut and many more die cut machines! Because the 3mm “stones” are actually a gel or soft resin substance, they can be cut down the middle.
They have adhesive on the back that is exposed when the protective film is peeled off. These particular sheets measure 20″ by 10″.
Supply is limited to grab them before they are gone.
CLICK HERE to purchase yours now!