Welcome to Scrap Happens ~ Embellish It's 2nd Blogaversary Blog Hop!!!
I am excited to wish Jenn a Happy Blogversary!
You should have arrived from MELANIEs blog but if you have just stumbled upon my blog, click HERE to start from the beginning.
This hop is an ANYTHING GOES hop and there are so many different craft projects to see along the way.
Here is the lineup in case you get lost along the way!!
Here is the lineup in case you get lost along the way!!
- Scrap Happens~Embellish It --- http://scraphappensembellishit.blogspot.com/
- Tara Barnes Bruening --- http://craftindesertdivas.blogspot.com
- Tammy Smith --- http://cuttinandstampin.blogspot.com
- Amber Neal-Johnson --- http://pixiperfectcreations.blogspot.com
- Robin Carroll --- http://cutonedesignsbyrobin.blogspot.com/
- Melanie Rozwood --- http://afternoonscrapper.blogspot.com/
- Lori Apgar --- http://scrappinmystressaway.blogspot.com/****HERE
- Norma G. --- http://lilhoneybeestudios.blogspot.com/****NEXT
- Maria Matter --- http://JoyfulStamper.blogspot.com
- Angie Livingston --- http://angiescraftypad.blogspot.com
- Robin Lane --- http://create-a-latte.blogspot.com/
And now onto my project:
I started with this frame. The opening is about 7.5" x 15" and was sold "as is" at Michaels. It was probably a custom frame that did not work for the customer who ordered it. It was perfect for what I had in mind....
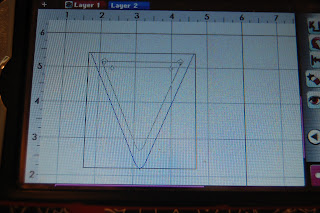
I am a visual crafter and have learned that by using Cricut Craft Room and my Imagine Cartridges together, I could see just how big (height AND width) each image is. I can not print and cut (right now) with CCR, so I took the size that I wanted and cut the pieces out on my Imagine.
I used the banner flags from Yummy Cricut Imagine cartridge.
I cut two of each banner flags and the layers sized to 2.5 inches.
In order to fit on the banner flags, I sized theses letters from Martha Stewart Birthday Cake Art at .70 inches.
The banner flags were not filling up the space like I wanted to I went back to Gypsy.
I put a banner flag from Birthday Bash on my mat about the same size as the Yummy flags. I opened up a new Layer and copied the banner flag on it. I enlarged the flag until the layers looked good (3.22 inches).
I cut out the banner flags in the same blue cardstock as the letters. I embossed the flags with Stampin' Up Chevron Sixxiz embossing folder. I tied the banner flags together with pink and blue twine.
Thank you for stopping by!!
Your next stop on the hop is NORMA.


27 comments:
This turned out great. Thanks for showing how you made it.
Very Creative.. Love it
gorgeous banner Lori!!
hugs
OMG! I love love love it!! Now off to hopping, thanks!
xoxo Charity
Good Morning Lori, your banner turned out great! Beautiful project :D I'm so happy to be hopping with you today!
What a great banner...I'm off to create!
mb6464@hotmail.com
marciasmemories.blogspot.com
Your banner is adorable! Love the colors. Thanks for sharing how you made it. I'm going to have to try CCR. Happy to be on the hop with you!
Tara
Great banner! i love it, your blog too, so i am now a follower! Thanks for being a part of this hop
marianneDOTwanhamATgmailDOTcom
Very cute! Love the banner. I have tried using the CCR but couldn't get it to working with my Imagine.
I am going to have to figure that one out:D
Loving all of the projects on the hop.
(:(:Smiles:):)
Robin
thecricutscrapper at yahoo dot com
I think that this is so cute!!! I am thinking that maybe I might need to make one for Christmas...thanks for such a great idea.
robin
http://cutonedesignsbyrobin.blogspot.com/
A Fabulous and Fun banner!Love it!
Migdalia
Cute idea. I really have to use my Imagine more.
Very cute, love it.
Robin L.
This is really cute!
How adorable and inspiring!
Love your banner. great colors
CUTE Banner!! Great project :))
rrandrr@insightbb.com
Wonderful banner! Love your blog!
this is a lovely banner!!! love the colors you used! thanks for the inspiration!
You did a great job on that banner and gave wonderful directions too! Thanks for the hop and have a great week!
You put so much wonderful tiny little details on this banner! It's gorgeous!!!
Very nice little step-by-step you've written here.
Visualization tools are pretty important in crafts, I think, especially with resizeable stuff from cartridges or svgs or plain ol' digital stamps. It's great you've found one that works for you; you certainly seem to know how to work with it.
Beautiful Banner. Love it.
Hugs, Rosalee
How cute!
I love your banner, so creative!!
What a cute banner!
Great banner and likethe idea that you framed it.
marg0006 at verizon dot net
Post a Comment