Copyright Information

Thank you for stopping by my blog! I hope you enjoy the things that I create and share! I do have a copyright on my original creations (see logo on my sidebar below).
If you create and post a creations based off of mine, please refer (with a link) back to my blog. Please do not use my ideas for files, profit or for contests. Thank you!


My Craft Goals for 2015

My Goals for 2015:

1. Update my goals for 2016 in January of 2016 :)
2. Maximize my crafting time!
3. Keep plugging away at scrapbooking photos!!
4. Learn how to Heat Press!!
5. Have fun!


Tuesday, September 25, 2012

I love Candy Layout

I am finally getting around to scrapbooking last year Halloween photos!!!

Tanner was a Police Officer and his best bud Jadon was Batman.  One of our neighbors dressed up as Cruella DeVille.  My husband dressed up as Santa.  It was a fun night and the longest Tanner trick-or-treated so far!!

I used Hannah Montana for the font and sized the shadow layer to 1.5 inches.  The heart is from George and is also 1.5 inches.

I added the normal font (Hannah Montana at 1.5 inches) on another Layer.  I also added some hearts (from George) at 1.5 inches and 1.35 inches.

Here are the letters and hearts cut out.  I used orange, black and yellow cardstock.

I wanted some candy, and I found these suckers on October 31.  I used Hide Contour to erase the other pieces of candy.  The sucker is sized to 5.46 inches.  It looks super busy on this screen shot.

Once I hit the cut button, this screen looks so much better!

The round pieces of candy are from Simply Charmed and are sized to 3 inches.  The long pieces of candy are from Slumber Party and are sized to 3.92 inches.

I cut out the suckers in white, yellow and purple cardstock.  I trimmed off the stick part of the yellow and purple ones and glued the circle on.  I assembled the candy and then added stickles to the cardstock.

I wrapped celophane around the candy and tied the ends with twine.

It looks like candy!

I also tied celophane on the suckers.

I ended up using the yellow heart on top of the orange one.

Don't these look good enough to eat?


Making these pages is putting me into a Halloween kind of mood!!!  Halloween is my favorite holiday!!!

Friday, September 21, 2012

Candy Corn Card (Triangle Challenge - Frosted Designs)

This week at Frosted Designs our challenge is Triangle.  I was going to make a banner, but thought about my favorite fall candy and decided to make a card instead.

I used this image from Create a Critter sized to 4 inches.  I created the shape card by copying and rotating the shadow layer of the candy corn.  I welded the two together.

I cut out the pieces in cardstock.  I did not want the mouth to show through, so I cut an extra layer in yellow.  I measured and cut the yellow strip (minus the mouth) and adhered it to the orange layer.

The extra white triangle piece is a little smaller (3.76 inches) and is for the inside of the card.

I stamped You are so sweet from Kinderstampo and tied some twine around the candy (before I adhered it to the card base.

Here is my sweet little card!!

Tuesday, September 18, 2012

Pirates and Pals Layout


I am working hard on catching up Tanner's Scrapbook from last year.  I do not necessarily scrap in order - it is more like I scrap what fits the challenges/themes for my Design Teams and also the pictures I have the best ideas for!!

Last year at this time we went on a Disney Cruise.  I recently purchased Buccaneer Cricut Imagine Cartridge and also recently learned how to make layouts with Cricut Craft Room and the Imagine so I am glad I had not scrapped these photos from our Pirates and Pals evening at WDW!
I layered these images on a 12x12 mat in CCR and printed this out on one piece of white paper.

I then cut out another layer of the word Pirates!, my treasure map and Yo Ho Ho word bubble.  I wanted to add dimension by pop-dotting these on the page.

I crumpled the treasure map and inked it to make it look old.
I created another one of these treasure maps at 12x12 for Tanner's room.  You can see that project HERE.


Here is Pirates! pop-dotted over the page.

This is the part that CCR and I started to not get along.  I wanted the second page to print out like this above with the pirate ship printed on it.  Well, CCR had other ideas.  Good thing I am stubborn!!  I went straight to my Imagine and printed out the full sheet of paper first.  Then I matched the size of the design on CCR and cut and printed out (after I remembered to change the settings on the Imagine) the Pirate Ship.


I also cut and printed "Scaley Wag", a flag, a piece of parchment paper, and a pelican.

I put a little water on the page by tearing some blue cardstock and pop-dotted the pirate ship on top.

As you can see by his photo, our Pirate Guide was full of personality and made this experience very fun!

Tanner was chosen to carry the flag out to the Pirate Ships.  Once in the boats, we took a cruise over by the Magic Kingdom and got to watch and listen to the Haunted Firework Show.

Once we got back to the dock, Peter Pan grabbed Tanner and another little boy and walked with them to his designated spot for autographs.


I tucked the flag behind this photo of Tanner carrying the flag.

If you go to WDW in the fall, be sure to check out the Pirate and Pals Excursion.  We have gone twice and it was fun both times!

Saturday, September 15, 2012

Last FIRST day of School Layout

I designed this layout for Seems A Little Sketchy Layout Sketch Challenge.


My middle son is a senior this year and it hit me when I took his First Day of School picture that this is his LAST first day of high school.  I cut a star out of cream colored paper cardstock and inked it up with Vintage Photo and Walnut Stain to match my papers better.

I used some papers from my 8x8 DCWV The High School Stack.  I cut this paper wide enough so the word "senior" was visible behind his schedule.  I also used locker paper behind the photo.

I cut out the word "Senior" from Varsity Letter at 1 inch.
I typically keep Tyler's pages simple as he is a little picky.  I can get away with more of his younger brother :)

If you like to follow sketches for challenges or inspiration, please check out Seem's A Little Sketchy!  You can check it out or link up a project of your own!

Thursday, September 13, 2012

Treasure Map

My son Tanner has a Pirate Themed bedroom.  Last month, I created some vinyl wall hangings for his room.  You can see them HERE.  

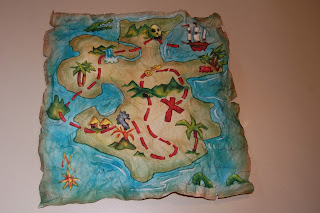
I recently got Buccaneer for my Cricut Imagine and really liked this Treasure map.  I printed it out on cream cardstock.  I trimmed the paper where it was intentionally torn.  I crumpled up the paper (this part was fun) and inked it with Vintage Photo ink.

Here is what it looks like all crumpled and inked.

I bought a frame to fit a record album.  It is 12.5" x 12.5".  Since I did not have any 12.5" x 12.5" paper, I spray painted the back piece of the frame.  It is almost a particle board material.

Here is the map inside the frame.

Do you use your crafting supplies to decorate your children's rooms?

Monday, September 10, 2012

Hexagon Shape Card

This is Lori from ScrappinMyStressAway and I am so happy to be the Guest Designer today at The Bug Bytes.

I found out this week that a friend passed away.  I met Frank and his wife Dawn Marie 15 years ago.  Dawn Marie and I were in the same Daycare Provider Group until I moved to a near by town.  Frank was a great father and husband and wonderful person!  He loved children and dresses as Santa and came to several of my daycare Christmas Parties in full costume.  He was a special man and will be greatly missed!

I wanted to make a special card for Dawn Marie and her family.

I saw a card on Pinterest that sparked an idea.  I grabbed my Gypsy and created this hexagon card.  I took a hexagon from My Quiet Book and sized it to 4 inches.  I copied a second hexagon and rotated it -61 and welded it to the first hexagon to create my card base.

I put two more hexagons on my mat sized to 3.76 inches.

I opened another layer and found this tree on Jolly Holidays.  I left the first layer visible to help me size the tree.  I sized it to 2.65 and cut it out in brown cardstock.

I cut out the card in a green patterned cardstock and the smaller hexagon in a blue shimmer cardstock.

I adhered the layers together and added the tree.

I used my Martha Stewart Butterfly punch to cut out some tiny butterflies in pink cardstock.

I used mini glue dots to adhere the folded butterflies to my card.

I inked the edges of the card with a blue stamp pad.

I really like how this card turned out.  I did not use the extra blue hexagon on the inside as the back of the green patterned cardstock is light green.

I have a hard time making sympathy cards.  I do love butterflies and every time I see one I think of my mom who died in 1989.  She loved butterflies!

Thanks for stopping by today!