
Welcome to Day 2 of the All About the 70s Blog Hop!

Welcome to the "All About the 70's" Blog Hop!!
We're so happy you could join us for this super-fun hop showcasing cards, layouts and projects that feature anything and everything related to the 70's!! So pull out your bell-bottoms and peace signs, and join us for the FUN... You'll find an array of ideas throughout this hop -- From decorations to gift ideas and more, we hope you'll enjoy each and every GROOVY project along the way!! This is a TWO-DAY hop, so be sure to check it all out (besides, we have a FAR OUT prize for a random someone who visits and comments on each stop for each day!!)...
We can guarantee some psychedelic excitement for this event... So let's get hopping!! If you've hopped over from INSERT NAME/LINK of person BEFORE YOU, then you are in the right place!! If you've just popped in to visit my blog or are reading this via email and you'd like to join our FUN, then please CLICK HERE to start at the beginning with Lynda's blog...*** 70'S HOP DAY ONE (January 15):


For my project today, I created a layout about a Time Capsule our class buried in 2nd Grade. We dug it up in 6th grade. I only wish I remembered some of the things we put in it!!!


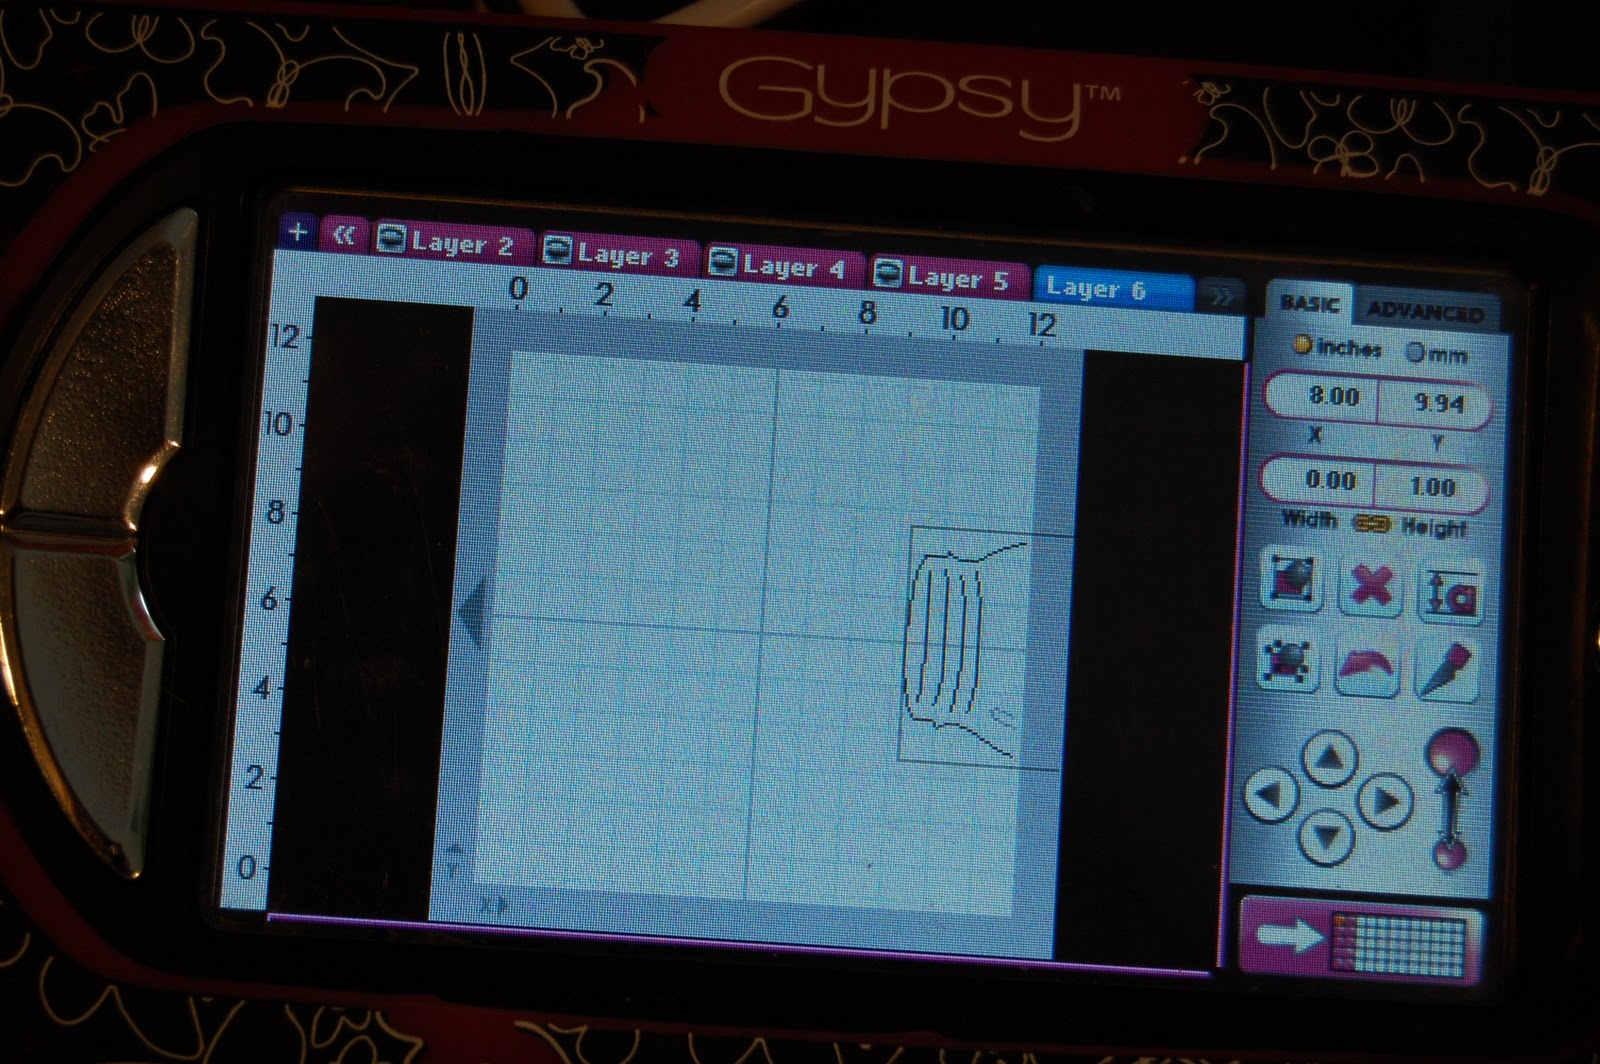
I wanted a brick background and remembered that the Batman cartridge had one. I cut out the shadow and the layer at 8.70 inches.

The bricks in the background of my photo were darker so I grabbed my inks.

I used Walnut Stain and Vintage Photo to darken up the brick and give some dimension.

I found this jar from Doodle Charms and sized it to 7.71 inches. I hid the inside cuts with Hide Contour and copied and pasted a second jar and hid everything except the highlight detail. I cut both out of vellum.
I made one more copy and moved it off the mat for the jar lid. I cut this out of white cardstock to match the jars in the photo.

I used Hello Kitty Font Shadow letters for my title. I sized them at 1.12 inches.

I cut out the letters in black cardstock and saved the negative piece to use as a template. I ran the letters through my Xyron.

I adhered the letters using the template as my guide.

I peeled off the template and my title was perfectly lined up!

I journaled on my jar lid after I inked the edges.

There is a huge macreme wall hanging in the background and I just had to add some twine to tie that in (no pun intended). If my memory returns of the items we put in our jar, I will add those.
Thanks so much for stopping by!!
Your next stop in the hop is Rachel.


12 comments:
Lori, what a COOL layout!! I remember burying a time capsule in the 2nd grade too... And, like you, can't remember a THING we put in it!! I wonder if they've dug any of those up yet... Hmmmm....
I always love your posts -- You put so much time into showing your steps...
You are sooooo GROOVY!! :)
Thanks for being a part of the hop...
Amy :) at www.lovetocrop.com
Time capsules were so fun. I remember doing a couple of those myself in classes. Great layout and love how you did the bricks.
What a great layout I love the brick wall and the awesome bottle and your tutorial is great Thanks for being so detailed
Big blog hugs! Janet
Oh I love this. We did a time capsule when I was in school too. Fun times. I don't remember what I put in there either. Wonder if the kids from the school ever went and dug those items up.
Smiles Sher
ShersL84bed@aol.com
Great time capsule and memory!!! Love the complete tutorial!!! Pleasure hopping with you! Totally Groovy!
What a Great Idea for a Layout. So Creative! Thanks for Sharing! :0)
cindymarshall63 at hotmail dot com
cindys-greencricut.blogspot.com
Fantastic Layout! thanks so much for sharing a great idea and I enjoyed the tutorial too.
SUPER COOL! Thanks for the lesson as well!
Hummer Hugs,
Misty
http://deliteful-gifts.blogspot.com/
hummingbird204 at comcast dot net
That's a fun idea for a layout. I can't remember if I ever did a time capsule and if I did, I probably wouldn't remember where I put it!! LOL Thanks for the details..
Thanks for sharing,
Creative Wishes,
Claire DT 70's hop
www.scrapmyway.blogspot.com
What a great page. I remember doing the time capsule thing when I was going to school.... Wish we had taken photos because it is a wonderful memory. TFS
I think everyone did a time capsule in school. Had forgotten bout ours to be quite frank. TFS and reiminding.
Debbie
http://craftywizard.blogspot.com
Adorable Layout!
Post a Comment