Copyright Information

Thank you for stopping by my blog! I hope you enjoy the things that I create and share! I do have a copyright on my original creations (see logo on my sidebar below).
If you create and post a creations based off of mine, please refer (with a link) back to my blog. Please do not use my ideas for files, profit or for contests. Thank you!


My Craft Goals for 2015

My Goals for 2015:

1. Update my goals for 2016 in January of 2016 :)
2. Maximize my crafting time!
3. Keep plugging away at scrapbooking photos!!
4. Learn how to Heat Press!!
5. Have fun!


Tuesday, March 12, 2013

Peace, Love & Shamrocks!!


Hello and Welcome to the Beautiful Burlap Blog Hop!!


Burlap is hot right now and gives a project texture.  For this hop, we were challenged to use Burlap in our project.  I sure hope we inspire you!

You should have arroved from Robin's BLOG.  If you found me first, you should hop on over to Jessi's BLOG so you don't miss anything!

In case you get lost along the way, here is the entire line up.


We do have some fun Burlap Blog Candy:

1 yard of red 2" burlap ribbon

1 yard of white 2" burlap ribbon
1 yard of mint green 1" 
1 yard of 1.5" jute ribbon in natural 
1 yard of your choice of colored 3/8" jute ribbon (see my etsy store)
And pick 2 colors of jute twine (see my etsy)

Please leave a comment on each blog to be entered in the giveaway!


Now on to my project:


I used a banner flag from Birthday Bash and sized it to 5.70 inches.  I put three on my mat.


I cut the banner flags out of watercolor paper so they would be sturdy enough to adhere the burlap to.


I use watercolor paper for banner flags and mini albums.  I find that it cuts well on my cricut.  If my blade is pretty new, I don't even change the settings.  If the blade is old, I multi cut it (2).


I used green glitter cardstock from Michaels.  When cutting with this paper, I flip my images and put the paper on my mat glitter side down.


The peace sign is from Cricut Stencil and is sized to 2.88 inches.

The heart is from Plantin Schoolbook and is sized to 2.76 inches.

The shamrock is from Paper Doll Dress Up and is sized to 3.12 inches.  I used Hide Contour to hide the inside cut at the stem of the shamrock.


Here are the shapes cut out.


Next I covered my banner flags with burlap.  When cutting burlap, it is easier to cut it after you pull out a strand.

I trimmed the burlap to fit my banner flag with some extra over the top.  This gave me a finished edge at the top.

I used my ATG gun to adhere the burlap to the watercolor paper.

Since I covered the holes, I grabbed my Crop-A-Dile.

I used green twine to string the banner together.

The final step was to tie green ribbons on the twine in between the flags.

I hope you enjoyed the banner!  What do you want to make out of burlap??

Your next stop on the hop is ZOE.

Make Your Own Glue Dot Tutorial (Frosted Designs)


Hello Crafters!!!  Lori here from Scrappin'MyStressAway with a tutorial I have been wanting to do for a while.  My husband's grandma recently passed away at the age of 97.  When I met her, she was 75.  My mother-in-law is not a picture person (gasp!!) and I just recently saw some of grandma's photos from her youth when I was putting the picture boards together.  

She was a beautiful lady!!

I knew that this was a great opportunity for me to honor Grandma Kelly along with my tutorial!

Many of us use Glue Dots a lot for various projects.  A friend of mine shared her Glue Dot secret with me and I thought I would share it with you!! This will save you money (something Grandma Kelly loved to do) as well as give you more options than the store-bought dots do. 


You need 2 things: 

Aleene's Tack-It over and over glue.  I found mine at Michael's and used a 40% off coupon.

Wax paper or leftover sticker sheets.


I am using a leftover Glue Dots sheet.  I probably should have used something wider, but this worked!!

Simply squeeze the glue into the size dot you need.  You can also make lines of glue.

Let it dry.  

The smaller dots dry within an hour.  My large dots dried in about 24 hours.  The key is to plan ahead if you need a large dot.  

I knew I was making a flower out of ribbon, so I made my dot the size I wanted the flower to be.


The biggest dot was made on a sticker cellophane wrapper.  It is still a little white in the center a couple of days later, but dry enough to use.

These glue dots are much stickier than the Glue Dots from the store (which can be good or bad).

For my ribbon flower, I started in the center and wound the 3Girl Jam ribbon around and around.


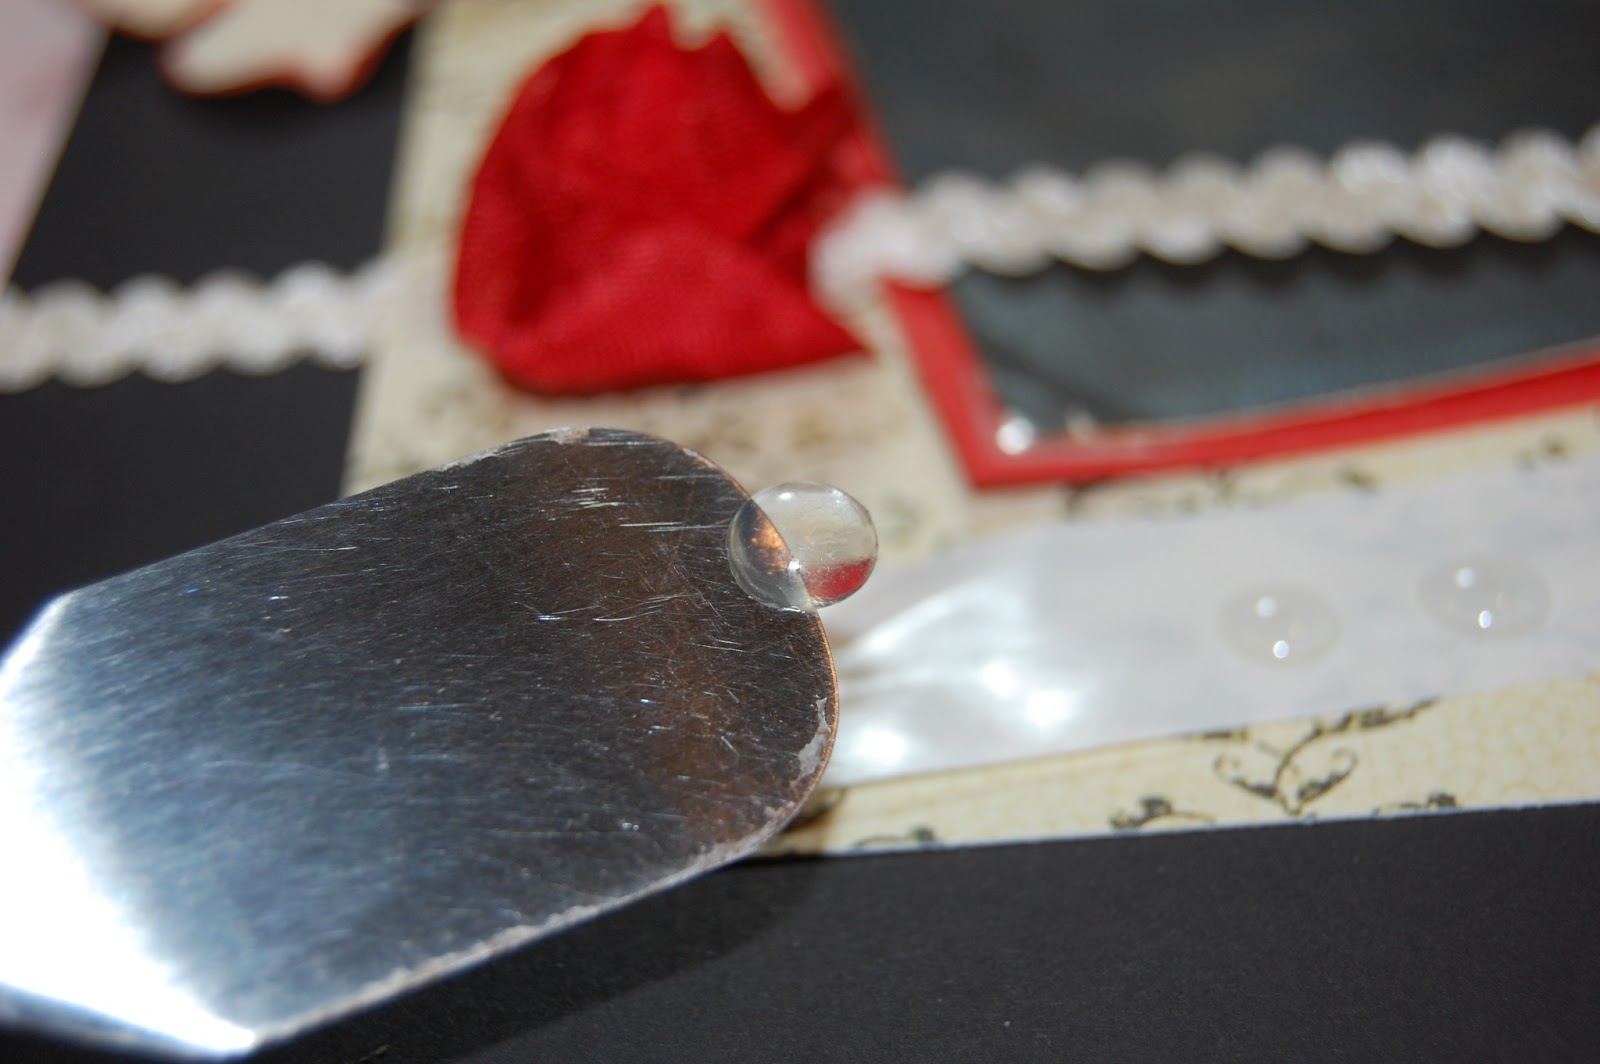
I used my Cricut spatula to get the glue dot off the cellophane and positioned on my layout.


I like the ribbon flowers better than the 3D paper flowers I make with my cricut if I am putting the layout into an album.  The ribbon is more flexible (aka squishy when you close the page)!!

You can't see here, but I used a small glue dot to glue a pearl in the center.  I did not intend to, but the glue backing came off the pearl (hate when that happens) so it is good to have options!!


I used the medium sized glue dots to adhere the paper flowers on my layout, as well as the pearls in the centers.


I added some ribbon, metal flowers and gem flourishes.


For my smaller flower, I used my tweezers to position the glue dot on my page.  Then I wound the ribbon on it.


The tweezers also helped tuck in the end of the ribbon.


Grandma Kelly wrote on the front of a lot of her pictures!!  Yikes!!  In the corner of the photo you can see "Louise 1934" written in ink.  

I thought that would make the best title for my layout.


I used Quarter Note and my Gypsy to weld Louise.

I cut out Louise sized to 1.48 inches.  I cut out 1934 sized to 1 inch.

I used a label from Lacy Labels sized to 3.12 inches to adhere the title to.


I cut the letters and numbers and shadow tag out of red cardstock and the tag out of the reverse side of the patterned paper.


I slid the tag under the photo mat.


I love this photo of Louise, her eyes follow you!  She was 18 years old in this picture - her whole life was ahead of her.

I love creating glue dots in the perfect size for my projects.  I hope my Make Your Own Glue Dot Tutorial was helpful!

I am also linking up today at Pink Cricut!


Monday, March 11, 2013

Lucky (BugBytes)

Top 'O the Morning to You!!  I am LUCKY to be at The Bug Bytes today!

I have a fun burlap project today!  There are a ton of burlap crafts on Pinterest right now, so I had to get some!!

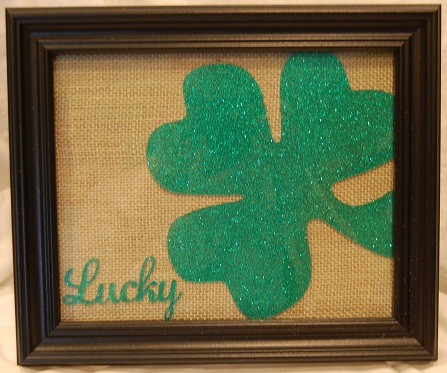
I started out with my Gypsy, some burlap, a piece of green glitter cardstock, and a frame.

I started out by putting a square on a Layer of my Gypsy and sizing to to 8x10 to represent the frame.

I grabbed a shamrock from Paper Doll Dress Up and made it grow bigger until it was big enough to fall off the top and side of the frame.  It ended up being 8.18 inches.

I also used Hide Contour to hide the inner cut at the bottom of the stem.

I welded the word LUCKY from Quarter Note.  The letters are 1.43 inches.  I welded the word first, then grew it to fit my space.

You will notice that the word and shamrock are flipped backwards.  I did this on purpose because when I cut the glitter cardstock, I cut it out glitter side down.


j

This is what I cut out.  Luckily I cut out Lucky twice, the first one tore a bit and some of the glitter peeled off.


I cut the paper glitter side down.  I tape the edges just in case because this paper is usually $1.99 a sheet and I don't want to ruin it!!

I use a multi cut of 2 and turn my blade one setting higher.  On this expression, I typically cut at 5 so I set it to 6.  The expression at work is set to 4 so I set it to 5.  Having a new blade helps too!

I trimmed a piece of burlap to fit my frame.  I used a piece of 8x10 chipboard that came with some pictures I had printed at 8x10 to adhere the burlap.  I used my ATG gun to stick it down.

I then used my ATG gun to adhere the shamrock and LUCKY to the burlap.  I trimmed off the edges of the shamrock and put it in the frame.

I displayed this on my entryway table!  I am a lucky girl and want to remind myself of that every time I pass by that table :)

I hope you have a wonderful St. Patrick's Day whether you are Irish or not!!

Friday, March 8, 2013

Connie's Birthday Blog Hop


Happy Birthday Connie!!!!

Welcome to Connie's Birthday Blog Hop with Connie and her craftastic friends!


Today we invite you to come check out this great group of crafters who will be showcasing Birthday cards, layouts, or projects. ... You should have arrived from CHARITY.
If you happened upon us please start at the beginning of the hop at http:// www.conniecancrop.blogspot.com/
This is a one day blog hop and we appreciate your leaving a comment to encourage all my fabulous crafty friends to continue sharing their ideas and creations.


Since it is Connie's Birthday she wants to celebrate by giving out the gifts! 


 So what do you need to do to win? Easy... become a follower of each of the fabulous blogs in this hop and leave each of us a comment letting us know what you like best about our projects.

Then head over to http://conniecancrop.blogspot.com/ and post that you followed the rules.
You will have until 9:00 pm Sunday to finish the hop and leave your comments.  Be sure to follow everyone and leave a comment along the way! Ready to join in the fun?

 Hope you all enjoy this super celebration!


For my project, I made a gift card holder/card from the Close To My Heart Atriste Cricut cartridge.


I selected the card I wanted and sized it to 4.5 inches.  This card was on the letter "g" key using the  Card Function Key.   ***Note: the gift card opening was a little tight and next time I will size to 5 inches.

I love both CTMH cartridges, but I have a hard time finding the cuts I want.  They are not arranged very logically in my opinion!! 

The butterfly is sized to 1.94 inches.

The sentiment is sized to 1 inch.

The accent/tag is sized to 2.41 inches and will be used vertically.


I used kraft, burgundy and a patterned cardstock (kraft on the back side) to cut my images.


Here are the images cut out.

I scored the card and used my ATG gun to adhere the sides of the gift card holder.  I used my fine tip glue pen to adhere the Happy Birthday sentiment on the inside.

I inked the edges of the 

I bent the wings up a little bit and adhered the body of the butterfly with my ATG gun.  I put a little pearl on the body (you could easily use gems or stickles for added sparkle).


You just tuck in the gift card and it is ready to go!!

I am really loving kraft colored cardstock right now!!  I love how this turned out!

Thanks for stopping by today!  Your next stop is JAMIE!

Here is a complete lineup in case you get lost along the way:


Monday, March 4, 2013

Pinch Proof Card


Hello and Happy St. Patrick's Day a little early!!

I am Pinch Proof today over at She's A Sassy Lady!


I went to a crop and learned a few tricks with my CTMH Artiste cartridge.


This stamp set (Perfect Fit - Frames 2) coordinates with some cuts on the Artiste cartridge.  It tell you the exact measurement of each image to coordinate with the stamp.

I chose the square-ish shape and cut some out of white cardstock at 2.5 inches.

I actually cut out several of each shape and put them with my stamp set for future use!!  But for today's card, I used the square-ish one.


Next, I used a Stampin' Up stamp set (borrowed from my friend Jenny) for the circle image and the inside sentiment.

I stamped the Pinch Proof stamp on white cardstock and used my Fiskars 1" punch to punch it out.  I inked the edges with the same green.

I stamped my cut image with green ink.

I wrapped the image with some orange twine for a color contrast.

I pop-dotted the circle image to the center of the shape.

I used some green stickles on the shamrock and a couple of gold gems on two corners.

I stamped the sentiment on white cardstock, trimmed it and inked the edges.

I used a 3x6 kraft cardstock card base, folded in half.


Here is my Pinch Proof card - I hope it works as I don't like getting pinched!!!

I hope you have a wonderful March!!

I am also entering this over at Craftin Desert Diva's!!