Copyright Information

Thank you for stopping by my blog! I hope you enjoy the things that I create and share! I do have a copyright on my original creations (see logo on my sidebar below).
If you create and post a creations based off of mine, please refer (with a link) back to my blog. Please do not use my ideas for files, profit or for contests. Thank you!


My Craft Goals for 2015

My Goals for 2015:

1. Update my goals for 2016 in January of 2016 :)
2. Maximize my crafting time!
3. Keep plugging away at scrapbooking photos!!
4. Learn how to Heat Press!!
5. Have fun!


Showing posts with label 3 Birds on Parade. Show all posts

Monday, June 17, 2013

Nest Mini Album


I am a Cricut DIVA today!!!


I took a chipboard/burlap mini album from Michaels, a 6x6 American Crafts Color Crush paper pad (also from Michaels) and added my Gypsy to create this fun mini album.  

I flipped every other page so I would have two pages with the same papers together, then two pages with burlap.  Doing this makes the pages more bulky, so I purchased bigger rings.

I made this album with my friend Robin in mind.  She just opened a shop in March called Robin's Nest where she sells re-purposed items.  She is quite talented and her shop is doing very well!!


I used a bird from Sophie for the cover.  I sized it to 13.53 inches (2.42 inches using Real Size as this cuts with a bird cage).

I used Storybook for the font and sized NEST at 1.13 inches.


I used a piece of paper from the paper pad that was all different shades of green with a watercolor pattern.

I added the linen lace to the bottom and some gems.  It still needed a little something that I found a little later....


I found the sentiment "this nest is blessed" on 3 Birds on Parade for the first page of the album.
I sized it to 1.59 inches and cut it out of pink (light and bright) cardstock.


I pop-dotted it to the bottom of the photo mat so you can slide a photo behind it.


I added a bird from Sophie (shown two photos below) and I also pop-dotted it on the corner.


The next pages showcase birdies from Straight From the Nest sized to 1.25 inches.

I made a pocket using my ATG gun to put tags for journaling.  You can also tuck in extra photos and momentos.


I found the leaf wreath with bird on Lacy Labels and sized it to 6.35 inches.  I cut the wreath out of green patterned paper and the birds out of hot pink and dark blue-green papers to match the patterned papers in the album.

The word "Family" is from Letter Envy and I sized one for the cover at 1 inch and one for the inside page at 1.47 inches.


I like how the wreath frames the photo mat.


This tree came from the Heritage cartridge.  I sized it to 5 inches and cut it out of the dark blue-green cardstock.


The tree was perfect for the back cover!


Here you can see the bird is pop-dotted on the cover.


I added the word Family to the cover.  I have a theme with each mini album I make.  Even though many people get that a Nest is like a House for a family, I did not want people to assume I lived with all birds!!

I tied some ribbon to the rings to finish it off.

Thanks for being a DIVA with me today!!


Friday, March 15, 2013

Special Delivery Card (Up Up and Away Challenge)


This week at Frosted Designs, our next challenge is Up Up and Away begins.  For this theme you can use hot air balloons, planes, birds, clouds, etc.

Our challenges now run for two weeks to give crafters more time to create a project.  The linky is in the side bar on the right side of the Frosted Designs Blog.

I have a new baby coming to my daycare.  He was born a couple of weeks ago and I can't wait to meet him in person!!!  I wanted to make a card to go along with his baby gift.


I found this cute stork on 3 Birds on Parade and sized the pieces to 2.18 inches.

The sentiment also came from 3 Birds on Parade.  I sized "Special Delivery" to 1.12 inches.

The tag card came from Tags, Bags, Boxes and More and I sized it to 4.25 inches.


I used cardstock scraps to cut out the pieces.  I ended up changing the color of the stork body and wing to colors that looked better with the background paper.

I inked the pieces with dark blue and adhered them together.


Look at that tiny binkie!!!  So cute!!!

I trimmed a light blue piece of cardstock for a mat.  I inked the edges blue and tied on a bit of twine to match the beak. 

I added stickles to the wing, beak and blanket.


I love the layered sentiment.  The shadow piece is the same paper as the blanket.


I tore some white cardstock into clouds.  I inked the edges and added some crystal stickles.

What a sweet little card for a sweet little boy.  I can't wait to hold little Liam!!!

Don't forget you have plenty of time to link up your Up Up and Away project at Frosted Designs!


Saturday, July 21, 2012

Cricut Imagine + CCR = Layout!

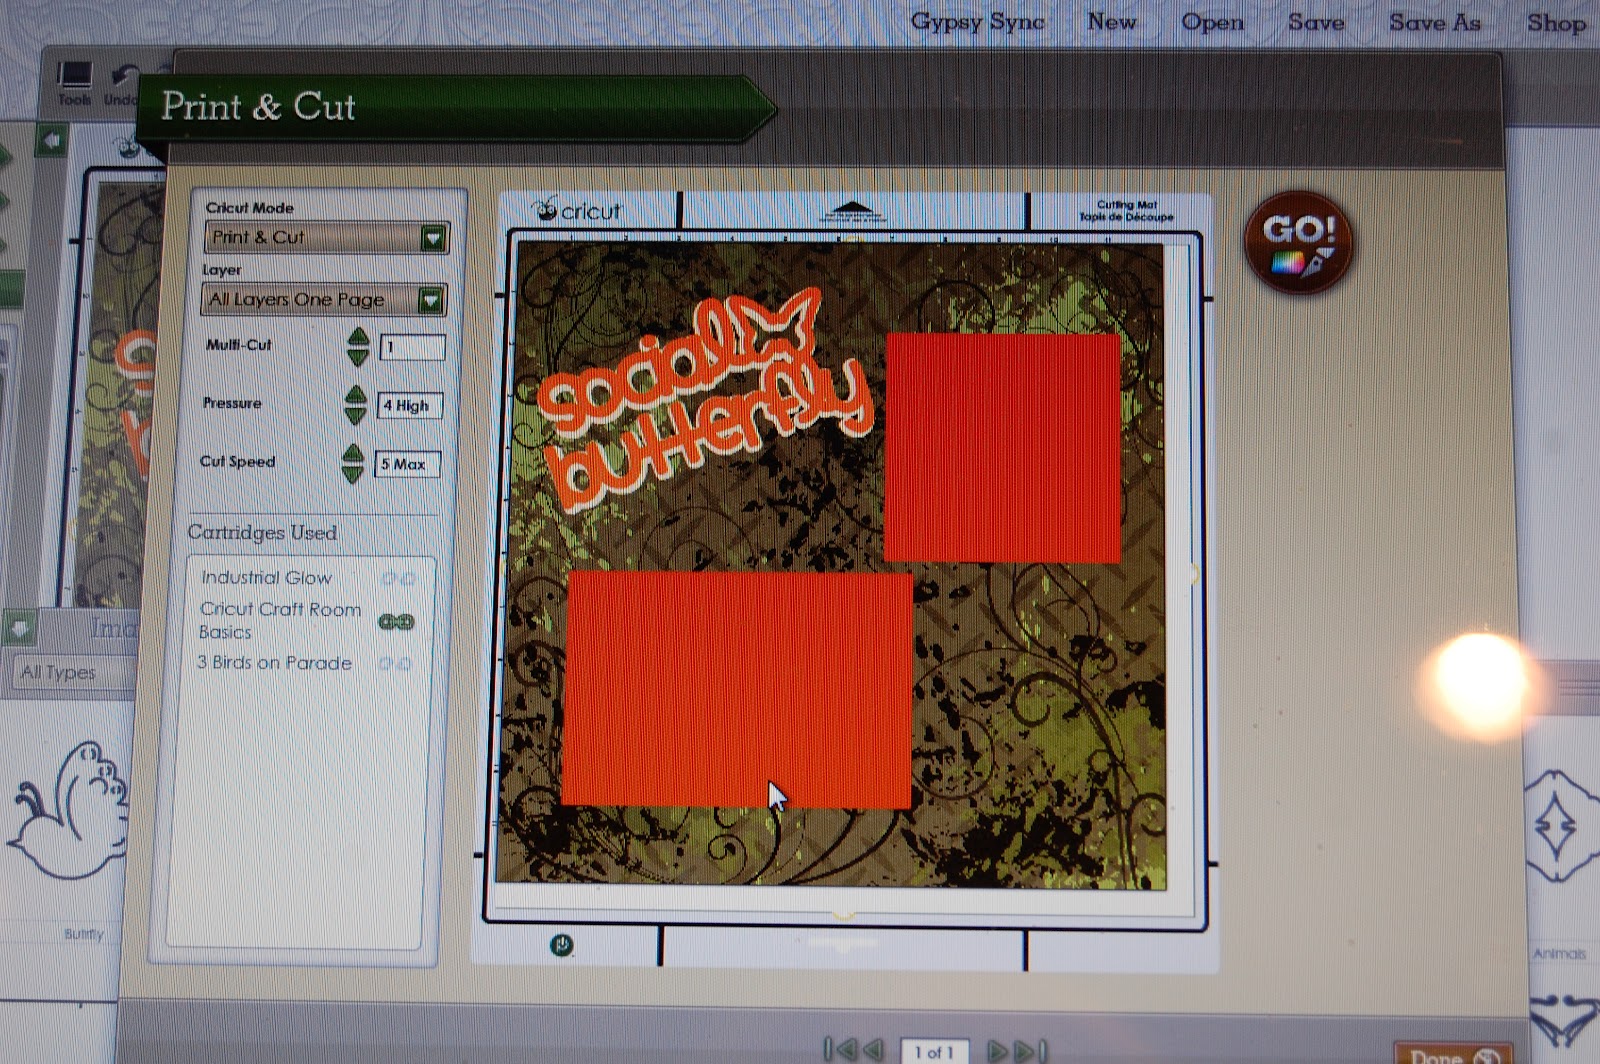
I decided to give CCR another try after I saw a YouTube video combining the Imagine with CCR.   Now I can't find the exact video that I followed.  I found another one HERE in case you want to see how to combine the two to create a print out a layout.  This video was made when CCR was in the Beta stage so some of the specifics have changed.  The biggie is when you add elements to your patterned  page, instead of clicking on Don't Weld (like this video shows) CCR will ask you if you want to make an additional layer - click yes and you can fill your shape/image with a different color.

I put a 12x12 square shape on my mat and selected the paper I wanted from Industrial Glow.  Next I added two photo mats.  I sized a square 4.25 x 4.25, put it on my mat and colored it orange from the color options.  I repeated this with a rectangle 4.25 x 6.25 in the same color.

I grabbed this title from 3 Birds on Parade and colored the shadow layer cream and the title in orange.  I layered them one on top of the other.

Since I have a Gypsy, I had to dig out my carts and plug them into the Imagine to print out.

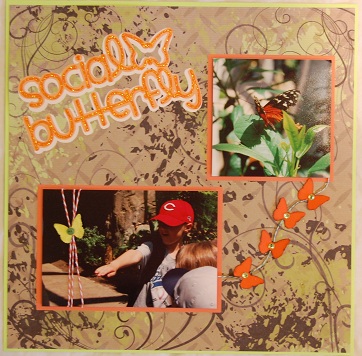
I felt this layout was a little flat, so I got to work!!

I added orange stickles to the title.

I pop-dotted the photos on the mats.  I created a string of orange butterflies (inked in brown) to connect the photos.  I added green gems.

On Tanner's class field trip to the zoo, the guy in the Butterfly House put a butterfly on each of the kid's hands.  It was so cool!!

I added some twine and a little green butterfly to the photo and then trimmed of 1/8" from each side and mounted the layout to a lime green cardstock- and this layout is done.

Now, I am a 2-page scrapper and I have a lot of photos of this trip.  Here is how I created page 2:
I cut the remaining photos to 4x4 and adhered them around the page (lime green cardstock) leaving the center open.   I went back to CCR and grabbed a 3.75 x 3.75 square and used the same background paper from Industrial Glow.  I manipulated the pattern to make it smaller so it matched the 12x12 page.

I grabbed these butterflies from Wall Decor and More (banner function) and added them to the square.

I also cut out the same butterflies (on my E) in orange cardstock so I could layer them on top.  I pop-dotted the butterflies on and added green gems.

I tied a bit of twine around the bottom of the square and added a journaling stamp from Pink by Design.


I think it turned out pretty good for my first time :)

Here are my two layouts together.  Maybe there is hope for me and CCR after all!!

Wednesday, June 13, 2012

Cricut in the Daycare

Many of you know I have an in-home daycare in my basement.  I love using my Gypsy and Cricut in my daycare and here are some of my most-used (or still hanging up) projects.

This first one is a clock face from My Quiet Book.  I cut out the pieces at 10 inches.  I adhered the numbers to the circles and the circles to the clock face.  I poked a hole in the center with my dental tool (cricut tool kit).  Then I used my 9" Xyron to laminate it.  I punched a hole in the clock hands and laminated them too.  I used a brad to connect them together.

This will hang in the Kitchen Area but can also be used during Table Time.


I painted a piece of canvas red and cut out different letters from Cuttin' Up! in yellow and white cardstock to make my Alphabet Soup!  This was a PG project (Pre-Gypsy) so I was just cutting random sizes using capital and lowercase letters.  My son was the first to tell me which letters I missed!

We are teaching the children the months of the year.  I took 6 pieces of white cardstock (8 1/2 x 11) and cut them in half.  I took the months from Designer's Calendar and saw that November was the widest word.  I sized November to 11" wide.  I sized the other months to the same HEIGHT as November and cut them out.

For now, we use them in this pocket chart, but they could easily be made into a book.

Birthday Train!

This is another PG project!  I cut all of these pieces from Going Places and laminated them.  I used my computer to label the months.  I have had this train in my daycare for over 5 years!  I trim a photo of each child and place them in the proper car.

I am re-doing my Family board.  I have a lot of teacher kids who are gone over the summer, so I take the time to freshen things up.  I cut out 2" letters from 3 Birds on Parade for my title.  I used a piece of black foam core board and we hang photos of family members on the board.  This is good for the children to see mommy or daddy as well as their friends.

I use my cricut a lot with my daycare and will be better at sharing those projects with you in the future!!!

Please come back on Friday to see what my crafty space looks like clean AND dirty, as well as some of my organizational tips!!


Sunday, April 8, 2012

Happy Easter!


I got this idea from Carolyn when she Guest Designed at ShesASassyLady.  Her blog post is HERE.  Carolyn made her chick/bunnies into cards.  I wanted to make a banner out of mine.  Thanks Carolyn for the great idea!

I hope everyone has a wonderful Easter (or Passover) weekend!!

Thursday, March 22, 2012

Easter Bucket


Welcome to the Memories in Tyme Easter Blog Hop.  In this hop you will see cards, layouts, decorations and gifts to celebrate Easter.  You should have arrived from JANET.  If not, please go back to the BEGINNING so you don't miss anything!

For my project today I decorated a bucket with some vinyl for my son.
I started with my Gypsy and found this cute font on 3 Birds on Parade.  It has little birdie feet in the letters ~ so cute!!  I sized the letters to 1.24 inches.

I grabbed the bunny from Celebrate With Flourish and sized it to 4.18 inches.  Because this is for a boy, I left off the top layer with the flourish cut into it.

I cut out 9 eggs from Easter 2010 sized to 1.12 inches.


I loaded up my vinyl on my mat.  I save my scraps for this purpose.

This is my first time cutting vinyl on my new E2.  On my Expression, I set my speed, pressure and blade depth to 3-3-3.  On the E2, you select Vinyl - kiss cut.  Super easy!

I use my dental tool to weed away the extra vinyl....

and the inside pieces.

I carefully placed the pink bunny layer on the green bunny piece.

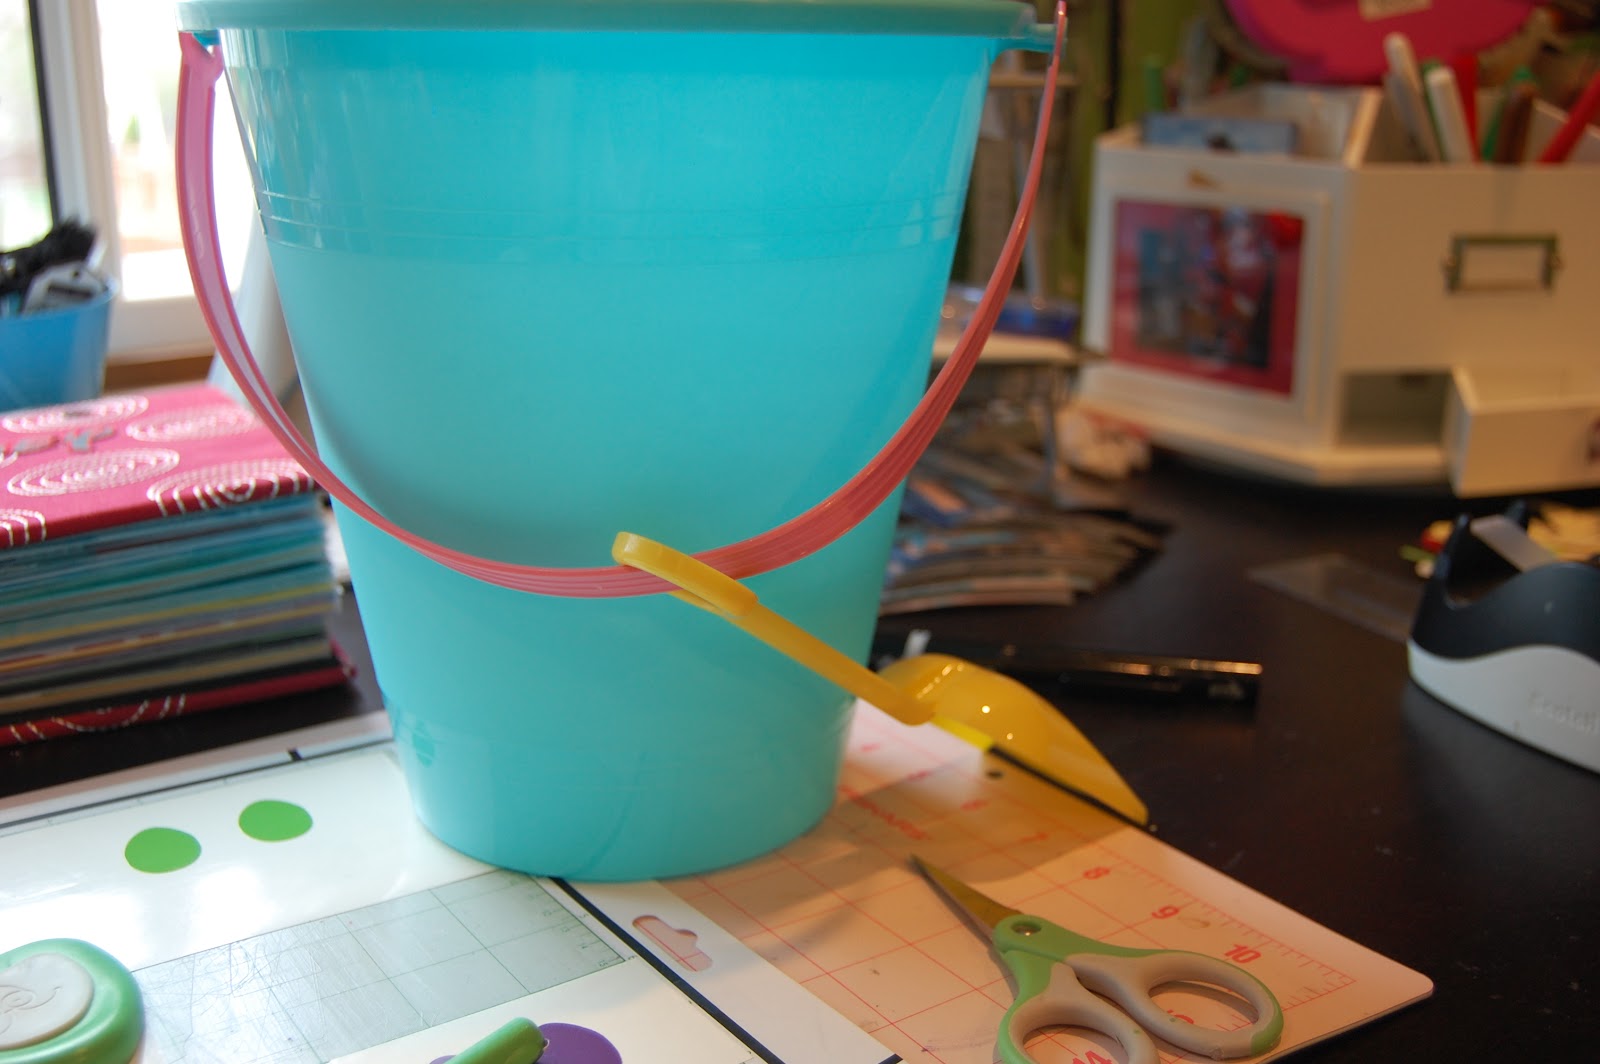
I got my bucket from Michaels for $1.00.

I put Tanner's name on the back of the bucket.

I put the bunny on the front.  I put the colored eggs around the bottom.

Here is the back. If I were making this for a girl, I would add gems to the eggs, flowers and bunny!

Your next stop in the hop is RHONDA.