Copyright Information

Thank you for stopping by my blog! I hope you enjoy the things that I create and share! I do have a copyright on my original creations (see logo on my sidebar below).
If you create and post a creations based off of mine, please refer (with a link) back to my blog. Please do not use my ideas for files, profit or for contests. Thank you!


My Craft Goals for 2015

My Goals for 2015:

1. Update my goals for 2016 in January of 2016 :)
2. Maximize my crafting time!
3. Keep plugging away at scrapbooking photos!!
4. Learn how to Heat Press!!
5. Have fun!


Showing posts with label Christmas Cartridge. Show all posts

Saturday, December 15, 2012

Gift Card Holder ~ Bug Bytes Holiday Blog Hop


Hello and Welcome to the Holiday Blog Hop!!!  Today's hop is a collection of Holiday (Christmas or New Year) crafts designed by the Bug Bytes Design Team Members.  We all take a turn designing at The Bug Bytes one day each month (I am on the second Monday each month).

You should have arrived from Denine!  If you found me first, please start at the beginning with our hostess with the mostest Pam! 

My DT Sisters are very talented so be sure to enjoy each project along the hop!  It is a short hop (only 10 stops) so be sure to check us all out!!

Here is a complete list of blogs in case you found me first:


And now on to my project:

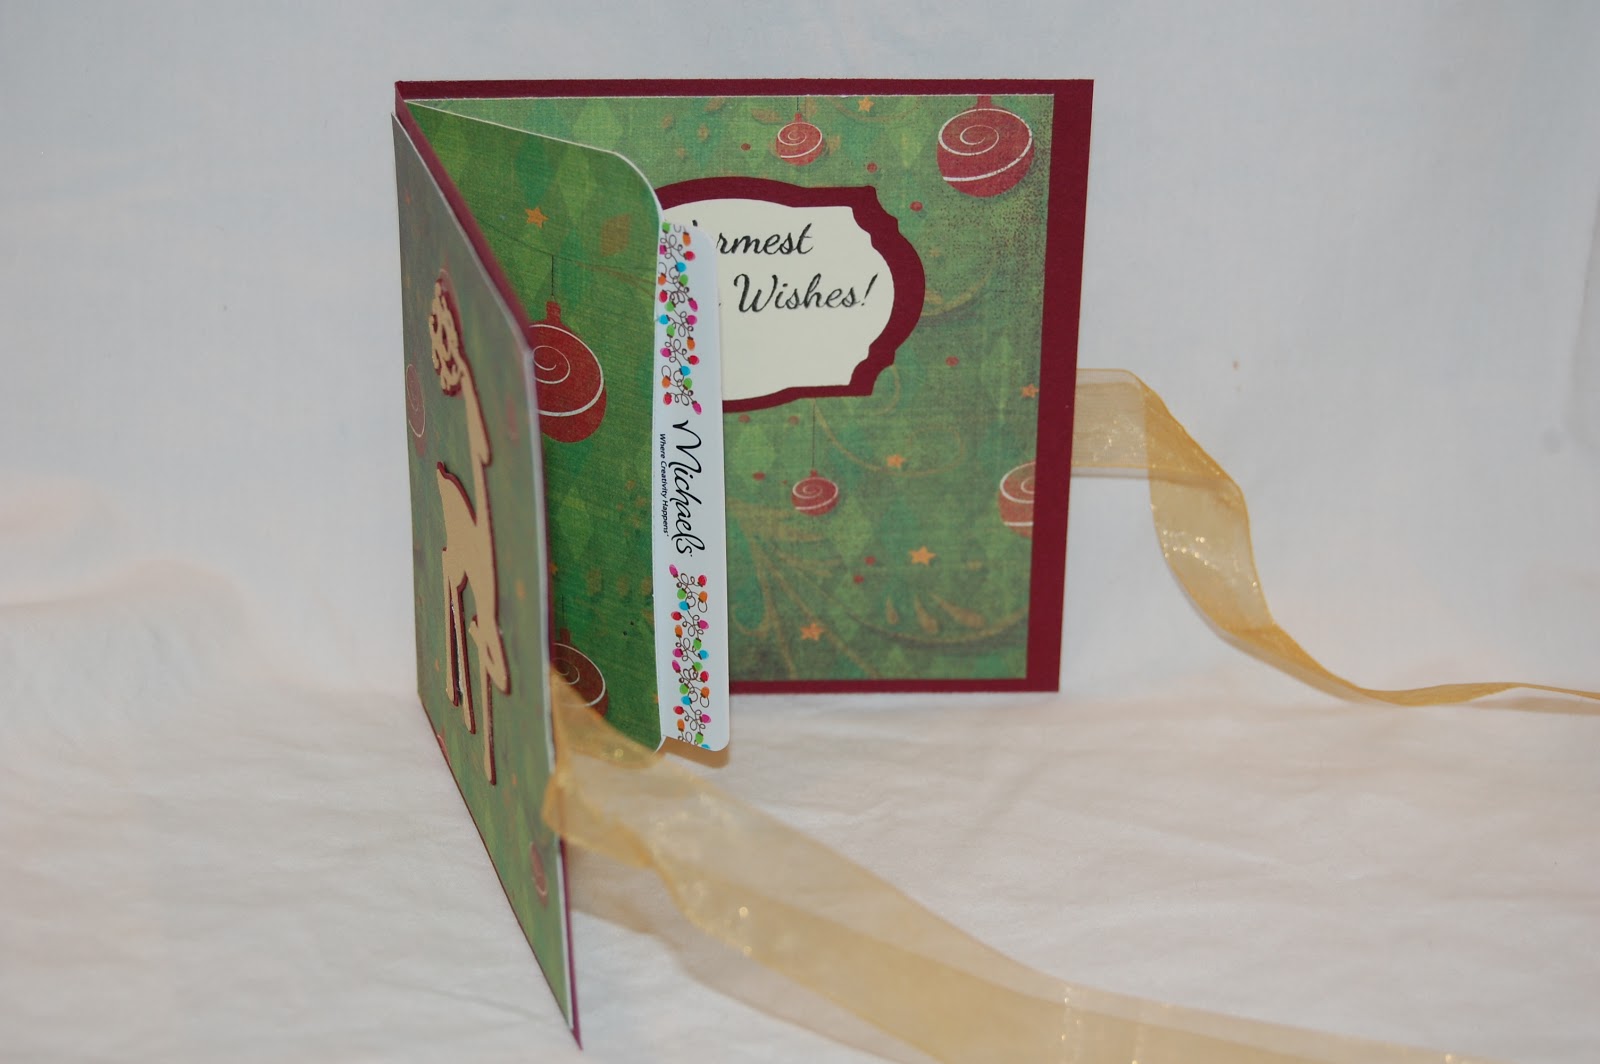
I designed my card to be a 4 1/4" square card.  The inside pages are sized to 4" x 6".  I scored one page at 4 inches.

The other page I scored at 2 inches.

After folding the two scored lines, the pages meet up like so to make a pocket for the gift card.

I cut a piece of cardstock 4 1/4 x 8 1/2 inches.  I scored it in half at 4 1/4 inches.

I used my ATG gun to adhere the inside page to the left side....

and then the right side, making sure my flaps lined up.

I adhered only the ends of the flaps to create a pocket.

I used my corner rounder to soften the look of the pocket.

Because this card was not going in the mail, I adhered ribbon under the front and back mat.  For the cards I made for my husband's employees that had to be mailed, I skipped this step.

I used Lacy Labels to create a layered label for a stamp and signature.

I sized these labels to 1.57 and 1.33 inches.

I cut them out of maroon and cream cardstock.

For the front of the cards, I used this gorgeous reindeer image from the Christmas Cartridge.  I sized them to 3 inches.

I used maroon and gold shimmer cardstock (hard to see the shimmer here though) to cut them out.
I used a stamp from Cardz TV Stamps for the sentiment.

I like how the layers look together - kind of like nestabilities.

I realized later that I should have made the signature area a bit bigger - but my husband writes small so it was ok.

I added the gift card and tied up the card I am using for my son's teacher,

All tied up!!  You can see the gold reindeer shimmer here!

Here are the cards for my husband to mail out.  I am very happy with how they turned out.

Thanks for stopping by today.  I hope I have inspired you!!!

Your next stop in the hop is my Awesome friend Adele!!


Friday, February 17, 2012

Valentine Door Hanger

This week at SweetSassyDiva's the theme is "Not a Card or Layout" so I decided to finish a project I started earlier.  I saw something similar several months back and created a file in my Gypsy right away (so I did not forget) and never even did a test cut!  I was thinking this would be cute for Valentine's Day.


I started with this box from Tags, Bags, Boxes and More and welded this layer of an ornament from Christmas.  The box is sized at 10.90w x 6.88h and the layer of an ornament is sized at 4.81w x 29.12h.

On a side note, the layer of the ornament can be used as a wine bottle tag!

I cut out my box in red card stock.

I scored and creased on the fold marks and used my ATG to adhere it together. 

I found an image from my Holiday Vignettes program and printed it out on white cardstock.  I cut it out.

I had to guess at the size of the image and it turned out pretty well!


I wanted to put a doily behind the image, so I opened up Lacy Labels and found an oval shaped doily.  I rotated it 90 degrees and sized it to fit the front of the box (4.91w x 3.47h).

I grabbed the "XOXO" from Sentimentals and sized it to 2.74w x 1.12h.

I cut both out of cream colored card stock.

I inked them both with Antique Linen ink to age them.

I wrapped some wide brown ribbon around the middle of the box and adhered the doily to the box.  I pop-dotted the image to the doily.  Now I just have to wait for my Valentines to be delivered!!!


Today is also Fabulous Friday Challenge at Frosted Designs.  My post today is a Mardi Gras Banner.  Here is a sneak peek.  Come back Sunday for a full tutorial!!


Friday, February 3, 2012

Twine or Ribbon Challenge

This week the Fabulous Friday Challenge at Frosted Designs is to use Twine or Ribbon on your project.  I saw a digital layout on Pinterest that gave me this idea.  I prefer actual paper and texture on my layouts.  Here is the page I was inspired by:
Here is a LINK to this project.  As you can see, my style is a bit different but the sketch is the same.

I started with some Christmas paper from my stash and gold cardstock.  I designed my layout on my Gypsy.  On the first Layer, I put a triangle from George on my mat.  I unlinked chain below the width and height and stretched my triangle to fit the page.  I sized it 5.00w x 11.50h.  I found the phrase Oh Christmas Tree from Winter Frolic and cut out both layers at 2.53 inches.  I intended on putting 2012 on my layout until I remembered that Christmas 2012 hasn't happened yet.....  I found the numbers from Designer Calendar.

On the next Layer, I put some jingle bells on the mat sized to 1.12 inches.  I used stars and hearts from George sized to 1.35 inches.  I cut out a sign post from Christmas at 2.88 inches, but did not use it.

I added our annual Christmas Tree Hunt photo of my boys.  One great sketch ~ two different looks.  Be sure to join us at Frosted Designs for our Twine or Ribbon Challenge this week!!

Friday, December 9, 2011

Holiday Blog Hop at The Bug Bytes!!

Welcome to the Bug Bytes Holidsay Blog Hop!!  I proudly design for the Bug Bytes the second Monday of every month and am surrounded by very talented ladies!!  If you found me first, please go to Pam's BLOG so you don't miss anything!!


8) Sheila aka sassylady - http://shesasassylady.blogspot.com/


For my project today, I decorated a shadow box.  I bought this 8x8 shadow box at Michaels.  I found the glitter scrapbook paper there as well. 
I trimmed the paper to 8x8 and used the velcro strip inside the frame to attach it to the back of the frame.
I opened up 3 Layers in my Gyspy.  The first layer has an 8x8 square to represent the shadow box.  The second layer has the Santa and the reindeer from Christmas.  The third layer has Believe from Gypsy Wandering.  I sized them to fit my 8x8 space. 
I cut out Believe in red vinyl.  I set my cricut to 3, 3 & 3 (speed, pressure and blade depth) to cut through the vinyl only not the backing.
I dirtied up a piece of clear contact paper on my jeans.
I burnished the contact paper to the vinyl then peeled it off and placed it on the glass of the shadow box.  I burnished it again and peeled off the contact paper.
I cut out Santa and his sleigh in black cardstock and pop dotted them onto the glitter paper.
I bought these glittered balls at Michaels (do you see a pattern here LOL) and glue dotted them to the bottom of the paper.
I put it all together and then added a bow.
I used glue dots to keep the ribbon tails and bow in place.
Thanks for stopping by!!  Your next stop is the Divine Denine!!

Monday, December 5, 2011

Snowflake Etched Ornaments


Happy December!!!  Just 20 more days until Christmas!!  I am the Guest Designer today at She's A Sassy Lady and I have some snowflake ornaments.  I FINALLY tried to etch ~ how fitting that I shared this project on Sheila's blog as she inspired me a long time ago when she etched a glass baking dish!
I bought these mirror ornaments at Michaels.
I used these snowflakes from the Christmas cartridge and sized it at 1 1/2 inches.  I cut out the snowflakes in vinyl.  I set my cricut to Pressure 3, Speed 3 and Blade 3 to cut through the vinyl layer only (not the backing).
I peeled back the extra vinyl using my dental tool.  It is helpful to roll the vinyl as you pull it away to prevent it from sticking to your project.
I weed out the inner cuts next.  I use clear Contact paper for my transfer tape.  You need to dirty it up a bit on your jeans to de-stick it a bit.  I placed the contact paper over my snowflakes and burnished it with my scraper. 
I placed the snowflake in the center of the mirror and burnished it again.  I slowly peeled off the contact paper.
I got out my Armour Etch that I bought at Michaels about a year ago!
I put some newspaper down and put a thick coat of etching cream on my mirrors.


After 5 minutes, I rinsed one off and it looked done.


Here are the ornaments after I rinsed them and dried them with a paper towel.
I peeled off the remaining vinyl.
I added some sparkly ribbon and a coordinating gem to each snowflake.  These would make a nice gift! 

Thanks Sheila for having me on your blog today!!!  I hope everyone over here has a wonderful Christmas!!