Copyright Information

Thank you for stopping by my blog! I hope you enjoy the things that I create and share! I do have a copyright on my original creations (see logo on my sidebar below).
If you create and post a creations based off of mine, please refer (with a link) back to my blog. Please do not use my ideas for files, profit or for contests. Thank you!


My Craft Goals for 2015

My Goals for 2015:

1. Update my goals for 2016 in January of 2016 :)
2. Maximize my crafting time!
3. Keep plugging away at scrapbooking photos!!
4. Learn how to Heat Press!!
5. Have fun!


Showing posts with label Guest Designer. Show all posts

Monday, January 3, 2011

Top 10 in 2010 ~ Guest Designer for Sassy!

Happy 2011!  Today is my day to be Sassy over at She's A Sassy Lady and I created a 2 page layout highlighting my top 10 events from 2010.

I started out by putting a rectangle on my mat from George and unlinking the Aspect Ratio Link (the chain between the Width and Height on the Basic Menu).  I changed the Width to 0.62 and the Height to 12.00.  I copied it and moved each rectangle to either sides of the mat.  I copied another rectangle and rotated it 90 degrees.  I copied one more and moved one to the top of the mat and the other to the bottom of the mat. 

I made another copy and positioned it at X5.74 Y-3.16 to create a border on the bottom of my layout.  I grouped and welded the 5 rectangles.  ***At this point I save my project as lo.frame.3(I have two similar versions saved already).  The next time I want to make a similar layout, I have the basics ready to go.

I used the "ten" border on Graphically Speaking and stretched it to 11.25w x 2.25h.  I moved it into the border space and welded it.  ***Copy and paste onto Layer 2 so you have a page 2.

Go back to Layer 1 and add the words "Top 10" from Varsity Letter at 1.29w x 1.77h.  Move them up into the rectangle a bit and weld.

On Layer 2, repeat with the words "In 2010".
I opened up Layer 3 and took the blackout shadow of a basic tag shape from Tags, Bags, Boxes and More and sized it to 2.55w x 3.92h.  I made 9 copies.

On Layer 4, I added the numbers from Designer Calendar at 1.11w x 1.07h.

I opened a Layer 5 with some words that I highlighted on my tags.  I did this later, after I listed my top ten!  I used Songbird for my font as it welds no nicely!  Each word is a different size so that it fit the tag once welded.

***When you are finished cutting your project, use the SAVE AS option so you still have your basic layout saved.  You will need to change your file name a bit (ie lo.frame.3.top10).

I used a maroon cardstock to cut out my pages.
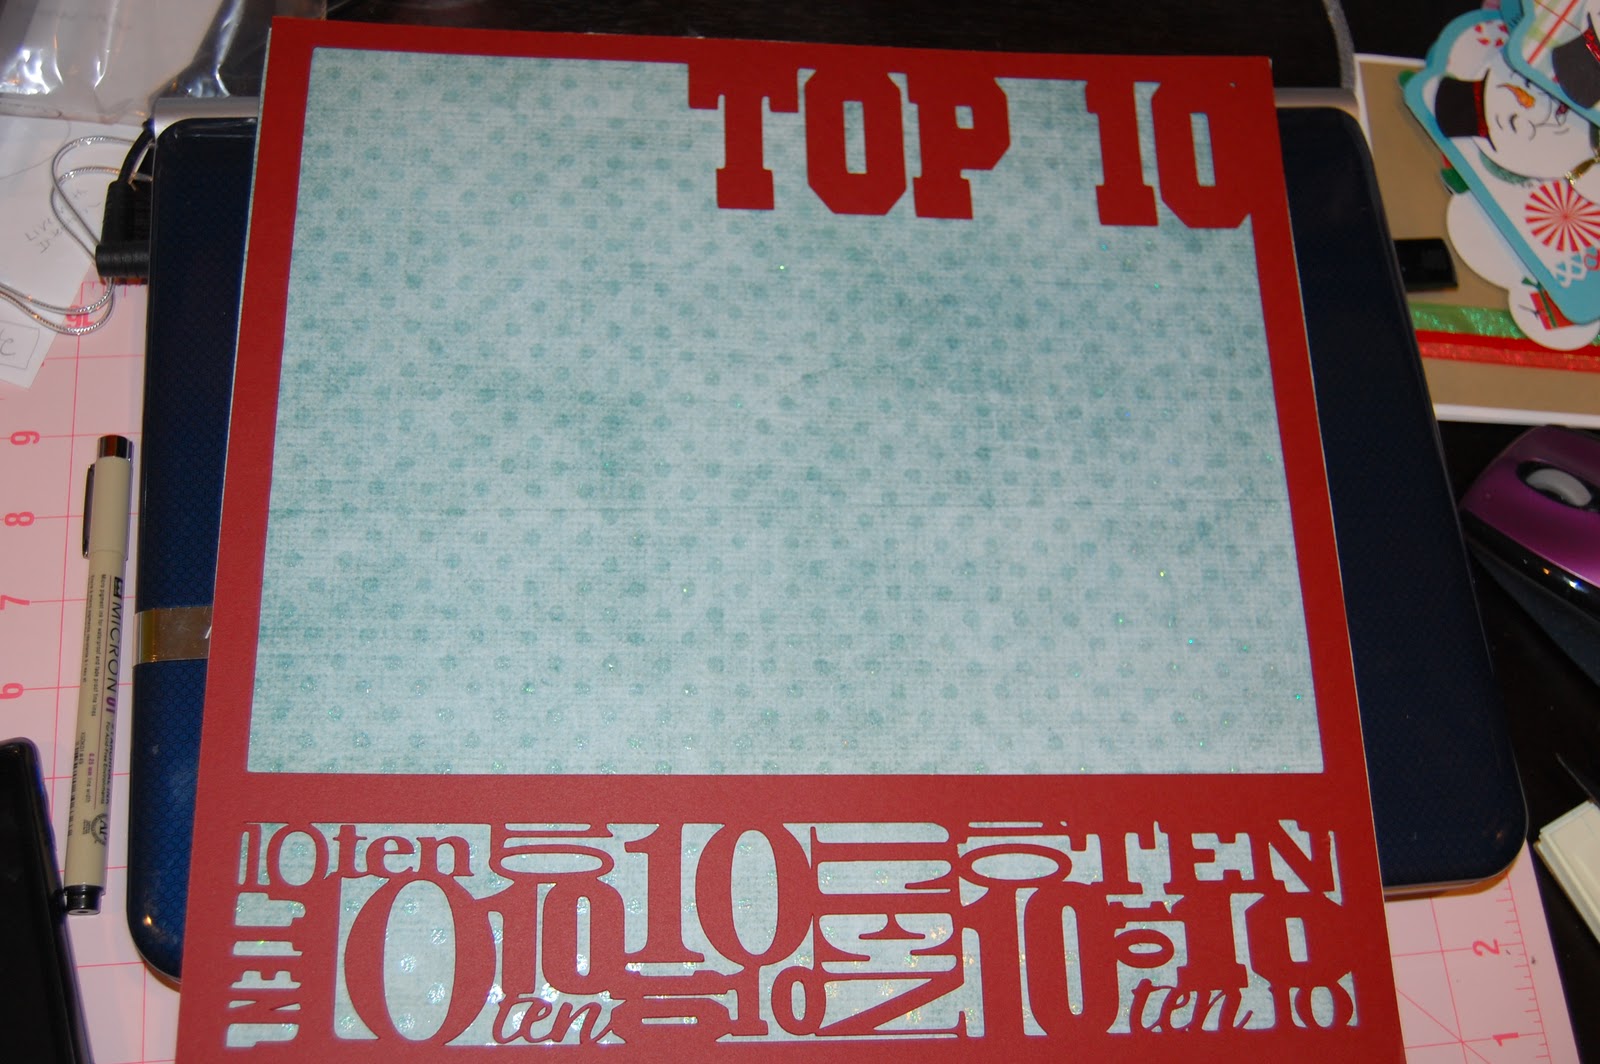
I glued them down onto a blue dotted page.

I cut out the tags in ivory card stock.

I used my scraps to cut out the numbers.

I inked the tags with Vintage Photo.

I used ribbon to create a banner of tags.  I added buttons and staples to the tags.

Here is a sample of my journaling with my key words.  Note the dot on my i ~ I always lose them in my Xyron so I improvised.  I also had a couple of mistakes in my journaling, but I just wrote right over them because that is how I normally write.


Here is the "10" border from Graphically Speaking up close.

It is kind of hard to see in this photo, but I used faux stitching around the letters and numbers so they stand out a bit.

And here is another look at the two pages together.  This layout took me about 4 days to complete ~ I worked it in between work and other projects.  I had to walk away several times and come back and almost gave up....glad I stuck it out!!! 

Thanks Sheila for having me on your blog today!!

Thursday, December 9, 2010

A Wreath of Stars

I am double posting today because I am doubly blessed!!!  I am a Guest Designer on two blogs today!  For my Sketches in Thyme post, click HERE.

My Wreath of Stars!

I am delighted to Guest Deisgn for Pam over at thebugbytes today!  My project today is my first Imagine project.  I have not taken the time to get to know my Imagine like I should (darn J O B)!  I found this paper from the Imagine More cartridge and was dying to use it!

I started out by loading George and Basic Shapes in my Imagine.  Once the I finished thinking, I loaded the Imagine More cartridge.  I selected the cricut cartridge symbol in the bottom left hand corner and selected the star from George.

I just tapped it with the stylus (loving the new stylus by the way!) and it appears in the Que.

Then, I tapped the Imagine cartridge shape.

I tapped the star and then tapped the pencil to edit my design.

My color choices appear below (this part is way fun)!

I selected the Sheet Music paper pattern by tapping on it.  I love how it fills in the space according to the size of the image.  The smaller the shape, the smaller the details on the paper.

I changed the size to 3 inches.

Then I selected Apply.


Now I am at the Project Preview screen and I can see my star on the mat.

Since I need a lot of stars, I select the Auto Fill option and get 9 stars per page.

I loaded white paper on my mat and here are my stars ready to go.  I made 27 stars (3 sheets of paper) for my wreath.

Here you can see how small the music notes are ~ they are soooo cute!!

Next, I inked the edges of my stars.  This took a while!


I cut out a circle frame from Lyrical Letters at 10" so I could glue my stars on and actually keep a circular shape!  I left a little space between the stars on the first layer, then overlapped the second layer.

For the last 5 stars, I used pop dots to attach them around the wreath.  I did not pop dot any stars where my bow is going to be.

Here is a close up of the layers.

I found this bow from Celebrate with Flourish.

Here is the bow on the wreath.  It seemed a little flat, so I cut out a second bow and pop dotted it on top.

I added a picture of my 3 stars (I mean sons) to the center.  This is one of the photos on our Christmas cards this year.

I cut out Christmas from the Christmas cartridge and the 2010 from Lyrical Letters.

And here it is all together.  I will make a coordinating "highlight" page with 2" pictures cut from the holiday cards and photos we receive this year!

Have a Wonderful Christmas season and a special thanks to Pam for showcasing my work!!!

Don't forget to check out my {2 cute} post that is featured on Sketches in Thyme today also!! 

Monday, August 2, 2010

Wicked! Guest Designer Today

Hi ~ I am Lori Apgar and I am the Guest Designer today on Sassy's blog.  My project today reflects my recent mood!!  First of all, I need to say that I absolutely love Halloween ~ it is my favorite holiday.  As I am preparing this project, I am feeling a bit wicked (or maybe witchy) since my Gypsy is still away.  I was expecting her to return last week, but instead she is scheduled to arrive Friday.  We leave Saturday for vacation so the project I had in mind for today will have to wait.

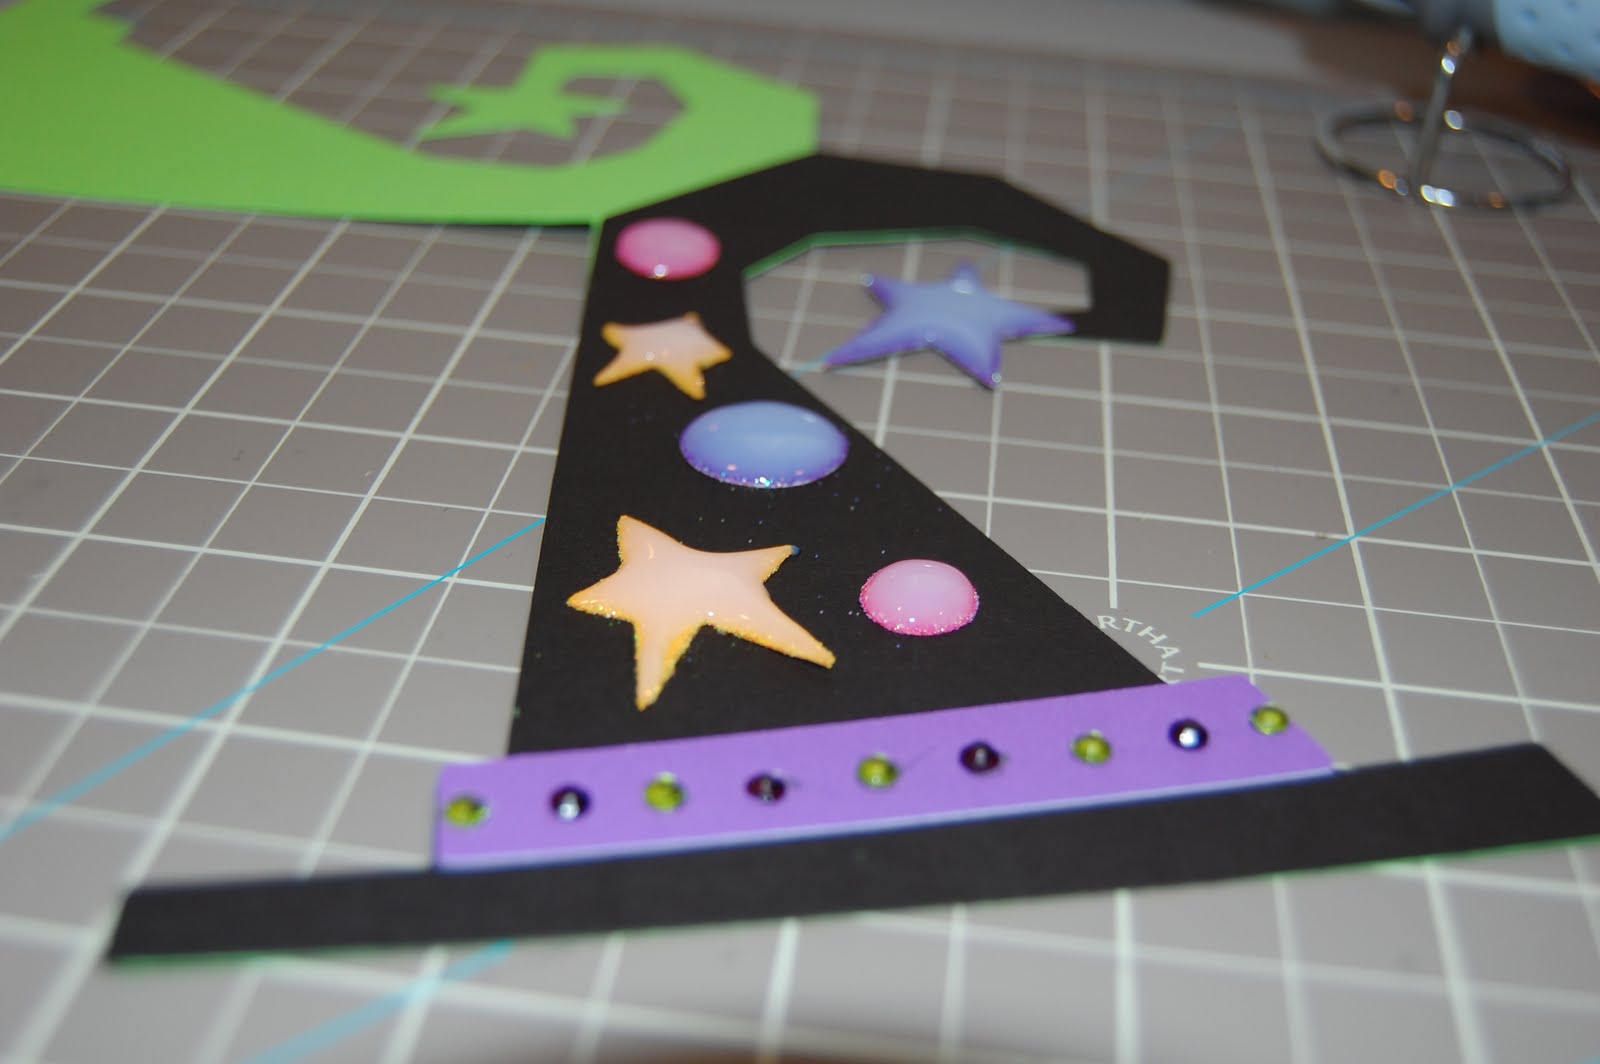
I cracked out my Mini Monsters cartridge for this one.  I wanted to add some bling with my new toy.  I also had to try a glitter technique I saw HERE from Kimberly (My Craft Spot).
I cut out the Witch's Hat card at 6".  I wasn't sure if the entire card would be 6" or if it would be 6" once folded.  It was the latter.
I cut out the layers (keeping the size on 6") from cardstock.
I flipped over the stars and dots and ran them through my Xyron upside down.  This puts the sticky on the front.
I got out my new Martha Stewart glitter.  This glitter is awesome ~ it is very fine and very sparkly!
I used my scoop tool to rub around my layer pieces to prevent glue boogers (he he) and then peeled off the plastic.
I put the pieces sticky side up and dumped on some glitter.  I used a folded scrap paper under the pieces so I can dump the excess back in the glitter bottle.

Next, I attached the hat to the front of the card with my Tombow tape runner.
I have been reading about the I-Rock tool and the Tulip tool.  Both are battery operated and comparable in price ~ around $14.99.  I also found the Jolees Jewels at Michaels in the bead area and decided to use my 40% off coupon on it.  The regular price is $19.99.  I really like that it has a cord.  I can't wait to try this on clothing!!

This one comes with several metal tips, I picked the 3mm tip and screwed it on the edge of the tool.  I plugged it in for about 5 minutes and it was ready.  The tip gets really hot so be careful!
I bought both of the I-Rock rock collections ~ this one and the clear one.  These crystals have glue on the back and are ready to stick down.
I glued down the hat brim and marked out where I wanted my gems.
I tried the Jewel Setter Applicator to place the crystals. It said "Easy to use! Just add water!" but it was not easy for me! I ended up using my fingers and my tweezers.
I just set the crystal on my pencil dot and pressed down with the tool for about 5 seconds.  The glue melts and the crystal sticks.
Here is the blingy brim!
Next, I glued down the glittered stars and dots using my Martha Stewart Glue Writing Pen.
I covered the glittered pieces with Glossy Accents.  This seals in the glitter and at the same time gives dimension to the layered pieces.

I outline the shapes first then fill in.
Once it dries, you can see the dimension.
Here is the front of the card ~ sparkly!!  I cut out letters from Cherry Limeade at 3/4" to put inside the card.  For fun, I alternated black and purple.
Once again, I am honored to be a Guest Designer on Sassy's blog! 

A side note:  even though I was feeling "wicked" on Wednesday when I made this project, I heard some sad news from two different friends.  Hearing that two friends were having worse days than me put things into perspective very quickly!  Flying off on my broom to enjoy my vacation!!