Today I am going to share with you and
Frosted Designs some of the Joys of Journaling on your scrapbook pages. I know what you are thinking - YUCK I do NOT like to journal!!! Once upon a time I felt the very same way!!
I want to start by asking you why do we scrapbook? Yes it is fun and relaxing, but we are also creating a memory book for our families. All good books have pictures, but the most remembered stories also have words!! The purpose of journaling in a scrapbook is so that someone else can pick up your scrapbook and learn about what was happening that day, who was present, where the were, etc.
There are a couple of different ways to include words (or the story) on our pages: computer generated, handwriting, stickers, die cut words. Many people do not like their handwriting. Children always know their parent's handwriting:
Please don't judge this part of my layout from several years ago!!! My mom died when I was 20. She was a leftie and had a very distinct handwriting that I tried to forge when I was in high school!!! I don't have many things in her handwriting now, but she wrote "Lori 6 mos." on the back of this photo of me. I photo copied it and included it under the photo. I treasure this page so much because of this!!
So please write on your layouts as often as you can stand it!!! And embrace your mistakes when writing!!! It is authentic if you really scratched out a letter or word!!
My layout today is all about my in-home daycare. I started my daycare in 1995 when my second son was born. I could not find daycare for him and decided to start one myself. I typed up a page of my story to tuck behind the photo. I also wrote on a journal card I cut from Authentic "Enhancements" Paper that came in my March kit.
I practiced writing on a scrap of paper so I could get the spacing correct. You can also write very lightly in pencil first and then copy over with pen.
Here is my journal card tucked behind the photo a bit. I also initialed it in the lower corner. After I took the picture I added the date. Signing and dating makes it official!!!
Here are the pieces of my layout - the photo, journaling card, my letter/story, my title and my paper.
Here is what I typed:
I have always loved
kids – especially babies. I started babysitting when I was eleven. The only thing I wanted to be when I grew up
was a mom.
Of course, I worked and
went to college and even put my oldest in daycare so I could work to pay the
bills. When my second child was born, I
loved my job very much, but I still did not want to go back to work. I lined up daycare when I was 5 months
pregnant thinking I was all set! At age
4, Kramer had transitioned from an in-home daycare to a center and he was very
happy with his friends. I loved the
center for Kramer, but was not excited to put an infant in a center. Well, my daycare lady filled the spot for
Tyler. I scrambled to find another
daycare provider. When Tyler was 2 weeks
old, the second provider told me she did not feel comfortable with infants as
her arthritis was acting up –
I was grateful for her honesty, but now back to the same place. I found a third daycare provider who could
watch both boys. She called the next day
and changed her mind as she wanted only teacher kids.
I took this as a sign
that I needed to stay home and take care of my kids myself. I was excited and terrified at the same
time. Our income was cut in half. I slowly got kids and then the refrigerator
went out. I got a call from a head hunter
for a really good job. I took a deep
breath and looked at my boys and kept moving forward. My daycare grew slow and steady.
The first few years
were rough. I learned a lot!! I learned that not all parents enjoyed
spending time with their own kids. I learned
that most parents were afraid to discipline their kids. I learned that not all people pay their bills
on time – including daycare bills. I finally learned that I can say “no” or “enough
is enough” when it is best for me.
I spent many hours at
the park, on walks, playing in the sprinklers, making crafts, soothing owies,
helping parents – all in the
comfort of my own home. We moved
eventually and now have a walk-out basement with a full kitchen and separate
entrance for my families.
Some of the best
benefits of running an in-home daycare are:
My boys never had to come home to an empty house after school. I was able to get laundry done and dinner
started during the work day. I got to
see most of my boys’ “firsts” and hear all about school when it was fresh in
their minds. I have met some wonderful
people along the way.
I am in my 19th
year of childcare. I have almost all
teacher kids now – which is great
in the summer time when we are so busy with baseball. I have great parents. I have great kids. I have a helper with me every day. My helper keeps me sane and allows me to get
out at nap time every now and then. I
get to take selfies every day and no one makes fun of me (because their cute
kids are in the pictures with me)!
Daycare and kids have
changed over the past 19 years. I am
amazed at how wonderful these kids have turned out! One year I had 4 former daycare students who
make Junior National Honor Society in 8th grade. One caring former parent called me to let me
know and to say I obviously had a hand in that!!! Moments like this let me know
I am right where I am supposed to be in life.
After all these years,
one thing has never changed –
I love kids!!
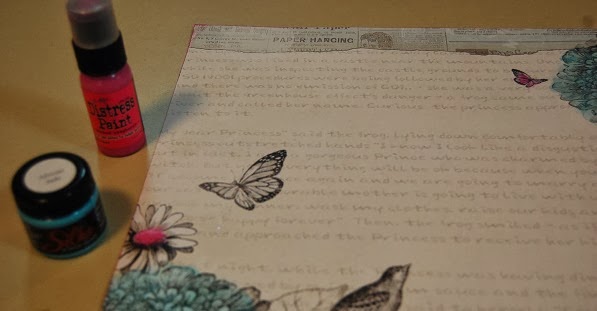
I used the Picked Raspberry Distress Paint and African Jade Silks acrylic glaze to paint my paper - Flutterby by Mother Nature from the March kit....
and the chippies from the April kit.
I added a pretty turquoise blue flower to my title!
When I adhered the photo mat to my paper, I only put adhesive on three sides. This created a side pocket. You can see my letter sticking out the right side. I wrote "the story" on the paper to draw attention to it.
I added a heart for a pop of pink!! I just have to say that I take a ton of selfies now with my kids - isn't Keaton the cutest?!? They love looking at pictures of themselves!
I tucked Bliss into the details of the paper so it did not compete with my title (back to Balance again).
If your story is fresh, like mine, journaling is super easy. If you are scrapping photos from years ago it helps if you have some notes written down somewhere or a relative you can ask.
I recommend keeping a notebook with you at all times - especially if you have young children!! If you can't write it down immediately, try to write something at the end of the day. Even one or two words is enough. I sometmes jot notes on post-it-notes and stick them to the back of the photos.
Write about yourself, your journey, the moment, your feelings or whatever is important to your story!!
For tips on spacing your letters, check out my friend Sandee's post
HERE. Sandee has a Video every Sunday on Frosted Designs and does miracles with Mixed Media on projects!!