Copyright Information

Thank you for stopping by my blog! I hope you enjoy the things that I create and share! I do have a copyright on my original creations (see logo on my sidebar below).
If you create and post a creations based off of mine, please refer (with a link) back to my blog. Please do not use my ideas for files, profit or for contests. Thank you!


My Craft Goals for 2015

My Goals for 2015:

1. Update my goals for 2016 in January of 2016 :)
2. Maximize my crafting time!
3. Keep plugging away at scrapbooking photos!!
4. Learn how to Heat Press!!
5. Have fun!


Thursday, October 21, 2010

The Boo Crew ~ Debut on Tuesday Treats

I am excited to debut today on Tuesday Treats!  My Gypsy Girl is celebrating her first birthday this month and we have been busy designing!!  Instead of getting to go to Utah for the Swarm two weeks ago, I got to go to Kansas City for the CKC Scrapbook Convention.  I was amazed at all the products and designs I saw.  My head was spinning with ideas.

I filled up an entire notebook with notes and sketches!  This one here is one of the projects I sketched.  There were several laser cut designs, some I could make on my Gypsy and others I couldn't.  So, yes, I bought plenty!!!

I started with the frame from Wild Card.  I sized it at 8.56w x 15.02h.  This leaves the center opening at 5.5 x 5.5.

I centered it on a 12x12 mat.   I changed my mat size to 12x24 to put my extra pieces on.  To do this, press the silver round button to get to the Main Menu, select Change Mat Size and select 12x24.

I used Opposites Attract for the font.  I started out with the Opposite Shadow feature and the Shift/Lock option for the capital letters.

Then I used the Opposite Feature with the Shift/Lock option for the capital letters.

Before I size the letters, I need to put the shadow letters on the bottom of my frame.

I sized the letters 1.89h.  I moved the Shadow letters in place....

then I group the letters with the frame and weld them.

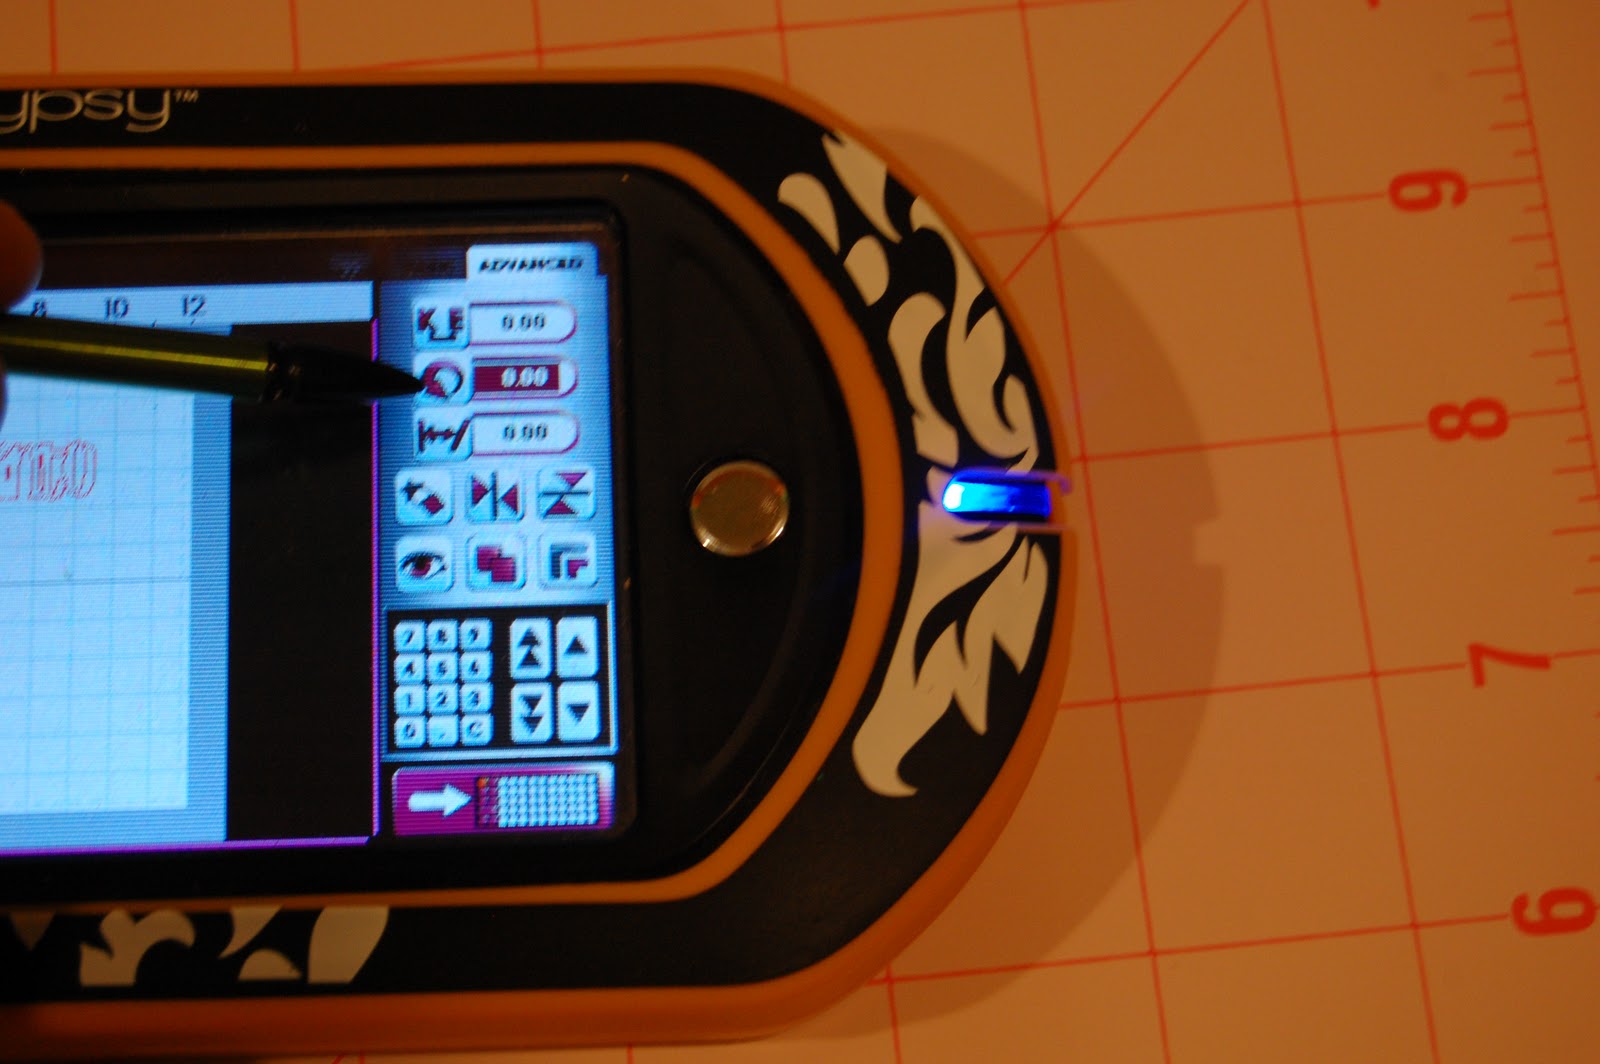
I grabbed a ghost from Mini Monsters (love this guy) and go to the Hide Contour Feature on the Advanced Menu.  I hid the eye and mouth cuts.

I duplicated the ghost three times and size them to 2.18h.  I flipped the center ghost so he is the opposite of the outside ghosts.  Before I welded the ghosts on, I duplicated two of the original ghosts and one flipped ghost.

I grouped and welded the ghosts to the frame.

I want to change back to a 12x12 mat.  First I need to open another Layer.  Then I highlight the three ghosts and the letters and copy them onto Layer 2.


Next, I move them over to the left half of the 12x24 mat and then change back to a 12x12 mat.


Here is the mat cut with black cardstock.

I cut out the ghosts in white cardstock and the letters in yellow cardstock.

I want to glitter the ghosts and letters, so I ran them through my Xyron upside down.  This puts the stick on the top of the images.

I grabbed my Martha Steward Lemon Drop glitter for the letters.

One of my little helpers (Max ~ 2 years old) helped me dump the glitter.

To seal the glitter and give some dimension, I put Glossy Accents on top of the letters.

For the Ghosts, I ran them through the Xyron and first put the gem eyes on.  They will not stick very well to glitter.

Then I sprinkled Sugar Cube glitter on top.

I found that if I use my fingers to move the pieces, the glitter will fall off where I touched it.  I used my tweezers instead to shake off the excess glitter.

Here are my ghosts all glossed up!

They dried in a couple of hours (I poured it on thick).

I glued the ghosts down first.  You could leave the letters on the bottom black if you want.  Because my background paper was very dark, I wanted yellow letters.

Once I glued the letters down, I realized that I did not really like the orange background with the photo I chose ~ so I changed it!!

You can see here how my ghost curled.  This was because I used so much Glossy Accent.  I kind of like how the ghost appears to be moving his hands and tail!

And here is my very own little Boo Crew!!

I had fun creating this Halloween project for Tuesday Treats!!  If you have been following me then you know my favorite holiday is Halloween!!!  I hope you have your very own Boo Crew to share Halloween with!!

Monday, October 18, 2010

Create!

This is my entry for the Cricut Circle Monthly challenge to create a layout or wall hanging describing what Create means to you, using shadows, patterned paper and bling.  I did not take many photos while I created this which was probably a good thing.  This turned out so different than I imagined it would and changed my mind a dozen times!!!

The first thing I came up with was my saying.  I used Songbird for the "share a piece of yourself" and welded the letters together.  I used Nursery Rhymes for the font and shadow for the word Create.

I used my search feature to find just the right butterfly.  I ended up using Wall Decor and More.  I made a border with six butterflies.  First I used Hide Contour to hide all of the inner cuts.  I copied five more, rotated them back and forth and welded them together.  I copied the border.

I put another butterfly on the mat (without the inner cuts hidden) and sized it to match the butterflies in the border.  I copied eleven more.

It was after I did all of this work that I noticed there is a border feature on this cart....but I liked mine better for what I had in mind. 

I put the letters "CREATE" on their own Layer to help me organize my cuts.  I opened another Layer and  hid the first Layer so I could see the word CREATE behind my layer.  I put another butterfly on my mat and sized it to fit inside the R.  I copied two more butterflies (because I try to do things in 3s) and cut them out the same color as the other butterflies.


The yellow paper I had did not really go with the color scheme, so I inked it with Tim Holtz's Vintage Photo distress ink and a sponge.

I bent the wings out and glued just the center of the butterflies down.  I put some bling on the butterfly bodies. 

I added some ribbon behind the word Create and here it is!!  Now I need to find the perfect place to hang it!

Saturday, October 16, 2010

Fall Into Fall Layout

This is my sample layout for my Gypsy class.  My goal is to have 2 classes a month, one a layout and the other a card.  This month's theme is Fall.

I used this leaf from A Child's Year.  I used Hide Contour (see below) to hide all of the veins.  Note:  if you hide the veins on the first leaf, every leaf you copy will have the veins hidden.  Otherwise, you waste a lot of time hiding contour!!!

  I wanted the leaves to point down as though they were falling, so I used the Flip button to flip the leaf.  Note:  you can just cut it out right side up and glue it down upside down.

I wanted 5 leaves, so I used the Copy & Paste button to make 4 copies.  I wanted a top layer of leaves the same size, so I copied one more leaf and put it on Layer 2.  Back to Layer 1, I lined up 5 leaves down the mat by making the x coordinates all the same value.  Then I rotated the leaves alternating -.30 and .30.  I overlapped the leaves a bit and welded them together.

On Layer 2, copy more leaves and arrange them on the mat so you can easily cut out 4 colors of leaves.

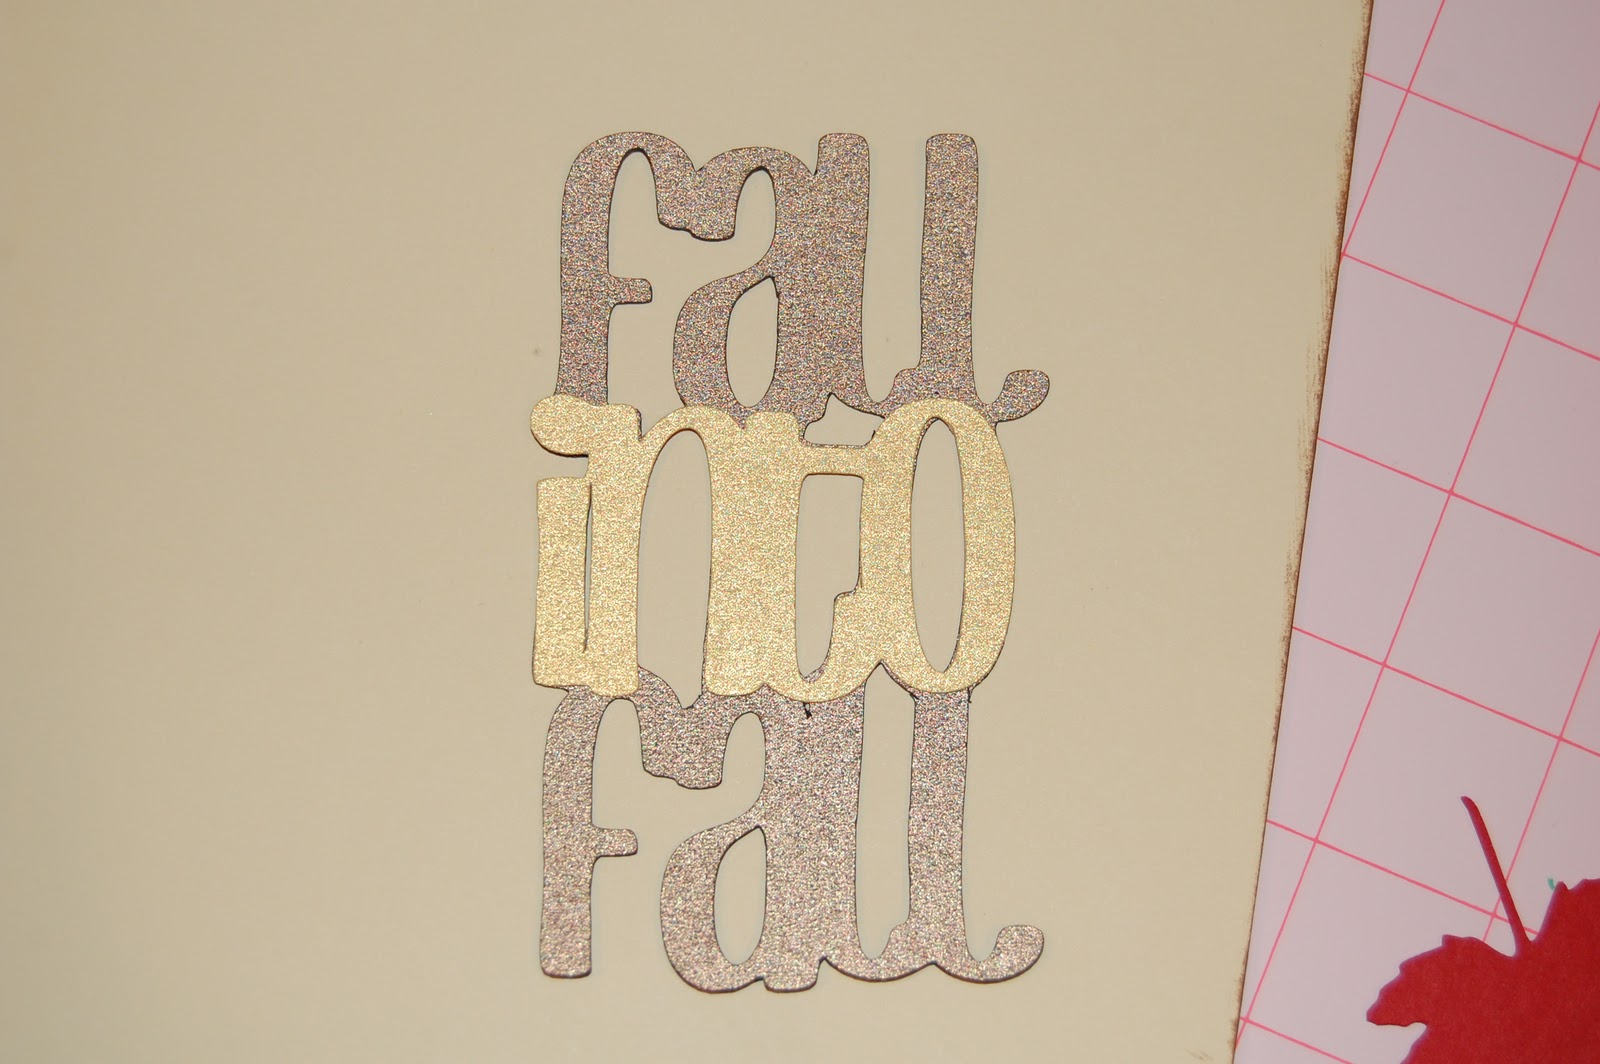
I opened Layer 3 and used Don Juan for the title.  This is a great font to use for welding.  I wanted my title to be vertical, so I stacked the words on top of one another and overlapped just a bit.  I copied the word "into" because I wanted to make a second layer in a different color.  Then I welded the title together.


Hide Contour button on the Advanced Menu allows you to hide cuts from your image.  I used this to hide the veins on the leaf.

Flip upside down button.  I used this to flip my leaves.

Rotate Button is used to turn images.  I turned the leaves for my border .30 and -.30, alternating the leaves.  Once you press the rotate button, you can use the arrows or the keypad to change the value.

I inked the edges of the background paper, photo mats and the leaves with Vintage Photo Distressing Ink and my fantastyx.

Here are the leaf borders.  I used two different colors of leaves for interest.

Here are the leaves to layer on top of the border.

Here is the title assembled.

I typically make a 2-page layout and thought it looked the best with the darker borders on the outside of the two pages.

Once I inked everything, I glued it down.  I left some of the border leaves showing (I did not cover all of them up).  I folded the leaves in half before I glued them down to give them dimension.  I also inked the main vein lines.

Here is the second page.  I used the extra leaves to frame the picture.  The yellow rectangle is for journaling.  I recently cleaned out my ribbon stash and found this gold sheer ribbon and decided it NEEDED to go on this page somewhere!!!

Once again, here is my finished 2-page layout for fall.  I can't wait to take some photos to add to this layout....I just love fall colors!

Friday, October 15, 2010

Halloween T-Shirts

We are headed to the pumpkin patch today for our annual field trip.  I thought it would be fun to make some shirts.  The witch came from A Child's Year.

I cut the images on Freezer Paper.  Freezer paper is shiny on one side and dull on the other.  You flip your image and cut shiny side up.  Put the negative piece (the stencil) shiny side down on your clean t-shirt and iron on.  I spent about 1 - 2 minutes ironing.  Paint with fabric paint and a sponge brush.  Let dry then pull off the freezer paper.

The bat came from Paper Doll Dress Up.

The pumpkin and face came from Pumpkin Carving.  The face is one of the square images.

The kids got to paint their own shirts.  I used Tulip fabric paint that can be found at Michaels or Wal-Mart.  For the pumpkins, once the orange paint is dry, iron the pumpkin face template on and paint with black paint.

Here is me peeling off the freezer paper.

And here is my shirt ~ fitting some days!!!

Thursday, October 14, 2010

T Wall Hanging

Tanner and I wanted to make a wall hanging for his room.  I put several T's on my Gypsy mat and cut them out with vinyl.

When I cut vinyl on my Expression, I set my dials to 3, 3, & 3.  This means speed and pressure at medium and the blade dial at 3.  This give you a  nice kiss cut ~ the blade only cuts through the vinyl not the paper backing.

While the vinyl cut out, Tanner painted a 16 x 20 canvas blue.  We used acrylic paint and a foam brush.

Once the paint was dry, I carefully peeled off some of the T's and placed them on each end of the canvas.

Tanner loves to craft with mommy!!

I did not know what to do with the rest of the T's and he was just standing there.....

Here is the negative.  Normally, I use clear contact paper as a transfer tape.  I loaned my extra Expression to my sister-in-law and my contact paper was in the tote (as I recently had a vinyl project at Michaels).  I don't recommend this, but I peeled off the vinyl negative and stuck it down on the canvas without a transfer tape.

Then we got out the white acryllic paint and painted over the canvas.

And here is the final project made mostly by Tanner.  He is very proud of his work.

Tuesday, October 12, 2010

CKC Kansas City

I drove down to Kansas City on Friday with my friend Crista.  You may remember her Gypsy on my blog a few months back.  She loaned me hers when mine was at the "spa" recovering from her facelift.

We met these lovely ladies at the crop Friday night.  Marilyn and her daughter Mrs. Jones from Dallas (I remember that because there was a Dallas Jones that kept winning prizes and she joked that was her).  They were celebrating Marilyn's birthday and Marilyn won a Big Shot that night!!

Here is a crowd shot of the crop.

I took a Digital SLR camera class and learned so much!!

I met so many people from Nebraska!  I met Amy from myMonsterCreations and she lives very close to me!  Go check out her BLOG she is having a giveaway this week!

Crista and I had so much fun ~ we can't wait to go again!!!