Copyright Information

Thank you for stopping by my blog! I hope you enjoy the things that I create and share! I do have a copyright on my original creations (see logo on my sidebar below).
If you create and post a creations based off of mine, please refer (with a link) back to my blog. Please do not use my ideas for files, profit or for contests. Thank you!


My Craft Goals for 2015

My Goals for 2015:

1. Update my goals for 2016 in January of 2016 :)
2. Maximize my crafting time!
3. Keep plugging away at scrapbooking photos!!
4. Learn how to Heat Press!!
5. Have fun!


Tuesday, March 11, 2014

They Joys of Journaling (Frosted Deisgns)


Today I am going to share with you and Frosted Designs some of the Joys of Journaling on your scrapbook pages.  I know what you are thinking - YUCK I do NOT like to journal!!!  Once upon a time I felt the very same way!!

I want to start by asking you why do we scrapbook?   Yes it is fun and relaxing, but we are also creating a memory book for our families.  All good books have pictures, but the most remembered stories also have words!!  The purpose of journaling in a scrapbook is so that someone else can pick up your scrapbook and learn about what was happening that day, who was present, where the were, etc.

There are a couple of different ways to include words (or the story) on our pages:  computer generated, handwriting, stickers, die cut words.  Many people do not like their handwriting.  Children always know their parent's handwriting:
 Please don't judge this part of my layout from several years ago!!!  My mom died when I was 20.  She was a leftie and had a very distinct handwriting that I tried to forge when I was in high school!!!  I don't have many things in her handwriting now, but she wrote "Lori 6 mos." on the back of this photo of me.  I photo copied it and included it under the photo.  I treasure this page so much because of this!!

So please write on your layouts as often as you can stand it!!!  And embrace your mistakes when writing!!!  It is authentic if you really scratched out a letter or word!!
My layout today is all about my in-home daycare.  I started my daycare in 1995 when my second son was born.  I could not find daycare for him and decided to start one myself.  I typed up a page of my story to tuck behind the photo.  I also wrote on a journal card I cut from Authentic "Enhancements" Paper that came in my March kit.

I practiced writing on a scrap of paper so I could get the spacing correct.  You can also write very lightly in pencil first and then copy over with pen. 
Here is my journal card tucked behind the photo a bit.  I also initialed it in the lower corner.  After I took the picture I added the date.  Signing and dating makes it official!!! 
Here are the pieces of my layout - the photo, journaling card, my letter/story, my title and my paper.
Here is what I typed:

I have always loved kids especially babies.  I started babysitting when I was eleven.  The only thing I wanted to be when I grew up was a mom. 
Of course, I worked and went to college and even put my oldest in daycare so I could work to pay the bills.  When my second child was born, I loved my job very much, but I still did not want to go back to work.  I lined up daycare when I was 5 months pregnant thinking I was all set!  At age 4, Kramer had transitioned from an in-home daycare to a center and he was very happy with his friends.  I loved the center for Kramer, but was not excited to put an infant in a center.  Well, my daycare lady filled the spot for Tyler.  I scrambled to find another daycare provider.  When Tyler was 2 weeks old, the second provider told me she did not feel comfortable with infants as her arthritis was acting up I was grateful for her honesty, but now back to the same place.  I found a third daycare provider who could watch both boys.  She called the next day and changed her mind as she wanted only teacher kids.
I took this as a sign that I needed to stay home and take care of my kids myself.  I was excited and terrified at the same time.   Our income was cut in half.  I slowly got kids and then the refrigerator went out.  I got a call from a head hunter for a really good job.  I took a deep breath and looked at my boys and kept moving forward.  My daycare grew slow and steady.
The first few years were rough.  I learned a lot!!  I learned that not all parents enjoyed spending time with their own kids.  I learned that most parents were afraid to discipline their kids.  I learned that not all people pay their bills on time including daycare bills.  I finally learned that I can say “no” or “enough is enough” when it is best for me.
I spent many hours at the park, on walks, playing in the sprinklers, making crafts, soothing owies, helping parents all in the comfort of my own home.  We moved eventually and now have a walk-out basement with a full kitchen and separate entrance for my families.
Some of the best benefits of running an in-home daycare are:  My boys never had to come home to an empty house after school.  I was able to get laundry done and dinner started during the work day.  I got to see most of my boys’ “firsts” and hear all about school when it was fresh in their minds.  I have met some wonderful people along the way.
I am in my 19th year of childcare.  I have almost all teacher kids now which is great in the summer time when we are so busy with baseball.  I have great parents.  I have great kids.  I have a helper with me every day.  My helper keeps me sane and allows me to get out at nap time every now and then.  I get to take selfies every day and no one makes fun of me (because their cute kids are in the pictures with me)!
Daycare and kids have changed over the past 19 years.  I am amazed at how wonderful these kids have turned out!  One year I had 4 former daycare students who make Junior National Honor Society in 8th grade.  One caring former parent called me to let me know and to say I obviously had a hand in that!!! Moments like this let me know I am right where I am supposed to be in life.
After all these years, one thing has never changed I love kids!!

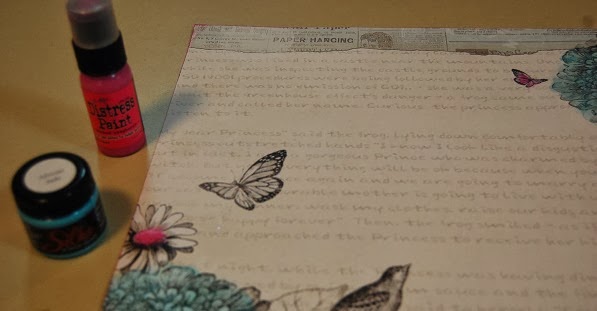
I used the Picked Raspberry Distress Paint and African Jade Silks acrylic glaze to paint my paper - Flutterby by Mother Nature from the March kit....

and the chippies from the April kit. 
I added a pretty turquoise blue flower to my title! 

When I adhered the photo mat to my paper, I only put adhesive on three sides.  This created a side pocket.  You can see my letter sticking out the right side.  I wrote "the story" on the paper to draw attention to it.
I added a heart for a pop of pink!!  I just have to say that I take a ton of selfies now with my kids - isn't Keaton the cutest?!?  They love looking at pictures of themselves!
I tucked Bliss into the details of the paper so it did not compete with my title (back to Balance again).
If your story is fresh, like mine, journaling is super easy.  If you are scrapping photos from years ago it helps if you have some notes written down somewhere or a relative you can ask.

I recommend keeping a notebook with you at all times - especially if you have young children!!  If you can't write it down immediately, try to write something at the end of the day.  Even one or two words is enough.  I sometmes jot notes on post-it-notes and stick them to the back of the photos.

Write about yourself, your journey, the moment, your feelings or whatever is important to your story!!

For tips on spacing your letters, check out my friend Sandee's post HERE.  Sandee has a Video every Sunday on Frosted Designs and does miracles with Mixed Media on projects!!

I would love to see your journaling on your layouts!!!  You can post them in the Frosted Designs FaceBook page and tag me (Lori Johnson Apgar).

 photo Lori_zps2a01ac7d.jpg

Saturday, March 8, 2014

Beautiful Floral Bag (KCC Blog Hop)

Welcome to this month's blog hop with The Krazy Crafting Crew!! 

If you are looking for the Happy Birthday Blog Hop, please go HERE.

This month we are making Tags, Bags, Boxes and whatever can be made 3D!! If you just came by to visit with me, thank you, but please start at the first stop with our hostess, Janet (www.janetscreativeworld.blogspot.com).


Janet is also offering a fantastic giveaway. Here's her description of the giveaway that you DON'T want to miss!! Close To My Heart Cloud Nine Cardmaking Kit. Includes card bases, envelopes, cardstock, double sided paper, a stamp set, and washi tape, glitter tape and other embellishments to make 10 cards! Valued at $45.00! You can win this by leaving comments on each blog, and if you're not currently a follower, why not follow the blogs because there's always fun in this group and a blog hop each month to inspire you!

For my project today, I created this 3D gift bag with handles.  I purchased this file from the Silhouette Online Store.  The size of the bag is 8x5x3 inches.
I cut out the bag in hot pink cardstock, and the layer in floral paper from Basic Gray.  It was pretty easy to assemble.  I used my ATG gun to adhere the parts together.

The straps slip into the slits on the sides of the bag. 
I cut some flowers out of two different shades of pink cardstock.  I rolled them up - I have a detailed tutorial on how to make rolled flowers HERE. I put some Glossy Accents on the edges of the flower petals and dusted them with Picked Raspberry Distress Glitter from Tim Holtz.  I hand cut and inked some leaves.  I laid the bag on its side and used Glossy Accents to adhere the leaves and flowers to the front of the bag.
Here is a peek from the top.  You can see how the handles fit in the slits.  
Here is the back of the bag. 
This bag would be darling for an Easter, Mother's Day or Birthday gift.

Thank you for stopping by and visiting with me today. Please leave us a comment and let us know how you like our hop!! Now hop on over to the next stop with Zenita!

The complete lineup:

Liz             www.tryin2craft.blogspot.com
Lissa Marie   www.somanycrafts.com
Lori            www.Scrappinmystressaway.blogspot.com****HERE
Zenita        www.scrappinwithz.blogspot.com****NEXT
Cicily          www.pinkdalmatianscrapper.com
Jearise       www.lorbysworld.blogspot.com
Miranda     www.nanasscrapspot.com
Katina        www.lifeslittleblessings.com

Thanks for stopping by today!!

Friday, March 7, 2014

Lego Birthday Banner

Welcome to the Happy Birthday Blog Hop


It's Connie Can Crop's Birthday weekend and what better way to celebrate than with a super blog hop full of fabulous projects, a spectacular lineup, and yummy presents for 2 lucky followers!!

Connie Can Crop is the first stop on her Birthday blog hop. Welcome to her Birthday Bash!!

This is a one day blog hop and we appreciate your leaving a comment for all of these talented friends who are here sharing their ideas and creations. 
We have TWO awesome sponsors and giveaways for this hop!
 

ABusyBee
Is giving away 3 delicious Spring Colors of Skittles!!
What's a skittle?? Check out her store Here:
http://doubleclickconnections.blogspot.com/p/store.html


 Connie is  giving away a gorgeous 6x6 paper pad and  may just throw in some fabulous LoveBug Creations Rumple Ribbon too!!
So what do you need to do to win? Easy... become  a follower of each of the fabulous blogs in this hop and leave each of them a  comment letting them know what you like best about their projects. 
Then come back to Connie Can Crop and post that you followed the rules.
You will have until 12:00 am Monday to finish the hop and leave your comments. 
Winners will be announced on Wednesday at Connie Can Crop.
Be sure to follow everyone and leave a comment  along the way!
Gonna Party! It's Connie's Birthday! Let's go!

For my projects today - I made a banner and decorated gift bags for one of my daycare boys.  He recently saw The Lego Movie and is in love with Legos!!

I cut cardstock into 4x6 rectangles for my banner flags.  I then sized a rectangle on my Silhouette mat to the same size.
I made six circles and sized them to fit my rectangle.  I spaced them evenly and made a template.

Once I cut my template out, I moved the rectangle off my mat and squeezed in as many circles as I could fit for my 8 1/2 x 11 paper and cut them out. 
I cut enough for two sets of 6 circles on each banner flag.  I ran half of them through my Xyron and adhered them to the banner flags using my template (above).  I pop-dotted the second set of circles on top of the first. 
Once I had them all completed, I pop-dotted the letters and number.  I used my Crop-A-Dile to punch holes in the top of the banner flags.  I strung blue ribbon through the flags, leaving long tails just in case.
Here is a close up of Eli - you can see the dimension a bit.
Next I made a template for the gift bags.  Then I cut the bigger circles out.  I only cut one set per bag. 
I put my template on the front of the bag and adhered the circles. 
I gently peeled up the template. 
I made 3 of each color.  These were fun to make, but took longer than I expected.  Eli loved the pictures I sent his mom!!  Thanks for stopping by!!
 Up next is my friend Robin!!
Here is our complete line up in case you get lost along the way.

Wednesday, March 5, 2014

Happy 8th Birthday Layout

Today starts a new challenge at Let's Scrap!!  Let's Scrap is an online community with scrappers from all over the world!!!  We have weekly sketch challenges on Wednesdays, as well as Challenges and Layout A Day (or Year) groups.  I have been able to catch up on my scrapping in this group!!!!

For today, I scrapped some pictures from Tanner's birthday party last November.
Here is the sketch.  I wanted bright and fun papers.  Originally I was going to use more of the circle 8's but really liked the stars better. 
I found the images at the Silhouette Online Store and added the banner below Birthday. 
I pop dotted the stars and circle for dimension. 
I sometimes struggle with sketches as I try too hard to make my layout look exactly like the sketch.  I am getting a little better at letting my layout take on a life of its own.  How about you?  Are you a sketch follower - or do you use the sketch only as a starting point??

Monday, March 3, 2014

Burlap Bunny Banner

Hello - today I am featured at She's A Sassy Lady's Blog.  As I sit here writing this post it is -1 at my house.  Thank goodness we missed the predicted snow yet again, but I know several of you did not get off that easy!!!

I usually host Easter at my house and am trying to get some new Easter Home Decor ready to go!!  I also like this burlap trend so it just made sense to make a burlap bunny banner!!

I bought some burlap 12x12 squares at Michaels and used my fabric scissors to cut triangle banner flags. 
I found some bunny shapes and cut them out of vinyl.  I put a square around each bunny to create a stencil.  I weeded out the bunny and put the stencil on each banner flag.
I was able to get 10 triangles to fit on one 12x12 piece of burlap.
I used oil based sharpie markers to color in the bunnies.  I originally wanted to use paint, but did not have enough pink paint - so I improvised!!

I put paper down under my banner flags as the paint bled a little. 
I painted two coats.  Once the paint was dry, I peeled off the vinyl stencil. 
In order to create a backing for my burlap flags, I cut apart a paper grocery sack and painted mod podge on it. 
I put the flags on the paper grocery sack and pressed them into the mod podge.  I let it dry completely and then cut them out.
I used my Crop-A-Dile to punch holes in each flag and strung pink twine through them.

I was worried that the yellow paint would not show up, but after two coats it looked just fine!
I am hoping that if I hang this bunny banner now, spring weather will come soon!!!


Friday, February 28, 2014

Winner Winner Chicken Dinner!!!


The winner of this Amazing book written by my friend Michelle Homme is.........

Drum roll here......

Random Number Generator picked #6:  Stephanie who said: 
Your tiles are just perfect for these quotes. Beautiful job.
Thanks for the kind words Stephanie!!  Please email me your address so! I can send you your book!  lori.apgar @ gmail . com

You can find out more about Michelle's book, blog posts, quotes, book signings and speaking events:


Thursday, February 27, 2014

How Many More Days??

Hello!!  Today my project is featured at The Buckle Boutique Blog!!

I made a fun sign to help my kids count down the days to various events.  I took a piece of White Board paper from DCWV and trimmed it to fit this 8x10 frame from the Dollar Tree.  I took the frame apart and put the paper on top of the glass.
I added the vinyl image from the Silhouette Online store to the White Board paper.
I took some Self-Adhesive Resin Rhinestones (clear) and trimmed them to fit on the frame to bling it up!! 

Add a dry erase marker and you have a fun sign that can be used over and over!!

Thanks so much for stopping by!!!

The Buckle Boutique's Link Listing
The Buckle Boutique's Website . . . click HERE
The Buckle Boutique Blog . . . . click HERE
Facebook Page . . . click HERE
Twitter Page . . . click HERE

Pinterest Page . . . clickHERE

DCWV's Link Listing

****LAST CHANCE TO ENTER my book giveaway HERE!!