
Hello Crafters!!! Lori here from Scrappin'MyStressAway with a tutorial I have been wanting to do for a while. My husband's grandma recently passed away at the age of 97. When I met her, she was 75. My mother-in-law is not a picture person (gasp!!) and I just recently saw some of grandma's photos from her youth when I was putting the picture boards together.
She was a beautiful lady!!
I knew that this was a great opportunity for me to honor Grandma Kelly along with my tutorial!
Many of us use Glue Dots a lot for various projects. A friend of mine shared her Glue Dot secret with me and I thought I would share it with you!! This will save you money (something Grandma Kelly loved to do) as well as give you more options than the store-bought dots do.

You need 2 things:
Aleene's Tack-It over and over glue. I found mine at Michael's and used a 40% off coupon.
Wax paper or leftover sticker sheets.

I am using a leftover Glue Dots sheet. I probably should have used something wider, but this worked!!
Simply squeeze the glue into the size dot you need. You can also make lines of glue.
Let it dry.
The smaller dots dry within an hour. My large dots dried in about 24 hours. The key is to plan ahead if you need a large dot.
I knew I was making a flower out of ribbon, so I made my dot the size I wanted the flower to be.

The biggest dot was made on a sticker cellophane wrapper. It is still a little white in the center a couple of days later, but dry enough to use.
These glue dots are much stickier than the Glue Dots from the store (which can be good or bad).
For my ribbon flower, I started in the center and wound the 3Girl Jam ribbon around and around.

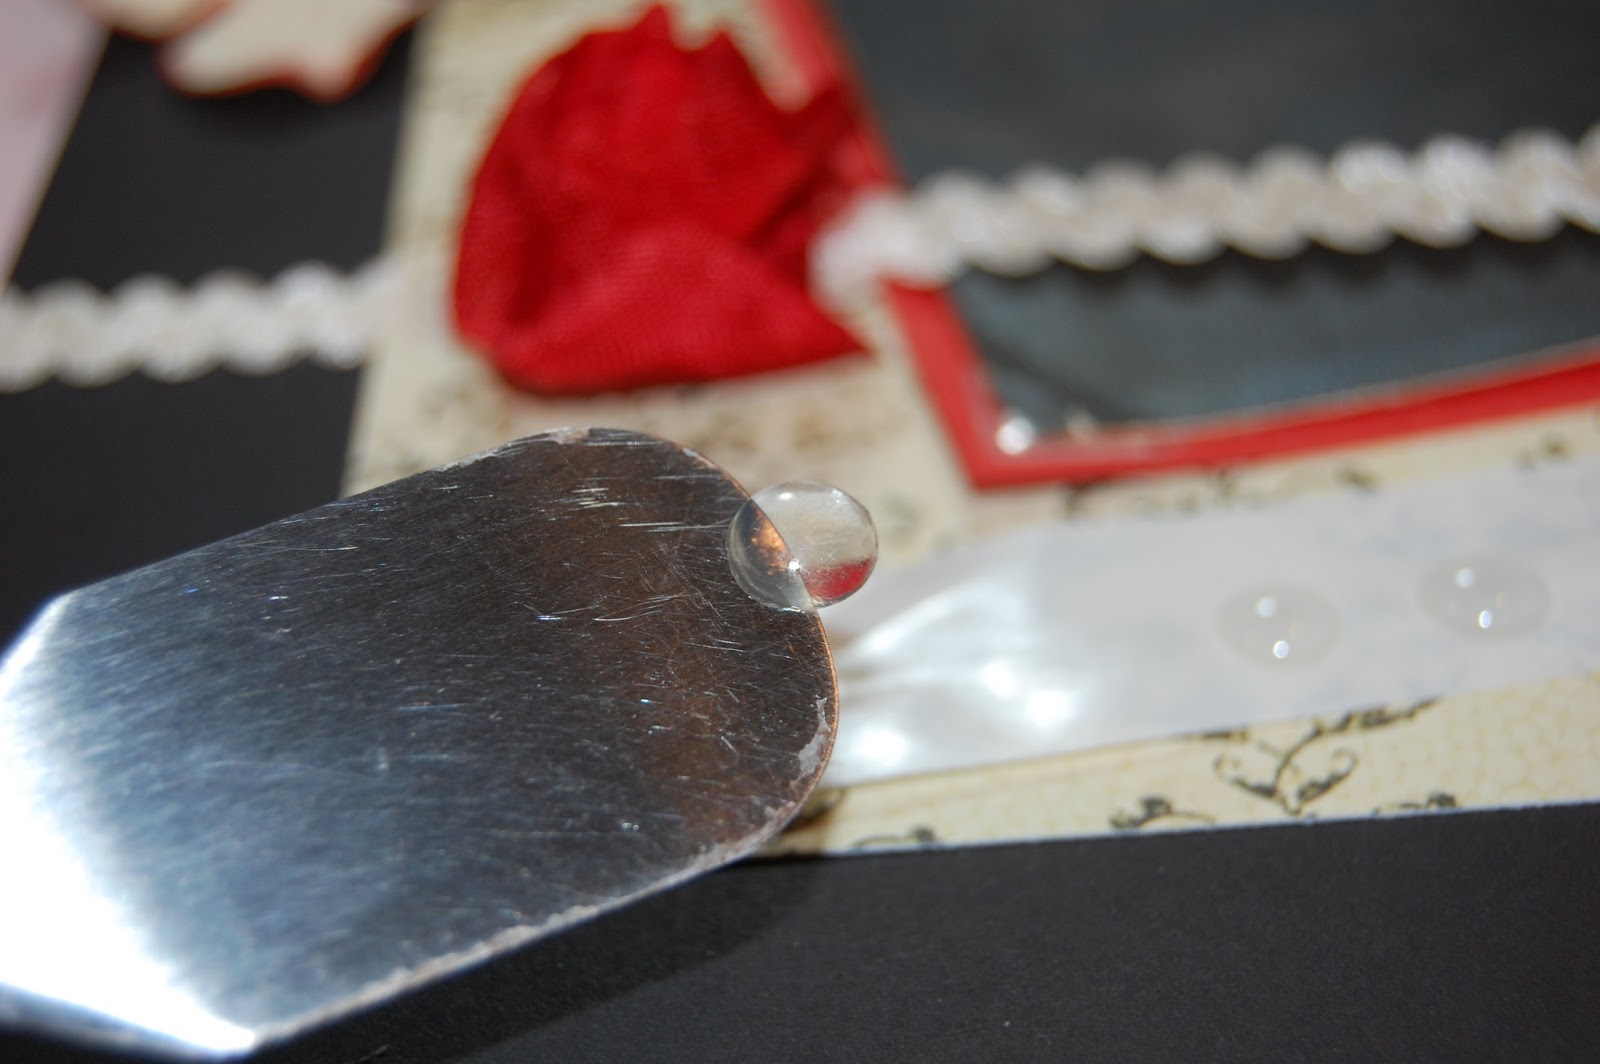
I used my Cricut spatula to get the glue dot off the cellophane and positioned on my layout.

I like the ribbon flowers better than the 3D paper flowers I make with my cricut if I am putting the layout into an album. The ribbon is more flexible (aka squishy when you close the page)!!
You can't see here, but I used a small glue dot to glue a pearl in the center. I did not intend to, but the glue backing came off the pearl (hate when that happens) so it is good to have options!!
I used the medium sized glue dots to adhere the paper flowers on my layout, as well as the pearls in the centers.

I added some ribbon, metal flowers and gem flourishes.

For my smaller flower, I used my tweezers to position the glue dot on my page. Then I wound the ribbon on it.

The tweezers also helped tuck in the end of the ribbon.

Grandma Kelly wrote on the front of a lot of her pictures!! Yikes!! In the corner of the photo you can see "Louise 1934" written in ink.
I thought that would make the best title for my layout.

I used Quarter Note and my Gypsy to weld Louise.
I cut out Louise sized to 1.48 inches. I cut out 1934 sized to 1 inch.

I used a label from Lacy Labels sized to 3.12 inches to adhere the title to.

I cut the letters and numbers and shadow tag out of red cardstock and the tag out of the reverse side of the patterned paper.

I slid the tag under the photo mat.

I love this photo of Louise, her eyes follow you! She was 18 years old in this picture - her whole life was ahead of her.
I love creating glue dots in the perfect size for my projects. I hope my Make Your Own Glue Dot Tutorial was helpful!
I am also linking up today at Pink Cricut!


5 comments:
Lori, your card is beautiful and so is the picture of Louise; she looks like an old-time movie star.
I just love your flower, and that's some great technique!
Hugs, my friend!
Oh, how clever to make your own glue dots. Can't wait to try it. Your ribbon flowers are beautiful - the whole layout is stunning. TFS
Your age is just gorgeous! Love the flowers along with your color choice. She was a beautiful lady.
I love that you made your own dots. Thanks for sharing this tip with us today.
Beautiful! AND soooo Ironic! I am making these same flowers in the exact Red!! lol with some white and black too ;)
xoxoxox
Jessica
www.homespunelegance.blogspot.com
What a lovely layout, Lori. You are so talented. I really enjoy your blog.
I'm definitely going to try and make those glue dots thanks to you...and your friend!
God bless,
Anita aka Nit
Post a Comment