Copyright Information

Thank you for stopping by my blog! I hope you enjoy the things that I create and share! I do have a copyright on my original creations (see logo on my sidebar below).
If you create and post a creations based off of mine, please refer (with a link) back to my blog. Please do not use my ideas for files, profit or for contests. Thank you!


My Craft Goals for 2015

My Goals for 2015:

1. Update my goals for 2016 in January of 2016 :)
2. Maximize my crafting time!
3. Keep plugging away at scrapbooking photos!!
4. Learn how to Heat Press!!
5. Have fun!


Friday, June 29, 2012

Wreath (FD Circle Challenge)

This week's Fabulous Friday Challenge at Frosted Designs is Circles.  I saw a wreath on Pinterest and thought I could make it one handed (my right wrist is still in a cast).

I love butterflies!!!

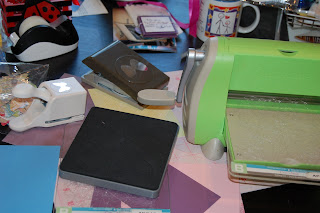
I used scraps of cardstock, two punches and a Sizzix Bigz Beautiful Butterfly with my Cuttlebug.  I did most of the cranking, but my friend Jenny and her granddaughter Genevieve helped with the rest for me!!


I bent the butterflies in half and hot glued them to a grapevine wreath.  Once they were all glued on, I thought I should add more circles (aka bling) to the body of the butterflies'

Note:  it would have been much easier to add the bling first!!
I used gems and pearls.  I used a little Glossy Accents to help them stay put!


I have this wreath hanging in my basement where my craft room is :)

Join us this week with your Circle project for a chance at a great prize!! 


Thursday, June 28, 2012

Sunflower Window Card

I made a couple of Thinking of You Sunflower Window cards.

My wrist is getting better - physical therapy is helping me gain back my range of motion, but my craft level is still simple for now.

I received some lovely cards when I broke my wrist and wanted to return the favor for a few scrappy friends of mine, so Gypsy and I got to work!
I use a tag from Gypsy Wandering sized to 4 inches.  I copied the tag and hid the inside cut.  I welded them together to make the card.  I used the sunflower from Gypsy Wandering and sized it to fit inside the oval, overlapping a bit.  I hid the inside cut and welded it to the card.


I found some bright paper and cut out my cards.

I copied the flower onto another layer to cut out a brown (without the inside cut hidden), green and orange (both with the inside cut) layer. 

 I layered the pieces together after cutting off the stem from the brown and orange layers.

I added some stickles in the center of the flower and a twine bow :)
I don't have a lot of stamps, but did find this "Hugs" stamp from Joys Life All Around Sentiments Stamp Set.

I am linking this up at She's A Sassy Lady! And mailing two to friends :)


Friday, June 22, 2012

Soccer Card

Tanner got invited to a soccer-themed Birthday Party this weekend.  I wanted to make a fun soccer card.

I grabbed my Gypsy and got to work.

I grabbed the layers of this soccer cut from Boys Will Be Boys and sized the pieces to 4 inches.

To make the card base, I copy and pasted the shadow layer, flipped it and welded it together.

I positioned the pieces on the mat, separated by colors.

I used solid color cardstock from my scrap file and cut the pieces out.

I adhered the layers together and the card is ready to go!  I stamped Happy Birthday on the inside.

Tuesday, June 19, 2012

We have a winner!!!

The winner of my Craft Room Blog Hop Blog Candy is...........................................

#37


sarahstone said...
Great space, Lori. I like your velcro idea. I need to get me some of that. Contact me at sarahstone@marykay.com. thanks :)

Her favorite tip was:
Using velcro to organize stickles!  I got this idea on Pinterest!

Congrats Sarah!

Monday, June 18, 2012

Smash ~ All About Me

I just finished my second 2-page smashout.  I wanted a page all about me at the beginning of my smash book.

I started with a couple of my favorite photos and my 2 favorite colors:  purple and lime green!

I journaled with the help of my computer as my right hand is still in a cast.

I love taking pictures and creating scrapbooks!

I love Disney and my family :) not always in that order!!

I found this quote on facebook.
I used the following Cricut Carts:
Sophisticated for the font
MS Seasonal Art Cake for the banner
Cricut Everyday for the Scrapbook Queen and Cricut symbol
Graphically Speaking for got kids?
Art Philosophy for the doily, tag and parenthesies


Sunday, June 17, 2012

Strawberry Ice Cream Cone Card (SweetSassyDiva)

Hi ~ Lori here from ScrappinMyStressAway and I am excited to be at SweetSassyDiva's today!!  

If you are looking for the Frosted Designs Crafty Spaces Blog Hop, go HERE.

I wasn't sure how much crafting I would be doing once I broke my wrist, but as long as I keep it simple and go slow I can still create!!

This week at Sweet Sassy Diva's, our theme is Strawberry Fields.  I am not a strawberry fan, but I do love ice cream!!

I found my ice cream cone on Sweet Treats and sized the layers to 4 inches.

I used cardstock for my layers.  I forgot to hide the drip on the ice cream cone layer (lt. brown), so I opened another Layer and copied a cone on it.  I hid the contour and moved it to the left of the first cone, fed the mat back in and cut it out. 

I used my stitching stamps to create the zig zag lines on the cone with Antique Linen ink.

I trimmed off the cone part of the pink layer.  I inked the edges of each layer.

I added some black ink for the seeds and lime green stickles for the top of the strawberry.


I hope you enjoyed my card, but not as much as a "real" ice cream cone!!

Friday, June 15, 2012

Frosted Designs Crafting Space Blog Hop

Hello and welcome to the Frosted Designs Crafting Space Blog Hop.  Above you will see how my scrap nook looks most of the time!!

And Nook it is, my scrap space is a corner of my basement that I share with my in home daycare.  I have to store my supplies where little fingers can not reach!!

You should have arrived from LYNN If you found me first, please go to the BEGINNING so you don't miss anything!

Here is a complete list of blogs in case you get lost along the way!


Here it is cleaned up a bit.

I have a few tips and tricks to share with you:

I use baby food containers to store my buttons and brads.  They fit perfectly in a 12x12 Iris case.

In order to keep my daycare kids out of my supplies, I use two of these Iris towers to house supplies for:  me, Tyler, Tanner, baseball, bowling, Halloween, Christmas, Vintage, Disney and card templates.

On top is my buttons/brads case and two purple cases that hold projects I am working on and projects I want to take with me to crops or classes.

Here are my Imagine and E2.  On top of my Imagine are 2 Recollections cartridge keepers that I use for my Imagine carts.

My E2 is sitting on another Iris tower.  These cases house:  stamps, inks, bind-it-all supplies (including scrap papers cut for future note pads), vinyl, sketches and punches.

I sort my Imagine carts by image carts and paper pattern carts.

My Gypsy sits next to my E2 on a $3 plate easel.  I use a binder clip to hold my cords up on the easel.  This way they do not fall on the floor when I unplug them.  I got this idea from Pinterest.

I hang my ribbons from big binder rings under a shelf.  I got the idea and pattern for the ribbon holders HERE.

My desktop spinning organizer came from Michaels.  I keep my tools in one slot, pens/pencils in another, and liquid adhesives in the third.  I use paper cups inside the slots to hold my tools and pens together.

The divided slots hold my crop-a-dile, rulers, tiny hole punch (for brads) and my tweezer and flower petal stylus kit. 

I keep my ATG gun and label maker in the center.

The drawers hold my cricut refill blades, scraper and other blade refills.

I also keep my wire cutters handy for my Bind-it-All.

This holds a lot of frequently used tools and I use it a lot!

I made my own "Clip It" from a wine bottle and lamp shade frame.  See how I made it HERE.

I bought this 3 tier wire tray from Wal-Mart in the bath accessories.  On the bottom tier I put my tape runners and pop dots.  The middle tier houses my double sided tape, glue dots and masking tape.  The top tier holds my Tiny Attacher (stapler), staples and tissue tape.


This expanding file folder was purchased at Wal-Mart and I use it to house my scraps.

Each color has 2 sections, one for solids and one for patterns.

I bought this itso cube from Target and store my 12x12 colored cardstock inside.  I use a "shelf" as my lid (dust cover).  The plastic containers inside came from Hobby Lobby and my stash.

I keep it on the floor so I can look down and select the perfect shade of green!!  My SIL gave me this idea.  She put the casters on the bottom so she could roll her crate out from under her table.  I have carpet so no casters for me!!

I got this Stickles storage idea from Pinterest.  I bought an 8x10 acrylic frame from Michaels and put three rows of stick on velcro on.  I put velcro on the bottles and stuck them on upside down.  

I put a piece of cardstock in the frame.

Behind my table, I use my window ledge and buckets to store:  gems, new punches, stickles overstock, twine, glitter, mists and tiny beads.

If I keep supplies where I can see them, I remember to use them!

Under my table is my cricut carts (in the black and white bags) my old Expression and the white polka dot bag holds my Smash supplies.  My MS Scoreboard is tucked between the Iris tower and table legs.

My room rarely looks this clean because I can not work if it is too sterile :)

Every time I am forced to clean, I find things I no longer need.  I am giving away my extras as blog candy today. 


To enter, please #1 Leave me a comment including which of my tips was your favorite and #2 a way to contact you.

I will draw a winner on Tuesday!!

Thanks for coming by today!!  Your next stop is SARAH.

Smash It Summer Fun!

I found some inspiration and decided to enter a Smash Challenge.  Smash books have been so ~ well scary to me!  I am great at collecting things but not great at Smashing....yet!

Karin from Smash Addicts posted a 2-page Summer challenge and I wanted to give it a try! 
I use my Gypsy most of the time so naturally I grabbed her and got designing.  Most of you know I broke my right wrist and I am right handed.  I can not easily sketch my layouts right now, but I can size up the pieces on my Gypsy!!

I used the font from Cherry Limeade and sized the letters to 1.5".
The pool is from H2O sized to 3.3"
The sun is from H2O sized to 1.5"
Home plate is from Baseball sized to 2.53"
The ball players, also from Baseball, are sized to 1.82"
I cut everything out from cardstock scraps.
I used Paper trimmimgs to cut out this 12" border of daisies.

Journaling is difficult for me right now, so I typed:
Soccer Mom
Baseball, Baseball, Baseball
In the pool
Vacation Fun
Flower Lust
I Love Summer
6-15-12, 22nd day in my cast

Everything else is from my stash.

Thanks for the inspiration!!