Hello and Welcome to the Holiday Blog Hop!!! Today's hop is a collection of Holiday (Christmas or New Year) crafts designed by the Bug Bytes Design Team Members. We all take a turn designing at The Bug Bytes one day each month (I am on the second Monday each month).
You should have arrived from Denine! If you found me first, please start at the beginning with our hostess with the mostest Pam!
My DT Sisters are very talented so be sure to enjoy each project along the hop! It is a short hop (only 10 stops) so be sure to check us all out!!
Here is a complete list of blogs in case you found me first:
- Pam - http://www.thebugbytes.com/
- Michelle - Lady of Leisure Ink
- Danita - http://danitasdesigns.
blogspot.com/ - Elizabeth www.217Creations.com
- Beth - http://www.
thunderbirdlindybydesign. blogspot.com/ - Lisa - http://www.momtooneson.blogspot.com
- Denine – http://www.pumpkinspiceblog.
blogspot.com - Lori - www.scrappinmystressaway.
blogspot.com****HERE - Adele- http://www.adelescreations.com****NEXT
- Sheila - http://shesasassylady.
blogspot.com/
And now on to my project:
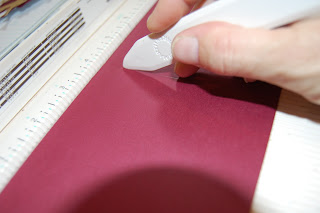
I designed my card to be a 4 1/4" square card. The inside pages are sized to 4" x 6". I scored one page at 4 inches.
The other page I scored at 2 inches.
After folding the two scored lines, the pages meet up like so to make a pocket for the gift card.
I cut a piece of cardstock 4 1/4 x 8 1/2 inches. I scored it in half at 4 1/4 inches.
I used my ATG gun to adhere the inside page to the left side....
and then the right side, making sure my flaps lined up.
I adhered only the ends of the flaps to create a pocket.
I used my corner rounder to soften the look of the pocket.
Because this card was not going in the mail, I adhered ribbon under the front and back mat. For the cards I made for my husband's employees that had to be mailed, I skipped this step.
I used Lacy Labels to create a layered label for a stamp and signature.
I sized these labels to 1.57 and 1.33 inches.
I cut them out of maroon and cream cardstock.
For the front of the cards, I used this gorgeous reindeer image from the Christmas Cartridge. I sized them to 3 inches.
I used maroon and gold shimmer cardstock (hard to see the shimmer here though) to cut them out.
I used a stamp from Cardz TV Stamps for the sentiment.
I like how the layers look together - kind of like nestabilities.
I realized later that I should have made the signature area a bit bigger - but my husband writes small so it was ok.
I added the gift card and tied up the card I am using for my son's teacher,
All tied up!! You can see the gold reindeer shimmer here!
Here are the cards for my husband to mail out. I am very happy with how they turned out.
Thanks for stopping by today. I hope I have inspired you!!!
Your next stop in the hop is my Awesome friend Adele!!


.gif)


22 comments:
Love the cards. The reindeer image is cute and the colors make an elegant choice
I love this idea! I will be amking some to keep on hand for spontaneous gifts throughout the year!
ptucker6 at cox dot net
Great project Lori, love the design, I shall try this out in the near future :)
Thanks for the great tutorial
Hugs
Adele
Your cards are awesome. Love making a bunch at once it really gives a sense of accomplishment! TFS
Love these cards - the reindeer image makes them look so elegant.
Hi! Thank you for sharing a really wonderful card.
THESE ARE SUPER CUTE!!!!!
very nice cards. i made some of these, but i think yours are much 'cuter'. i'm already a follower.
Great job Lori. I need to make one of these asap! Thanks for the tutorial.
Lori - these are wonderful - great cards. Love the tutorial and what a wonderful idea. TFS
Very pretty and thanks for adding all the details!
Love your cards and the details are fab.. New follower here.
Great cards. They will be well received.
Beautiful job on your gift card holders.
http://lorisartsyobsession.blogspot.com/
lori, your card style is so versatile and the reindeer oh well he is absolutely adorable. :)
The gift cards are so pretty. I really like the paper you chose!
Love your gift card holders!! And that paper is fabulous!!
Great gift idea and love that it can be made by anybody even if they don't have a Cricut cartridge or cut file for a gift card holder. The image you picked was great. I have Lacy Labels but keep forgetting what a versatile cartridge it is. THanks for reminding me!
What a great design! Love all the extra details you added!
Tracy
Beautiful work, Lori! I love the design and the colors you chose. Great job!
I like this idea a lot and I think you gave wonderful instructions.
Oh Ms. Lori you never cease to AMAZE me at your creativity! Not to mention your "go juice"! What a wonderful gift card you created! Sorry but e-mail was down all weekend! TFS
Post a Comment