Copyright Information

Thank you for stopping by my blog! I hope you enjoy the things that I create and share! I do have a copyright on my original creations (see logo on my sidebar below).
If you create and post a creations based off of mine, please refer (with a link) back to my blog. Please do not use my ideas for files, profit or for contests. Thank you!


My Craft Goals for 2015

My Goals for 2015:

1. Update my goals for 2016 in January of 2016 :)
2. Maximize my crafting time!
3. Keep plugging away at scrapbooking photos!!
4. Learn how to Heat Press!!
5. Have fun!


Showing posts with label Accent Essentials. Show all posts

Friday, July 8, 2011

Celebrate Banner (Frosted Design Blog Hop)


Welcome to the Frosted Designs Blog Hop!!  We are celebrating our one year blog~versary so the theme is three fold.  Our weekly challenge (to use ribbon/fancy trim, a charm, and rhinestone or pearl) and/or Ice cream on the beach, or celebrating or some of each.  Well, I was a little stumped at first, but then came up with an idea that had most of these elements.....an ice cream celebrate banner with ribbon, charms and rhinestones.

You should have arrived from the talented Diana.  If this is your first stop, please go to the beginning of the hop HERE as we are having a fun game with a giveaway (hint ~ you need to get information from each stop along the way to be eligible to win)!!

Let me show you how I made my project:

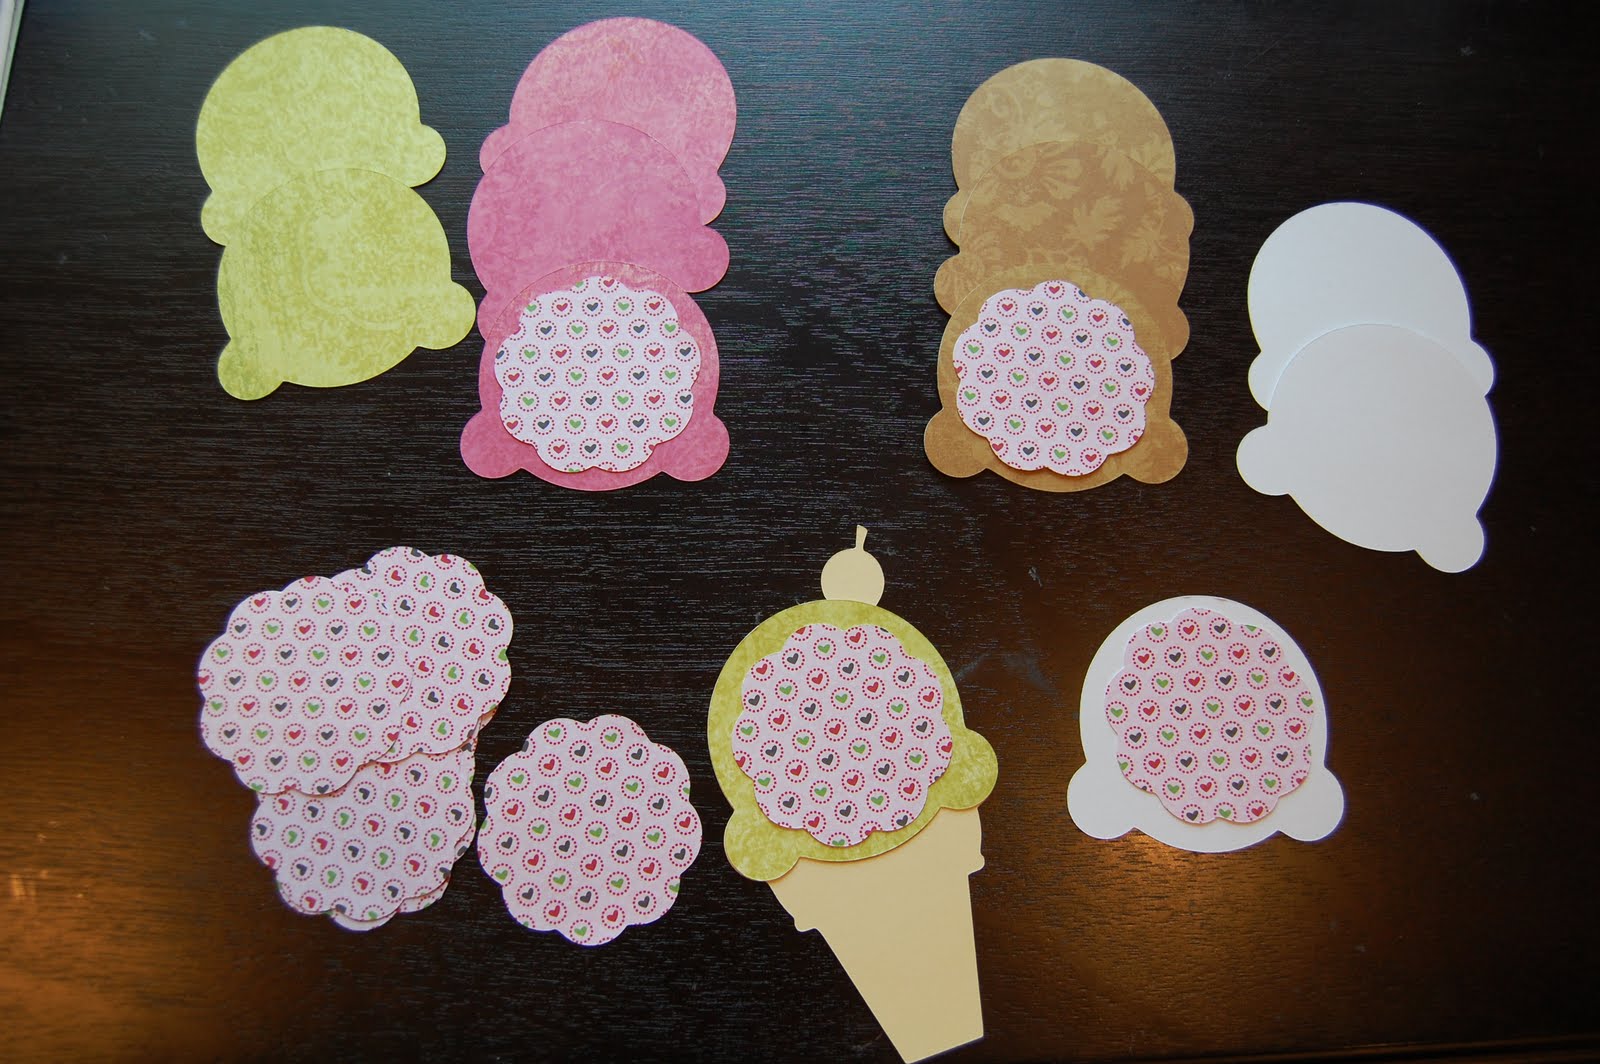
I found this ice cream cone from Straight From The Nest and cut them out at 3.27w x 5.47h.

I cut them out six at a time in cream colored card stock.

I put the ice cream layer 3 per half mat so I could easily cut three of the same color at a time. 

I cut out green (mint chip), pink (strawberry), brown (chocolate) and white (vanilla) ice cream tops.

I found this scalloped circle on Accent Essentials and hid the inner cut.  I sized it to 2.45w x 2.25h and copy and pasted until I had 12.

I used Ashlyn's Alphabet for the letters sized at 2.06 height.

In order to make the pattern on the ice cream cone, I used a stitch stamp from Hot Off The Press.  I masked off the top of the cone with a post-it-note.

Here is the cone with the ice creme on top, but the top of the cone looked plain.

I have this barcode stamp set from Close to My Heart, and I stamped "Life Celebration" on the cone low enough that you can read it under the ice cream.

I adhered the ice cream to the cone.  As an instructor, people ask me all the time what my favorite adhesive is for papercrafting. I use a lot of different types, but my go-to adhesive is my Tombow tape runner (HINT HINT).  I used black stickles to add the mint to the mint chip ice cream!
 
I used red stickles for the cherry on top.

I punched the ice cream behind the scalloped circle to string the ribbon through.  I added some heart and circle charms to the ribbon and some rhinestones to the letters.  I pop-dotted the scalloped circles to the ice cream.

Here you can see the cone!

I put a flower on the end cones and hung the banner.  This can be used to celebrate a birthday, anniversary or any other special event!

I have a little blog candy.  In order to be eligible to win, you need to #1 be or become a follower and #2 leave me a message with your favorite birthday or anniversary memory!

Your next stop is the fabulous Andrea!  Thanks for hopping with us!

Saturday, January 1, 2011

Hello My Friend

I bought a plain mini album with a paper machet cover at Michaels.  I covered it coordinating paper and ribbon.  I used pink, green and brown as my main colors.  I was inspired to create this for the My Pink Stamper design team call after I saw the picture below:

This is an advertisment for BoBunny in Creating Keepsakes.

The challenge was to use my favorite Cricut Cartridge, but I have so many favorites.....

I used Songbird for the tag, Walk in My Garden and Accent Essentials for the flowers.  The leaves are from Walk in My Garden as well.  I used the Hide Contour feature to hide some of the flower cuts.

I inked the edges of the flowers, leaves, tag and album with my Tim Holtz Vintage Photo distress ink pad.  I used gems for the centers of the flowers and pearls to tie the flowers together.

I had the perfect shade of brown ribbon, but it was 1" thick.  In order to make it thinner and add some texture, I knotted it and glued it down.  I put a layer of pink crystals under it.  I put hot pink ribbon going up the side and replaced the creme ribbon that binded the album with a green that matched the green paper.

I stamped Hello my friend (My Pink Stamper of course) on the tag and added a flower.

Here is another shot of my finished Mini Album cover.  This will make a wonderful gift for one of my friends!!  One of my resolutions is to put myself out there on other awesome blogs, and this is my first of 2011 ~ I am submitting to My Pink Stamper.  Wish me luck!!!

Wednesday, April 21, 2010

Knock Out!


This layout is from a sketch on the Practical Scrappers blog. When I was 3, I fell in our garage and hit my mouth on the cement step going into the house. I knocked my front tooth very loose. I went to the dentist the next day and had it pulled. I had a gap in my mouth for years!!

I wanted to capture the story and originally thought I would use a large tooth shape as a background for my photo. Well, it just did not look right because the tooth needed to be white and the colors didn't look good. I also changed the photo a couple of times, finally picking this one because I liked the dress ~ more important it goes with the paper I chose (he he).


I started by putting a square on my gypsy mat the same size as my photo. It is an odd size ~ 3.75 x 3.75. Then I took a scallop square from Accent Essentials and sized it to mat my photo (4.5 x 4.5). This was the paper that I HAD to use!! Then I grabbed the letters from Ashlyn's Alphabet and the tooth from A Child's Year. Using the 12 x 12 mat as my guide, I sized the letters and tooth so the title would fit where I wanted it on my page.


Finally, I made a corner by using a heart swirl from Mother's Day, copied it and rotated it -90 degrees. I anchored the swirl with a heart from Home Decor. I positioned the three pieces together and welded them. I them moved the corner piece to the scalloped frame and sized it. I arranged the pieces on my screen in quadrants by color of paper I wanted to use. I deleted the square that represented my photo and cut my paper.

I originally thought I would use paper, but I used ribbon as a background for my photo because that is what I had on hand (in other words Practical).

Wednesday, March 3, 2010

Girl Fun ~ Practical Scrappers


Here is my take on the Practical Scrappers challenge this week. The challenge is to use ink or chalk on your project. This is me and my friend Suzi and her daughter (my little scrapbooking buddy and the owner of my original baby bug)Danielle. Our families spent a week together in the Ozarks(in Missouri) and we stopped by KC on the way home to catch a baseball game. I love how we are all in blue. Thanks girls for making me look so tan (he he)!!

I used Color Blocks fluid chalk around the edges of my shapes. From my cricut, I used Ashlyn's Alphabet for the scalloped ovals and Accent Essentials for the flowers. I used A Child's Year for the title. This was my first time making the paper flowers ~ somehow I pictured in my mind pink or purple for my first flowers, but I just had to match the paper!!!
