Copyright Information

Thank you for stopping by my blog! I hope you enjoy the things that I create and share! I do have a copyright on my original creations (see logo on my sidebar below).
If you create and post a creations based off of mine, please refer (with a link) back to my blog. Please do not use my ideas for files, profit or for contests. Thank you!


My Craft Goals for 2015

My Goals for 2015:

1. Update my goals for 2016 in January of 2016 :)
2. Maximize my crafting time!
3. Keep plugging away at scrapbooking photos!!
4. Learn how to Heat Press!!
5. Have fun!


Showing posts with label Doodletype. Show all posts

Friday, November 2, 2012

Sketch Challenge ~ Mexico

This week at Frosted Designs we are having a Sketch Challenge!!!

Here is the sketch!


I started out with a 5x7 photo of Mike and I from our recent trip to Mexico.  I loved the bright orange and blue papers and even found a fishy paper at Michaels that matched!!

I cut out the center of the blue cardstock so I could mat my photo with the same color.  This creates less waste, not to mention I only had one piece of that shade of blue left!!  I trimmed 1/4 inch off of two sides (top and side) of the orange and white patterned paper to layer on top of the blue.

Now that I had my photo and papers set, I turned on my Gypsy and got to work!
I used these shell shapes from Life is a Beach.  The sand dollar is sized to 3.94 inches and the shell trio is sized to 3.59 inches.

I cut them out of white shimmer cardstock

I inked them with blush ink before I took the paper off my cricut mat.


The border you see was made by welding four shell borders from Life is a Beach.
To size borders on my Gypsy, I know I can cut as wide as 11.6 inches.  I put four borders on my mat and  welded them together.  Instead of adjusting the height of the welded banner, I adjusted the width to 11.6 inches.  The height ended up being .96 inches.  If it were too big, I would weld one more border piece.  If it were too small, I would delete one border piece.

I needed a little tag and a title.
I found this tag on Elegant Edges.  I hid the cut out and sized it to 3 inches.

I used DoodleType for my font and sized the letters to .88 inches and the numbers to .63 inches.

I cut them both out of orange cardstock.

I used a circle punch and some twine to create my banner out of the scraps.  I folded the circles in half and used a glue dot to hold them in place.

We recently went to Mexico to celebrate 20 years of marriage.  It was so beautiful there ~ I hope to go back again someday soon!!!


Saturday, September 8, 2012

Mimi and Papa Coupon Book

This week at Sweet Sassy Diva's BLOG we are celebrating All About Grandparents in honor of Grandparent's Day Sunday September 9th.

I used one of the free Cricut Digital Images that was loaded on my Gypsy when I updated in August.  The Digi is called Mother's Day Coupon Book.  There is a similar cut on the Mother's Day 2010 Cartridge that would work too.


I sized the coupon book cover to 3 inches.  I wanted to add Mimi and Papa to the cover and used Doodletype for the font.  I sized the letters to 0.69 inches.

I opened Layer 2 and placed 6 coupon pages on my mat sized to 3 inches.

I opened Layer 3 and kept Layer 2 visible.  I used Doodletype to place my words in the center of each coupon.  The letters are sized at 0.61 inches.
After trying both of my gel pen holders and failing, I used a mini Crayola marker with a pencil gripper to draw on my paper.


Bottom right coupon did not print very well, so I left it out of the book.  Had I not just spent a half an hour trying the other pens, I probably would have had the patience to re-do that coupon.
Who am I kidding....Tanner would not help "bake" the cookies, he would "eat" them anyway!!

I cut the cover out of patterned cardstock.  I cut the title out of dark blue cardstock.  I kept the template from my title and ran the letters through my 1" Xyron.

I used the template to line up my letters.

Perfect titles every time!!

I scored the cover and assembled the coupons inside.

I used a dark blue ribbon to bind the coupon book.  Here you can see the inside pages.


Tanner will love giving this book to his Mimi and Papa for Grandparent's Day!

What do you do to celebrate Grandparent's Day?


Monday, March 5, 2012

Look Mom....No Worms LO

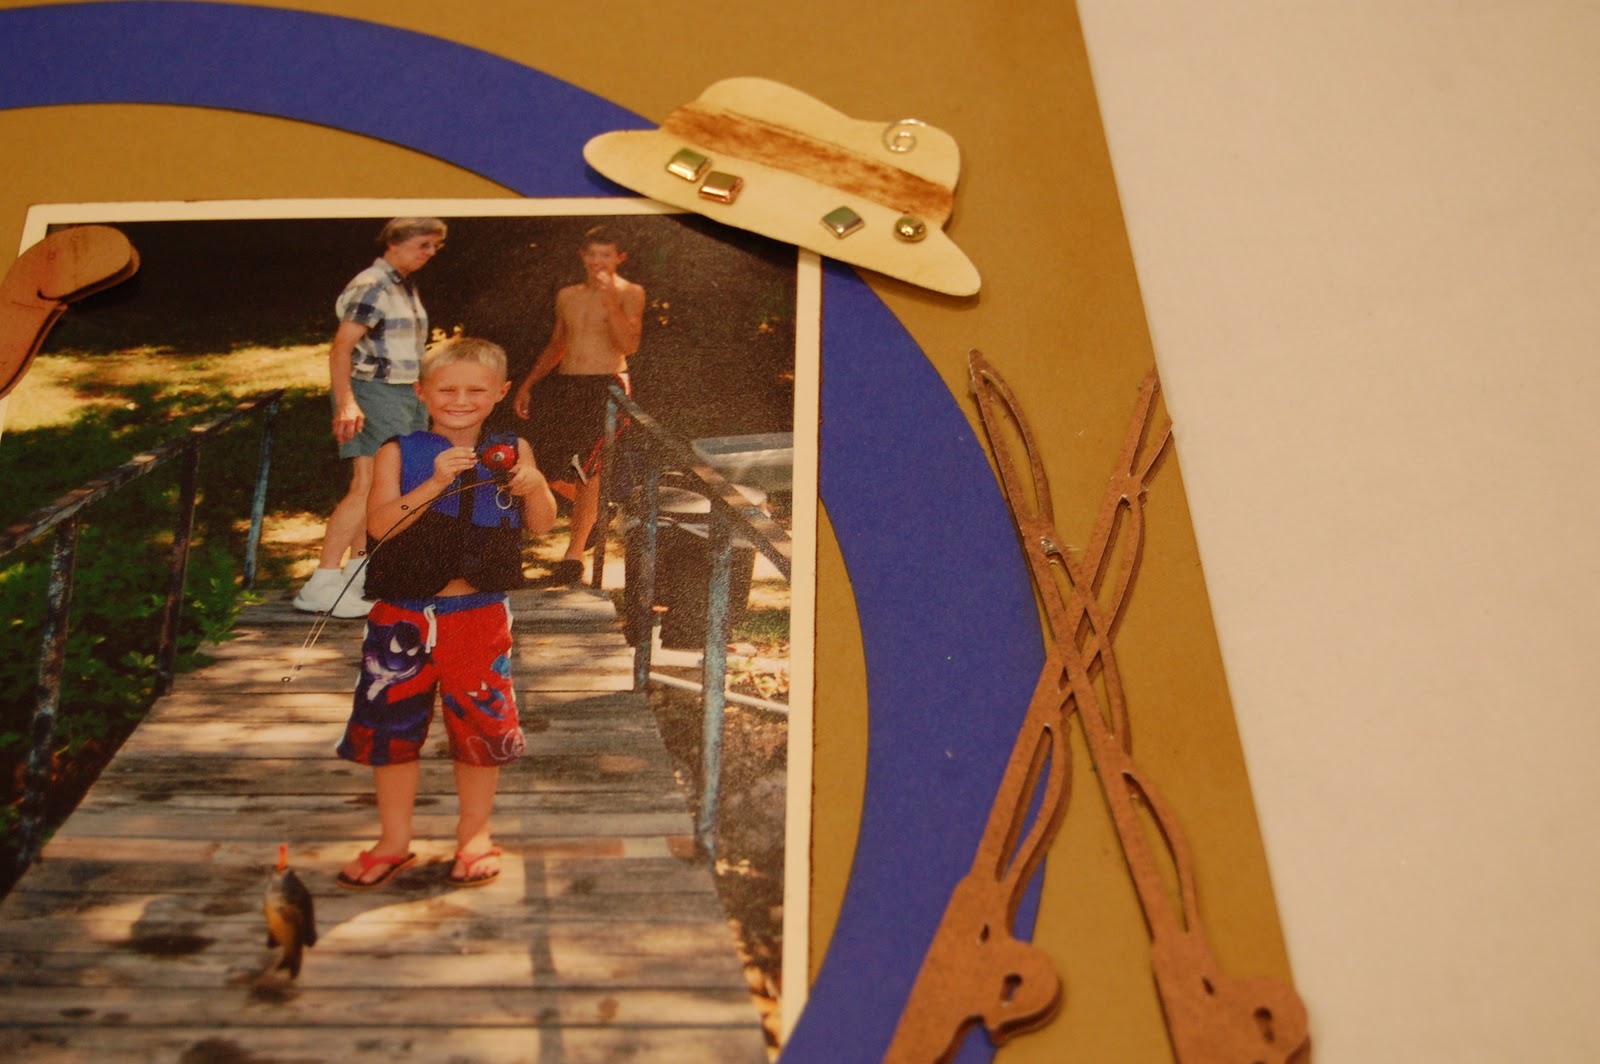
Lori here from ScrappinMyStressAway.  I am scrapping Tanner's pictures from our annual Ozark vacation.  One of his favorite activities is fishing.  Mike and I are not big into fishing, but my brothers are and Tanner loves spending time with them.  He was very proud that he caught two fish without a "worm" on his hook.  He was using a rubber worm.
When I work on several pages that all go together, I will sketch them out.  Once my sketch is complete, I grab my Gypsy and get to work!!

I started out with this circle frame from Doodletype and sized it to 10.65w x 10.18h.

I cut it out of blue cardstock and placed it on a piece of Kraft Brown cardstock.

Here are my photos. 

I opened another Layer on my Gypsy and put my title on the mat.  I used Batman font and shadow.  The capital letters are sized to 1 inch and the lower case letters are sized to .76 inch.  

I added the waves from Going Places.  The image is a waterskiier on the waves, but I used Hide Contour to hide the skiier.  I sized the waves to 6.23w x 4.99h.  I copied and welded the waves to create a border (total size is 11.5w x 5.84h).  I copied a second border.

I used black cardstock for the shadow letters.  I used red cardstock for LOOK MOM and orange cardstock for no worms!  I went back later and added three more exclamation points so I could use the periods in red in the title.

I cut out the waves in silver metallic cardstock.  I have a hard time matching the color of the water so lately I have been using silver and really like the look.

I inked the edge of the paper and the edge of the photo mats with Vintage Photo Distress Ink.

I saved the cut out piece from my shadow letters and used it as a template to line up my words.  I ran my letters through my 1 inch Xyron and stuck them down.

I gently pulled up my "template" and my title was perfect!  This is one of my favorite things about using my Gypsy!!

I grabbed some worms from Boys Will Be Boys and sized them to 1.35 inches.  I found the fish from Paper Dolls for Everyday, Life is a Beach and Boys Will Be Boys.  I sized them at 2.29 - 2.65.

I found fishing poles from Boys Will Be Boys and Paper Dolls for Everyday.  I ended up using the ones from Paper Dolls for Everyday sized to 4.99w x 4.37h.  I thought the fishing vest from Paper Dolls for Everyday would look like Tanner's life jacket, but it did not so I did not use it.  I did use the fishing hat from Paper Dolls for Everyday sized to 2.48w x 4.86h.

I used inks and makeup sponges to color my cardstock.


Here you can see the green, blue and pink in the fish.  They are cut out of the same paper as the waves but look different.  I pop dotted some of them on my page and adhered the rest flat.  This gives dimension.

I added some metal brads and a clip to the hat to resemble pins and a fish hook.  I inked and cris crossed the fishing poles.

I love to handwrite my journaling so I cut out a larger worm (4.04w x 2.53h) in cream cardstock and journaled on it.  I tucked it behind my photo.

The other worms are peeking out from behind the photos too!  I tied knots in some twine and ran it across my page.

Here is my completed layout.


I included a shot of the layout that will go on the page next to it.  Thanks so much Sheila for having me over today!

Monday, July 18, 2011

Christmas in July Gift Card Holders

Hi!! Here is a Christmas in July project for Sweet Sassy Diva!  I discovered this tag pocket from Going Places when I first got my Gypsy and did not have a ton of carts and figured out how to size it to fit a gift card.  Lucky for me I save everything!!  I still had the file from 18 months ago!
I sized the tag pocket at 7.03w x 3.53h.  I am able to fit four of them on a 12 x 12 mat.
I used this paper from the Deja Views Fair Isle Christmas Pad from 2010.  I like this paper because the pattern is subtle and doesn't take away from my little elf, and at the same time has some Christmas details in it.

I scored on the tic marks and used my ATG gun to glue it together.  The first time I made one, I glued the flaps to the outside ~ oops!
I found this cute little elf pulling a wagon from Jolly Holidays and sized him to 2 inches tall (2.70w x 2.0h).  I put him and his layers (copied 3 times) onto my mat.  It wasn't until later I realized that I cut out 4 tag pockets and only 3 elves!!
I loaded my paper (regular old cardstock)...
and cut them out.

I did not have skin colored paper so I cut out white paper and inked it with Stampin' Up Blush ink.

I put a PK face on!
I assembled all the pieces
I added some stickles to jazz him up a bit!

I cut out the "for you" from Doodletype at 2.29w x 2.05h.

Here is a cute little gift card holder for that special someone next Christmas!!