Copyright Information

Thank you for stopping by my blog! I hope you enjoy the things that I create and share! I do have a copyright on my original creations (see logo on my sidebar below).
If you create and post a creations based off of mine, please refer (with a link) back to my blog. Please do not use my ideas for files, profit or for contests. Thank you!


My Craft Goals for 2015

My Goals for 2015:

1. Update my goals for 2016 in January of 2016 :)
2. Maximize my crafting time!
3. Keep plugging away at scrapbooking photos!!
4. Learn how to Heat Press!!
5. Have fun!


Showing posts with label Wild Card. Show all posts

Tuesday, March 26, 2013

Thank You Window Card


Hello - I wanted to share with you a special thank you card that I made.

Tyler signed with Briar Cliff last week.  The admissions office sent us a card asking for a senior photo of Tyler to hang on their Incoming Freshman board so the staff can learn his face to his name.  I was very touched by this gesture.

I did not want to just send a photo, so I made a special Thank You card to go with it.


I started with this card shape from Wild Card sized to 5 inches.

I welded the base layer of a butterfly from Hannah Montana sized to 1.67 inches into the center of the opening.


I used a piece of patterned paper leftover from a travel album.


I put the butterfly layers on my mat also sized to 1.67 inches.  I added "Thanks" from Gypsy Wandering sized to 1.35 inches.


I cut them out of scraps of cardstock. 


I adhered the blue butterfly layer to the card.  I adhered just the center of the top butterfly layer and bent the wings a little.


I put the Thanks on the inside.


I love making window cards as they are pretty original!!


Here is Tyler signing.


Tyler is with his coaches, his future coach on the left and current coach on the right.  He earned a spot on the baseball team and we are very proud of him!!


Thursday, July 19, 2012

Thanks Window Card


If you are looking for Keira's Birthday Blog  Hop, please go HERE.

Many of you know that I broke my right wrist in May.  Since my cast came off, I have been going to physical therapy three times a week.  My time is almost done and I wanted to make a thank you card for the therapists who have helped me get my strength and mobility back.
I found this window card base from Wild Card and sized it to 4.05w x 8.23h.  I rotated it 90 degrees.

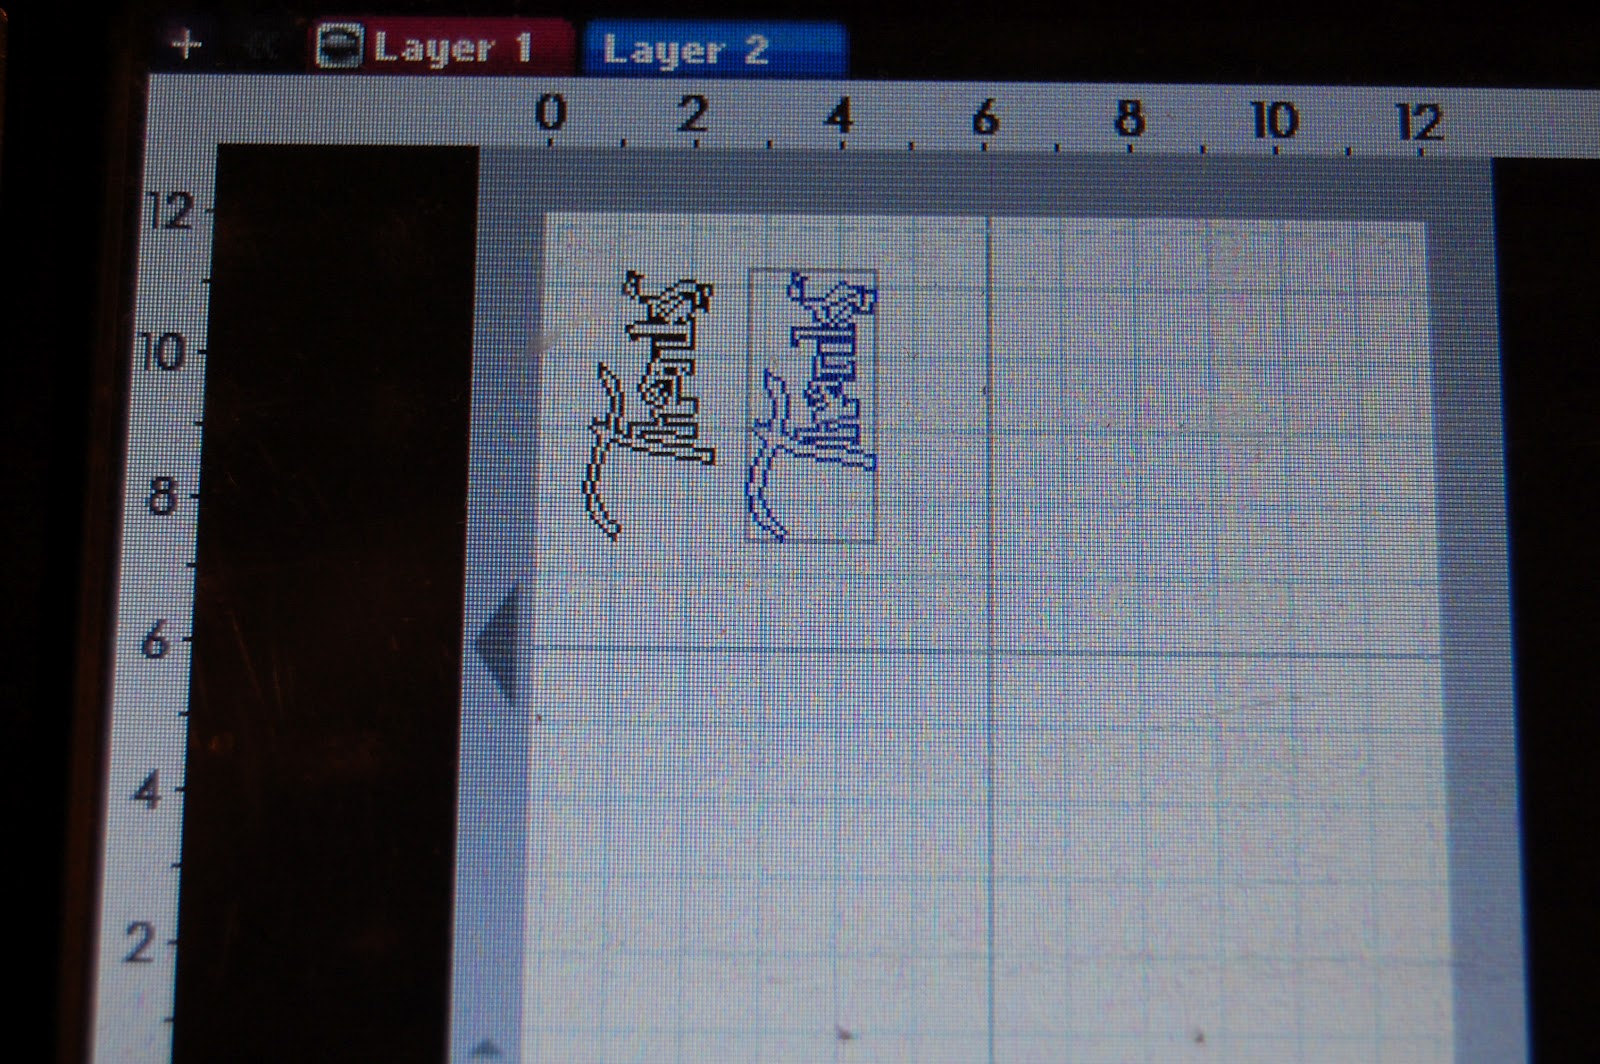
I grabbed this "Thanks" from Gypsy Wandering and sized it to 3.80w x 1.71h.  I welded it inside the window.  I copied the "Thanks" to another Layer.

I set up my file to cut two cards at the same time.

I selected a double sided cardstock to cut out the card base.  The inside is a light blue.

Here is Layer 2 on my Gypsy.

I cut out the "Thanks" in maroon cardstock.

I used Martha Stewart Lace Edge punch to create a border on the top of the card.  I used some flower pieces I cut out earlier with my Sizzix die.  I cut out pages from a book and inked the flower layers with Vintage Photo distress ink and fastened the flower together with a brad.

I wanted a semi-manly card as one of the therapists is a man.

I am linking this up at Sheila's BLOG for her Window Card Challenge!

Thursday, April 26, 2012

Rolled Paper Challenge - Mini Flowers

This week at Frosted Designs, our challenge is rolled paper.  I have wanted to make these tiny flowers for a while now and decided to give them a whirl this week!

I took 4 different flowers from Art Philosophy and sized them to 1 inch.  I put them into groups of 5 each in each 1/4 of my mat.  I loaded four colors of cardstock:  yellow, pink, red and purple.

I cut out the flowers but had a little trouble with the reds.  Luckily I cut out way more than I needed for this project!  Originally I planned on putting the flowers all around the square cut out, but later changed my mind.

I found this card on Wild Card and sized it to 5.5 inches.


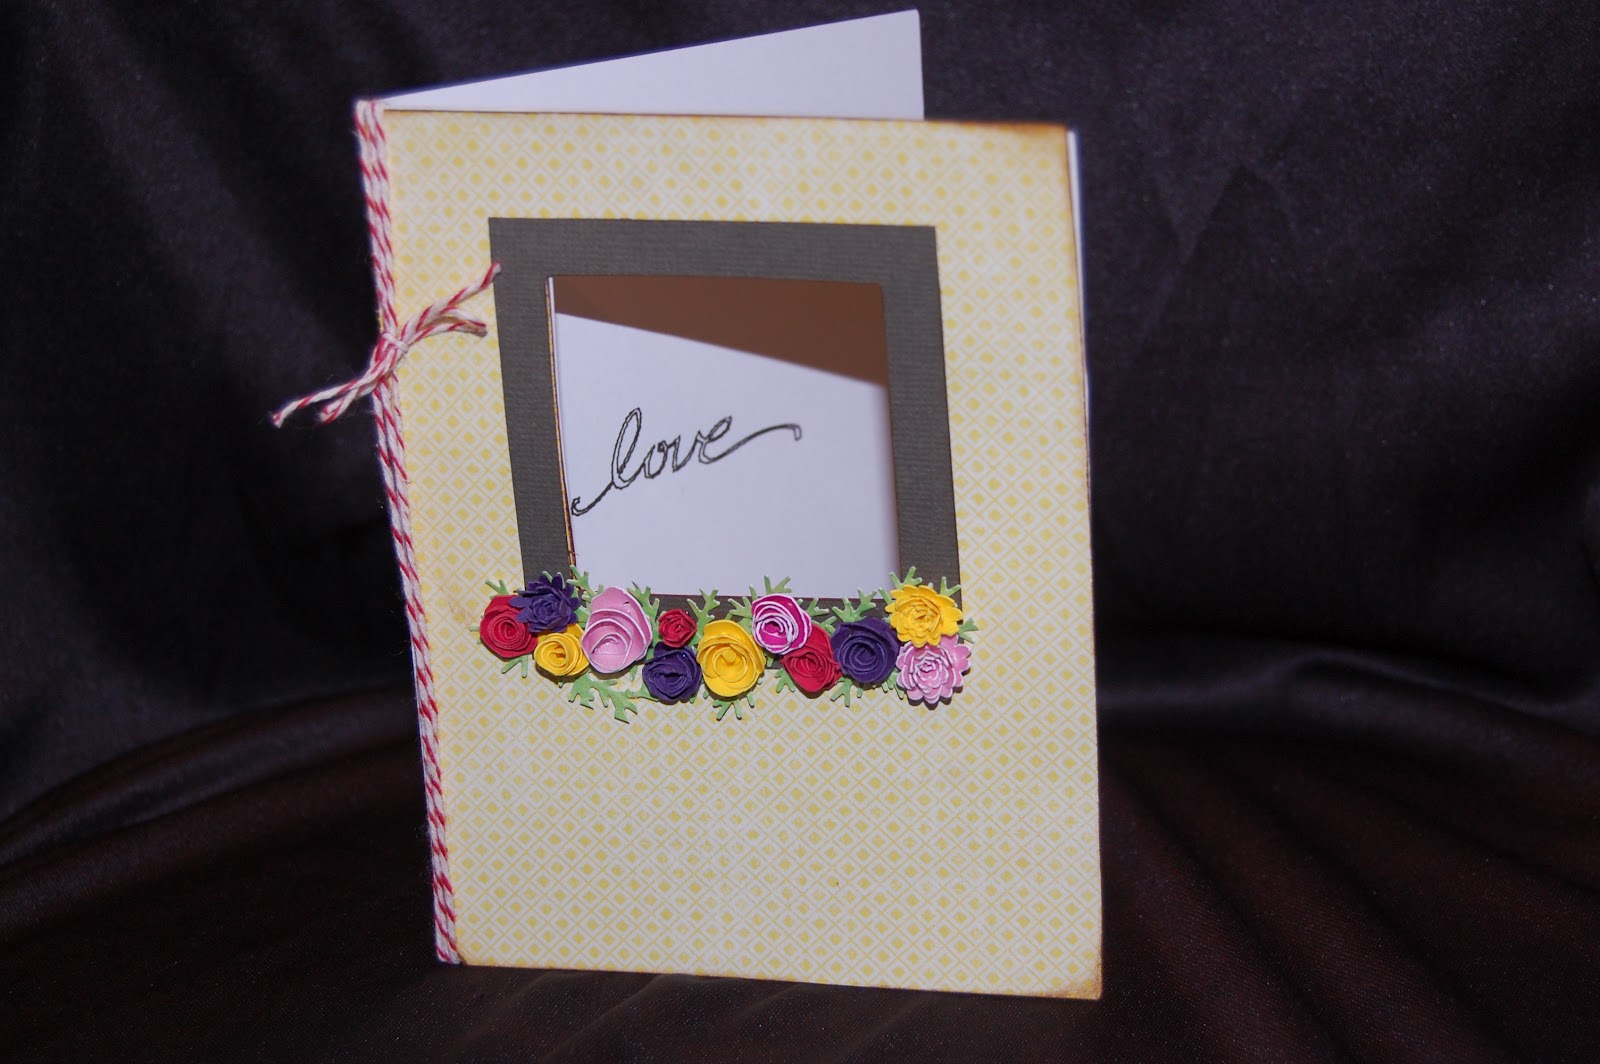
I flipped the card when I realized I wanted to draw the word "love" inside the card, showing through the opening.
I used this "love" from Home Decor sized to 0.61 inches.

First, I drew in "love" using my Chomas Gel Pen Holder and a black pen.  Then I returned to the design, changed layers to the card and put my blade back in.  I cut out the card.

I folded it over so the love shows through.
I borrowed this MS Branch punch from my friend Jenny and created my greenery.  Love this little punch but it has been discontinued :(

I used my paper quilling tool to roll up the flowers.  I glued them with Scotch liquid glue.

I decided to create a window flower box look.  First, I cut out another card in this yellow patterned cardstock, inked and adhered it to the front of the card.  Then I cut out the frame layer of the card in brown.  I trimmed the sides and top by 1/8" and inked it in brown.  I adhered the branches along the bottom and then used the liquid glue to adhere the flowers on.

I finished with a bit of twine along the spine (I am a poet)!

Here is my LOVE-ly window card!  I hope you join us at Frosted Designs with a rolled paper project of your own!

Friday, August 19, 2011

Interactive Card Hop ~ Easel Card

Hi there and welcome to the Interactive Card Hop!!


You should have arrived from Ashley's Blog!  If not, be sure to go to the BEGINNING so you don't miss anything!  I am a scrapbooker most of the time, so I took one of the easy cards!!!  I made this card for my husband for our 19th anniversary next month. 

Here is a complete list of the cards you will see in this hop:

TENT CARD - MONICA http://scraps2treasure.blogspot.com/
STAIR STEP - RACHELLE LARSEN http://creationsbyrachelle.blogspot.com/
LADDER - SHAWNEE PENKACIK -http://www.blessedonthebrightside.com
SHAKER – PATRICIA -http://pattyandcharlie.blogspot.com/
SHADOW BOX - ASHLEY SCRAPPINPINKPIGLET
EASEL - LORI ***you are here
SINGLE/DBL/TRIPLE TWISTED EASEL - SUZANNE http://www.cricutcraftingrammyblogspot.com/
T-Slider - Stephanie - http://www.alwayscrafting.com/
DBL SLIDER - Brittany http://www.britkdesigns.blogspot.com/
POPUP TWIRL - HEATHER http://www.operationcricutdesign.blogspot.com/
DIAMOND POPUP – ANGIE http://atuttletime.blogspot.com/
SIDE LADDER - BLUE CRAYONS http://craftingwithblue.blogspot.com/
POPUP ACCORDIAN -CHRISTEL - http://onescrappinsista.blogspot.com/
WATERFALL - RACHELLE LARSEN
http://creationsbyrachelle.blogspot.com/
WIPER CARD - TERESA

I don't know about you, but I can't wait to see these cards!!


I had a little help with the design thanks to Splitcoast Stampers (LOVE THEM)!!  Click HERE for a link to Splitcoast Stampers Easel Card Instructions.

If you want to see my very first Easel Card, you can go HERE!

I started out with a 4x4 square on Layer2 because that is the size of the card face that I wanted to fill up.  I closed the "eye" on Layer2 so it would not show in this photo and confuse anyone (especially me)!!

Next, I went back to Layer1 and added this bride and groom from Wild Card sized at 2.36w x 7.48h on my Gypsy.  I copied a second couple.  I found the rings on Designer's Calendar sized at 1.50w x .72h.  I found the numbers on Base Camp and sized them to .61inches.  I welded the numbers and rings and rotated them 90 degrees.

I welded the numbers and rings first, then rotated them to see if they fit my 4x4 square.  I sized them to fit the space. 


Here is the years welded to the rings.

After I cut out the bride and grooms, I realized that if I layered the black paper groom on top of the white one it would look better to see the white shirt through.  So I copied the couple on another layer and used the Hide Contour button to hide two inner cuts on the groom's chest/stomach area.


Much better!!

I cut off the bride in black.  If you want to get more detailed, you can cut out an additional bride in the color of your hair (mine would be yellow) and then layer that on.

I ran my groom and the dates/rings through my 1" Xyron.  I always try to remember to rub the images to cut down on glue buggers (extra balls of adhesive).

Here are the bride and groom.

Next, I score my 4 1/4 x 8 1/2 piece of cardstock at 4 1/4 and 6 3/8 and fold with the bone folder.

I used a piece of paper from this awesome 8x8 paper pad by DCWV.

I put a strip of paper on the bottom of the card and added some diamonds (sticky back crystals) to the ring.

I used pop dots for my bride and groom.

I added a little silver ribbon, some mini paper flowers (found in the $1 bin at Michaels) and some silver and pearl flowers from my stash.

I cut some pieces of a pearl border and added some crystals for fun.  The big pearl acts as a stopper for the card.

Here is a side view.  We are laid back people (he he).

Here is my anniversary card for my wonderful husband Mike who lets me craft just about any time I want to!!

No blog hop is complete without a little candy along the way!!!


All you need to do to qualify is #1 be or become a follower or email subscriber, #2 share a favorite anniversary (of any kind) memory or gift you gave or receive.

Thank you for your kind words ~ they keep me crafting!!!  Your next stop on this hop is HERE!!

Saturday, June 4, 2011

All About Dads ~ Blog Hop

Welcome to the All About Dads blog hop.  If you are just getting started, please to HERE to begin the hop.  If you arrived from Kathy's Blog, you are in the right place!

In our family, everything revolves around sports.  I am the only girl in the group and the only non-athlete!!  Thank goodness for my craft room!  I decided not to fight the sports theme and make my husband a Penant Card for Father's Day.


I used the penant from Baseball and #1 DAD from Varsity Letter.


This is what happens sometimes when I use cheap, thin paper and Calligraphy Collection cartridge.

I opened a new layer by tapping on the + in the top left corner.

I highlighted the #1 DAD and sentiment (turned them blue).

Went back to my new Layer and tapped on Copy/Paste from the Advanced Menu.  This way I only will cut out the parts I need to and not waste paper.

I load my paper back into the cricut.

This time the #1 DAD cuts fine, but the sentiment is chewed up again.  Time for a different font!!

I erased the cuts I just made and added a new sentiment from Wild Card.

I used the same paper, so I just made sure the new sentiment was moved over a bit.

I adhered the sentiment inside the card.  I scored the back half of the card 1/4 inch from the top.  I punched two holes in the side and ran baker's twine through them.


Here is another look at my Father's Day card.  Of course, I have blog candy here in addition to the Blog Hop Candy cricut cartridge (see below).

In order to qualify for this Tim Holtz Grungeboard, you need to #1 be or become a follower, #2 leave me a way to contact you if you are my winner, and #3 tell me one thing you love about your dad, father fiugure or grandpa.  I have so many memories of my Dad and his boat....I love that he used to let me drive it when I was little (sitting in his lap of course)!

Your next stop on our hop is DDs Crafts.


Don't forget to visit all of the stops to be eligible for the Cricut Cartridge A Child's Year.
Here is a list of the participants in our hop in case you get lost:
 Sher
Kathy
Lori **YOU ARE HERE**