Copyright Information

Thank you for stopping by my blog! I hope you enjoy the things that I create and share! I do have a copyright on my original creations (see logo on my sidebar below).
If you create and post a creations based off of mine, please refer (with a link) back to my blog. Please do not use my ideas for files, profit or for contests. Thank you!


My Craft Goals for 2015

My Goals for 2015:

1. Update my goals for 2016 in January of 2016 :)
2. Maximize my crafting time!
3. Keep plugging away at scrapbooking photos!!
4. Learn how to Heat Press!!
5. Have fun!


Showing posts with label Doodlecharms. Show all posts

Friday, June 21, 2013

Watermelon Card (FD Polka Dot Challenge)


Hello!!  I made a cute summery card today for my project!!


This week's challenge at Frosted Designs is Polka Dots!!  All you need to do is create a project that includes Polka Dots on it and you can link up for a chance to win some Copic Markers!!


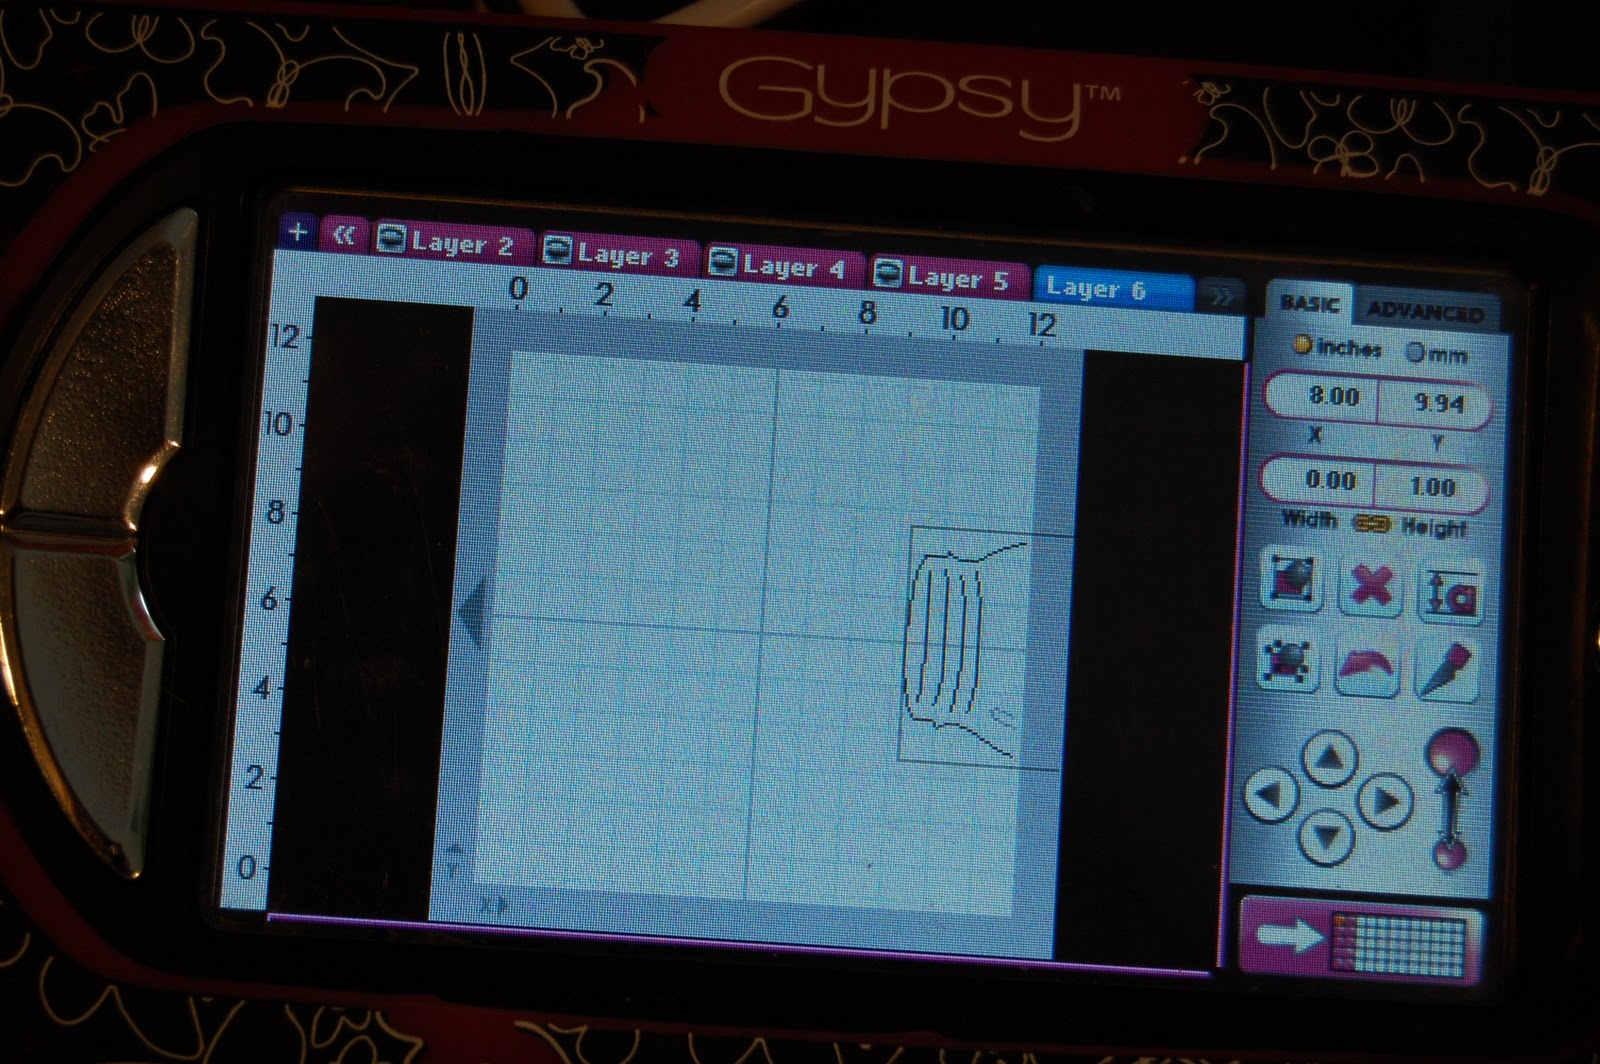
I pulled out my Gypsy and created a window card.


This card base is found on the Going Places cartridge.  It doesn't really fit with all of the vehicles, but I sure use it a lot!!  For this card, I sized it to 4 inches

I used the watermelon from Doodlecharms.  I welded the shadow piece of the watermelon (sized to 2.56 inches inside the frame of the card.


When I make a card, I usually make several of the same design to donate to my friend's card drive.  I cut out the watermelon pieces sized to 2.56 inches.  Note:  I did not use the seed cuts and forgot to hide them.  

I cut out the pieces in green and red cardstock from my stash.


I inked the edges and adhered the pieces together.


I added some stickle seeds.  I carefully made a dot and pulled the tip to make a tear drop shape.


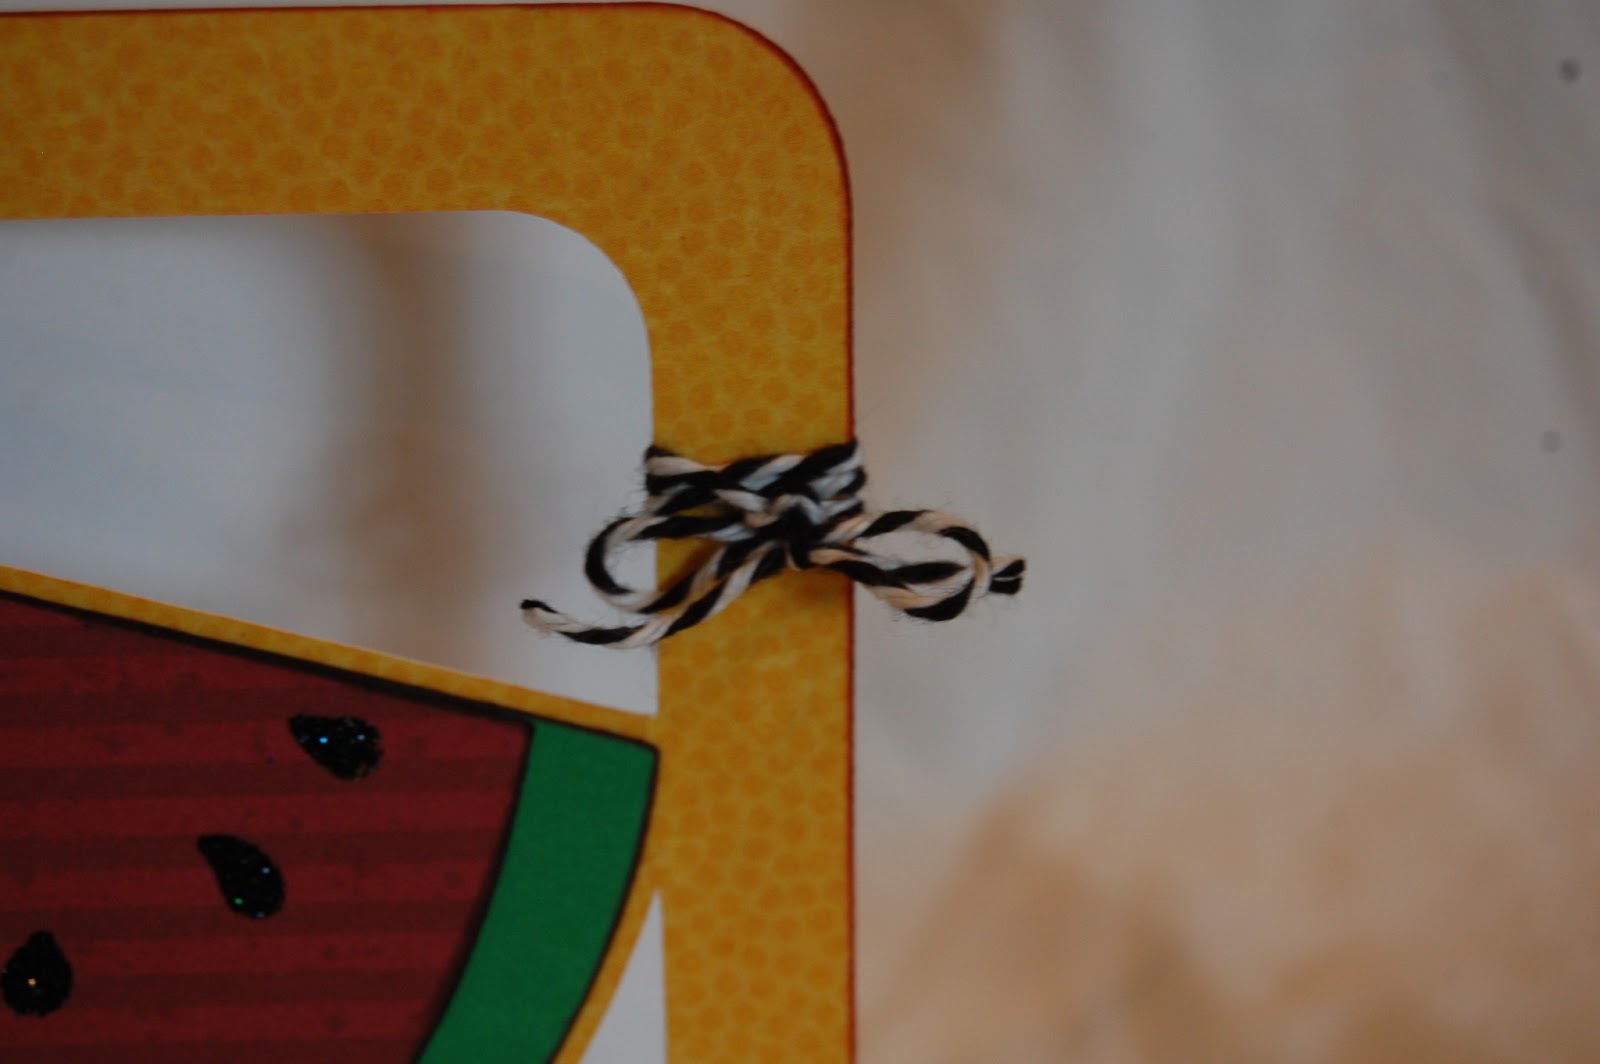
I tied a bit of twine to the edge.  Here you can see my card base is cut out of yellow polka dotted cardstock that is white on the back side.


This card is going to my friend Pam who is recovering from surgery.  She will not be able to craft for a while and I hope this cheers her up a little!!!

Thanks for stopping by and I hope you link up your polka dot project with us!!!

Friday, June 8, 2012

Watermelon Mini Card


Welcome to My Cricut Craft Room's Picnic Blog Hop!!!  We have a variety of Picnic inspired projects for you!

If you found me first, please go to the BEGINNING so you don't miss anything.  Below is a complete list of blogs in the hop!


When I think of a picnic,  I think of juicy slices of watermelon ~ yummy!!

I wanted to make a window card with a juicy slice, so I started with my Gypsy.

On the "card" function key in the Going Places cartridge, I found this square frame card.  I sized it to 3 inches tall.

I found this watermelon from Doodlecharms.  This watermelon fit the inside cutout area better than the other watermelons I found.  I sized the shadow of it to 1.92 and welded it inside the frame.

I added the watermelon layers to my mat, all sized to 1.92. 

I used cardstock from my scrap file to cut out my pieces. 

When I cut out the red layer I realized there were no seed cut outs.  I re-cut the red layer and trimmed off the rind.

In order to use patterned paper on the front of my card, I copied the card on my mat and positioned it off the mat.  This allowed me to cut just a little more than the front of the card.  I trimmed the extra off and adhered it to the front.

I inked the green layer with green ink.

I adhered the layers on the card.

I put glossy accents on the seeds and tied twine around the left side.

What is your favorite picnic food??

Thanks so much for stopping by!!  Your next stop is the Awesome APRIL!

Monday, January 16, 2012

All About the 70s Blog Hop Day 2

Welcome to Day 2 of the All About the 70s Blog Hop!


70's Hop

Welcome to the "All About the 70's" Blog Hop!!
We're so happy you could join us for this super-fun hop showcasing cards, layouts and projects that feature anything and everything related to the 70's!!   So pull out your bell-bottoms and peace signs, and join us for the FUN...  You'll find an array of ideas throughout this hop -- From decorations to gift ideas and more, we hope you'll enjoy each and every GROOVY project along the way!!  This is a TWO-DAY hop, so be sure to check it all out (besides, we have a FAR OUT prize for a random someone who visits and comments on each stop for each day!!)... We can guarantee some psychedelic excitement for this event... So let's get hopping!!  If you've hopped over from INSERT NAME/LINK of person BEFORE YOU, then you are in the right place!!  If you've just popped in to visit my blog or are reading this via email and you'd like to join our FUN, then please CLICK HERE to start at the beginning with Lynda's blog...
 *** 70'S HOP DAY ONE (January 15):
70'S HOP DAY TWO (January 16):


For my project today, I created a layout about a Time Capsule our class buried in 2nd Grade.  We dug it up  in 6th grade.  I only wish I remembered some of the things we put in it!!!


I wanted a brick background and remembered that the Batman cartridge had one.  I cut out the shadow and  the layer at 8.70 inches.

The bricks in the background of my photo were darker so I grabbed my inks.

I used Walnut Stain and Vintage Photo to darken up the brick and give some dimension.


I found this jar from Doodle Charms and sized it to 7.71 inches.  I hid the inside cuts with Hide Contour and copied and pasted a second jar and hid everything except the highlight detail.  I cut both out of vellum.

I made one more copy and moved it off the mat for the jar lid.  I cut this out of white cardstock to match the  jars in the photo.

I used Hello Kitty Font Shadow letters for my title.  I sized them at 1.12 inches.

I cut out the letters in black cardstock and saved the negative piece to use as a template.  I ran the letters through my Xyron.

I adhered the letters using the template as my guide.

I peeled off the template and my title was perfectly lined up!

I journaled on my jar lid after I inked the edges.

There is a huge macreme wall hanging in the background and I just had to add some twine to tie that in (no pun intended).  If my memory returns of the items we put in our jar, I will add those.

Thanks so much for stopping by!!

Your next stop in the hop is Rachel.

Monday, September 6, 2010

A Sassy Apple A Day!

Hello!!  I am a Guest Designer on Sassy's BLOG again today.  My Gypsy is home and a bit worn out as I have been designing like crazy!!  I have been so busy with back to school crazy things and all my teacher kids are back in my daycare so I don't have as much craft time during the day.  Too many projects....so little time!!

You know what they say....an apple a day keeps the doctor away!!  Well, this apple is just too cute.  I have seen several projects lately using pages of books and I couldn't resist.  Since I used the actual pages from a book (not copies) I did not want to include this apple in a layout with photos.  I decided to make a card for my son's preschool teacher.
I used the apple from create a critter.  I made the largest apple 3.47 inches tall and the others 3.24, 3.0, 2.76 and 2.53 inches tall.  I cut out the largest apple in green and red.
I used a Thesaurus that I found at Wal-Mart for $1.00 for the smaller apples.  I set my Speed at 3, Pressure at 4 and Blade at 5 (I normally keep my blade at 6 all the time except when cutting vinyl).  I also tried to line up the apples where the words on the page were.

The heights of the smaller apples are:  2.29, 2.06, 1.82, 1.59, 1.51, 1.35 and 1.20 inches.
I cut off all of the red stems and book page stems.  I glued the largest red apple onto the green apple.
I used my Fantastix and brown ink to ink all of the edges.
For the red apples, I used my Tombow adhesive to glue a strip down the middle of each apple.
I bent the edges a bit so the apple had some dimension.
Here are the 5 layered apples.
For the remaining apples, I put adhesive on the edges.  I did not want adheisve in the center. 
Here are the layers all together.
Before I attached the inner apples, I sewed them together.  Had I put adhesive in the center it would have gunked up my sewing machine needle.
Finally I glued the inner apples to the outer apples.
I used watermelon seeds from Doodlecharms for the apple seeds.  I used Hide Contour to erase the watermelon shape.
Then I rotated the image and put it on the smallest apple.  Then I adjusted the size.  I cut out two sets of seeds.
I went back and cut out another set of apples and thought you might want to see the book I used and how I positioned the pages on my mat.
Now the rest of the card!  I used Gaffer Tape from 7 Gypsies that I have had forever and have never used!  I cut a square of brown star paper from Creative Memories (it has the same design with blue stars on the reverse side).  I cut out "thank you" in yellow from Nursery Rhyme.  I tied a bit of jute cord to the stem of the apple.
And here it is again!  I just love this layered apple look and will be using this one again!  I hope you like it!