Copyright Information

Thank you for stopping by my blog! I hope you enjoy the things that I create and share! I do have a copyright on my original creations (see logo on my sidebar below).
If you create and post a creations based off of mine, please refer (with a link) back to my blog. Please do not use my ideas for files, profit or for contests. Thank you!


My Craft Goals for 2015

My Goals for 2015:

1. Update my goals for 2016 in January of 2016 :)
2. Maximize my crafting time!
3. Keep plugging away at scrapbooking photos!!
4. Learn how to Heat Press!!
5. Have fun!


Showing posts with label Heidi Swapp ink. Show all posts

Monday, October 27, 2014

Pick of the Patch

Today I am featured at Frosted Designs.

I just love fall - it is my favorite time of the year!  We went to the Pumpkin Patch last week and my friend captured this picture of Tanner picking his pumpkin.  I wanted to showcase this photo all by itself so I grabbed papers from the Garden of Abundance kit. 

I realy like the colors in the flowered paper - they look similar to the brown and green in the pumpkin patch.
I needed a pinch of orange so I grabbed an orange gelato and colored around my photo mat and title mat.  I spritzed my paper towel with water and blended the orange around the edge of the paper.
I used my Silhouette Cameo to design and cut the tree, pumpkin border and title.  I just love that tree! 
I inked the pumpkins a bit with some moss green ink and then spritzed them with Heidi Swapp gold color shine. 
Look at that gold on these pumpkins - just gorgeous!!  I cut some of the pumpkins off the border and pop-dotted them on the page.
I added the wood heart to the tree trunk and a bird in the branches.

Enjoy your fall and don't forget to create and share your stories!!


 photo Lori_zpsea64f050.jpg

Friday, June 27, 2014

Born to Fish

This week at Let's Scrap, I am hosting a Get Inky Challenge.  Tanner went fishing with some friends last summer and caught a fish.  He was so excited!!!

I really love the green colors in the picture, so I inked my paper and wood chips with dirty Martini Dylusions Ink and Heidi Swapp Gold Color Shine to get this pretty green/gold color. I used a crafters workshop diamond stencil to ink my paper.
I used a stamp pad to ink the edges of the tag.  I used Dylusions Dirty Martini Ink and Heidi Swapp Gold Color Shine to ink my paper. 

I cut out Born to Fish from the Silhouette online store using my cameo and black cardstock.
I love the bee! 
I had been waiting to use these wood snails!!
I love the nature feel of this layout!!  I used the kit Beauty of Nature for this layout!!  If you are interested in joining my challenge check out Let's Scrap!!

I got most of the supplies for this layout at Frosted Designs:


Thursday, April 3, 2014

What's In A Title?

Today I am featured on the Frosted Designs Blog!  Telling Your Story Through Scrapbooking is a monthly series I share.  I offer information and guidance to help scrapbookers from Beginners to Advanced to Haven't scrapbooked in a while scrapbookers!!!  I hope that I can inspire you to create your stories!!

Last month we talked about the Joys of Journaling.  Today we are talking about Titles.
What is in a title?  Well, I know I have several titles:  Wife, Mom, Sister, Sister-in-Law, Daughter-in-Law, Aunt, Miss Lori, Friend, Neighbor, Baseball Mom, Cousin, Instructor - you get the picture!!  Each situation calls for a different title, just like each scrapbook layout (story) calls for a different title.  You need to ask yourself ~ How do you want to title your story?


Take any photo (or set of photos from one event) and you can use several different titles.  The title depends on how you want to tell the story of this/these photo(s).  If your photos need several pages to tell the story, only the first page needs a title.  Here is an example of several titles for a birthday layout:

If you can't think of a title that fits the photo or the space you have left on the layout, it is time to get out of your box!!

Titles can be long or short, funny or serious, borrowed or original.  Titles can be a single word or headline, a mini headline or a set of title and subtitle.  There are no rules, just guidelines!!
Titles can be quotes, movie or song titles, song lyrics, a question, or a play on words.  I find inspiration everywhere for titles:  Pinterest, TV, magazine articles, nursery rhymes, stores - you name it!  I keep a notepad with me for journaling notes and title notes because you never know where inspiration will hit!!!
The photo I am using today is a slefie of Tanner and I at Disney last fall while riding the Dumbo Ride.  He loves when we take selfies together!!
I had many thoughts about what my title could be for this layout - Selfie Buddies, Riding Dumbo (again), Best Day Ever, I adore his smile...I cherish his hugs...I admire his heart...but most of all.....I love that he is my son, and So there is this boy....he stole my heart....he calls me Mom.

Last month I posted about journaling and using your own handwriting on your layouts (HERE) and I wanted to add my handwriting to my title this month.  I chose the last option so I could handwrite everything except He Calls Me Mom.

For my layout today, I used Heidi Swapp Teal colorshine to color my background paper.  I used Home Tweet Home - Word Play doublesided paper from ADORNit ~from the Love is in the Air kit.  I cut two pieces to layer under my photo.  I used the flowers and Tim Holtz Picked Raspberry Distress Paint to paint the edges of my papers and photo from A Moment In Time kit.  I used Picked Raspberry Distressed Ink Pad from the Sades of Spring kit. I cut "He Calls Me Mom" and the xoxo border with my cameo.
I wrote my handwritten part on a scrap paper so I can make sure it will fit on my page.  I decided not to write it all on one line because it would stick out too far.  Instead I wrote each segment on a line.

I hope you find titles a little more fun after today!!  If you need some help or ideas on Handwriting, please check out Sandee's video Typography and Lettering!!  Sandee has a weekly video on the blog called Sundays with Sandee!
I encourage you to practice handwriting part of your titles.  Join us here on April 11th for my next challenge (handwriting is a big part of it plus some ink/mist of your choice)- I would LOVE to see your layouts or projects!!!

Frosted Designs has a sale going on through April 6, 2014!!


 photo Lori_zpsea64f050.jpg

Wednesday, February 19, 2014

100th Day of School Layout

Hello - I am pulling double duty today!!  I am featured at She's A Sassy Lady as well as Let's Scrap.  This week at Let's Scrap, our challenge is a card sketch.  I rarely make cards, so I turned mine into a scrapbook layout.
Here is the sketch.

For Tanner's 100th Day of school, his teacher made 100 pancakes! 
I created a title using my cameo and a font from my computer. 
I used circles to represent the pancakes.  I sprayed the background paper with Heidi Swapp teal color shine.  I added a strip of paper and some twine.

The paper is from Frosted Designs - Hey Kid!
I am so grateful the teacher sent me this picture as volunteers were not needed.  The kids had such a fun day!!

If you are looking for some scrapbook motivation, join us at Let's Scrap.  We provide sketches and tons of inspiration!!!

Thanks for stopping by!!

If you are looking for my Constant Change Giveaway, please go HERE.

Friday, February 14, 2014

Love is.... (A Challenge and A Tutorial)

Happy Valentine's Day!!!
Today I am pulling double duty - my layout is part of the challenge at Frosted Designs and I am including a tutorial for Let's Scrap.  I am on the Design Team for both groups and happy that I could make this work for both!!

The Challenge is "Love Is..." using the following colors for inspiration:
I used yellow, blue and pink in my layout - very different from most of my Disney Layouts!!

I also followed this Let's Scrap sketch:


For my Let's Scrap Tutorial, I am going to show two techniques for putting titles/words on your project.  It is easy to pick the words you want to use, but not always easy to get them on your project straight and centered.  Before my first Cricut machine, I purposely would put my letters on my layout slanted back and forth because I knew I could not get them on perfectly straight!!

For my first example, I used my Cameo.  I lined up my letters and words on my screen so they cut out the way I want them to appear on my project.
I cut the words at the bottom out of yellow cardstock.
After I pull the paper up....
I have a ready-made template!
I simply lay my template on my page right where I want it.
I use painters tape to hold it in place.  I run my letters through my 1" Xyron to turn them into stickers.  Sometimes I use my fine tip glue pen.
Then I put the letters right in their cut out spots.
Once the first letter or two are in, your template will stay in place.  When the letters are all in, gently pull up the template.
Here is the first line - looks just like I wanted!

Normally, I continue on but I realize that not everyone uses an electronic die cutter with software, so I will move onto technique #2.
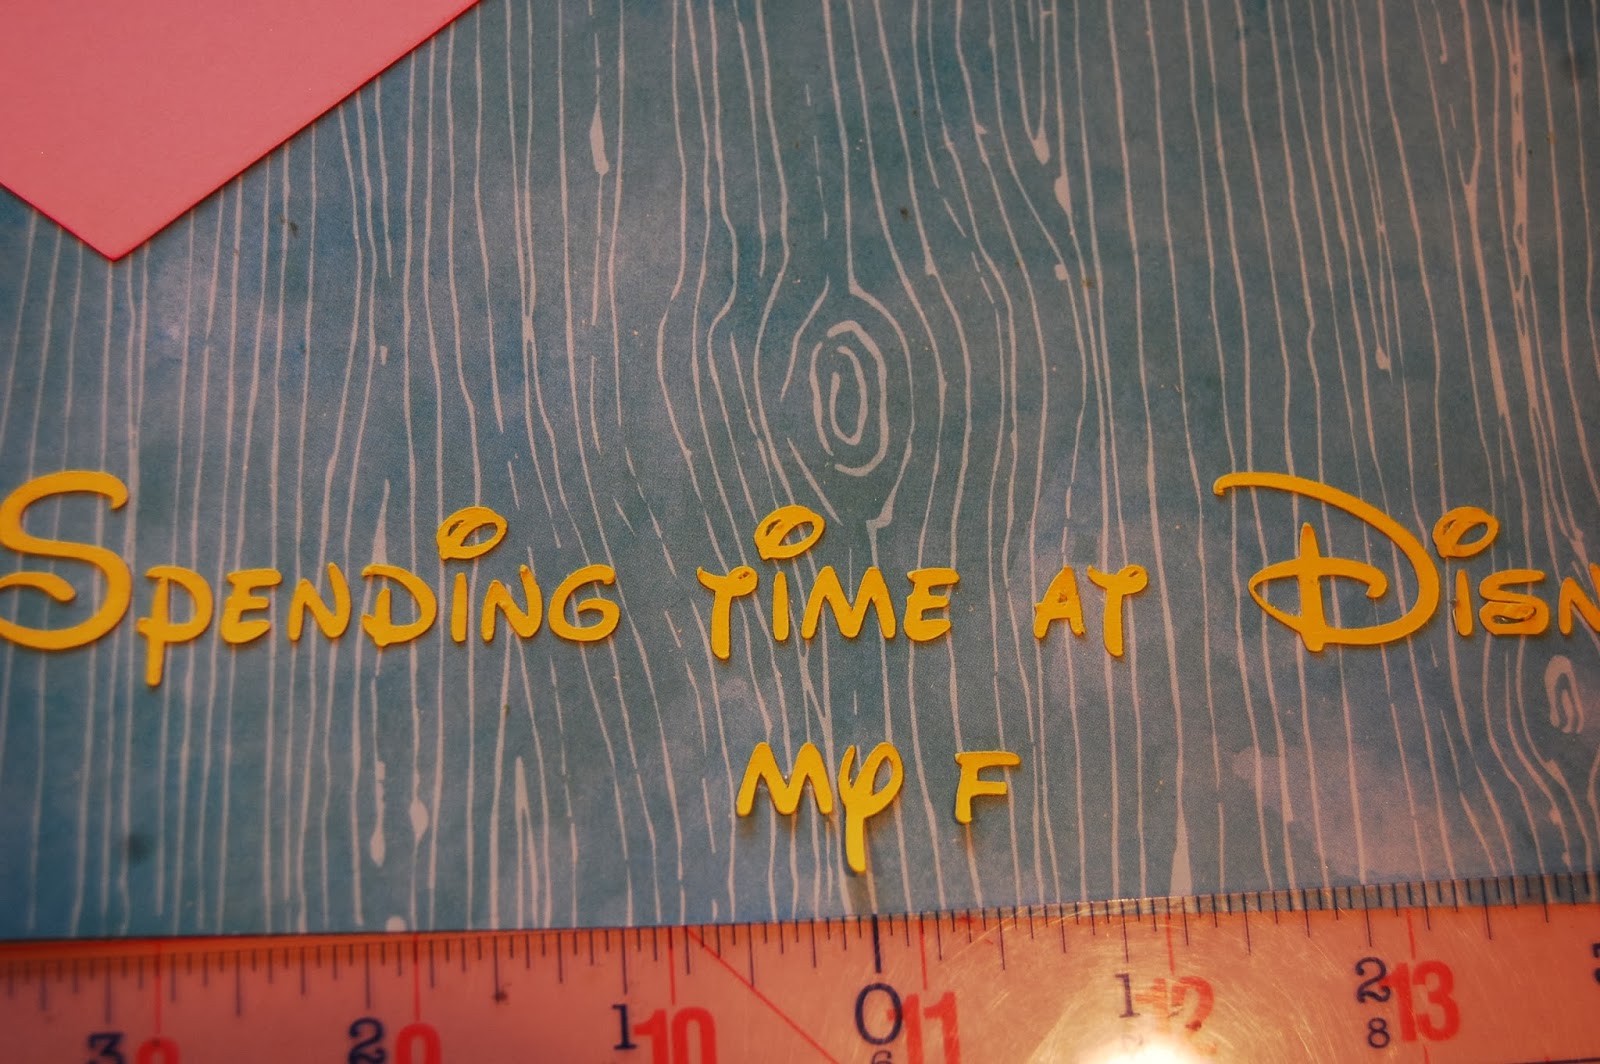
I have a centering ruler that works well with stickers or cut letters that are not nicely arranged on the paper.  Once you know your designated space for a title (or sub-title) you can start at the center and work your way out.
Once you find the center of the space you are putting your words, start in the middle of the title/sentence and put the bottom of the stickers right on the ruler.  I will say that the larger the letters you have, the easier it is to do this!!

Since I am adding the second line, I find the center point of the first line to determine my center.
Gently bend the ruler so the top of the stickers touch the page.  With one hand on the ruler, the other hand holds the letters in place as you gently pull the ruler away (my other hand was on the camera in this shot!!).
This way is a little awkward for me and does take practice but it does help line up the letters straight - something I can not do on my own!!
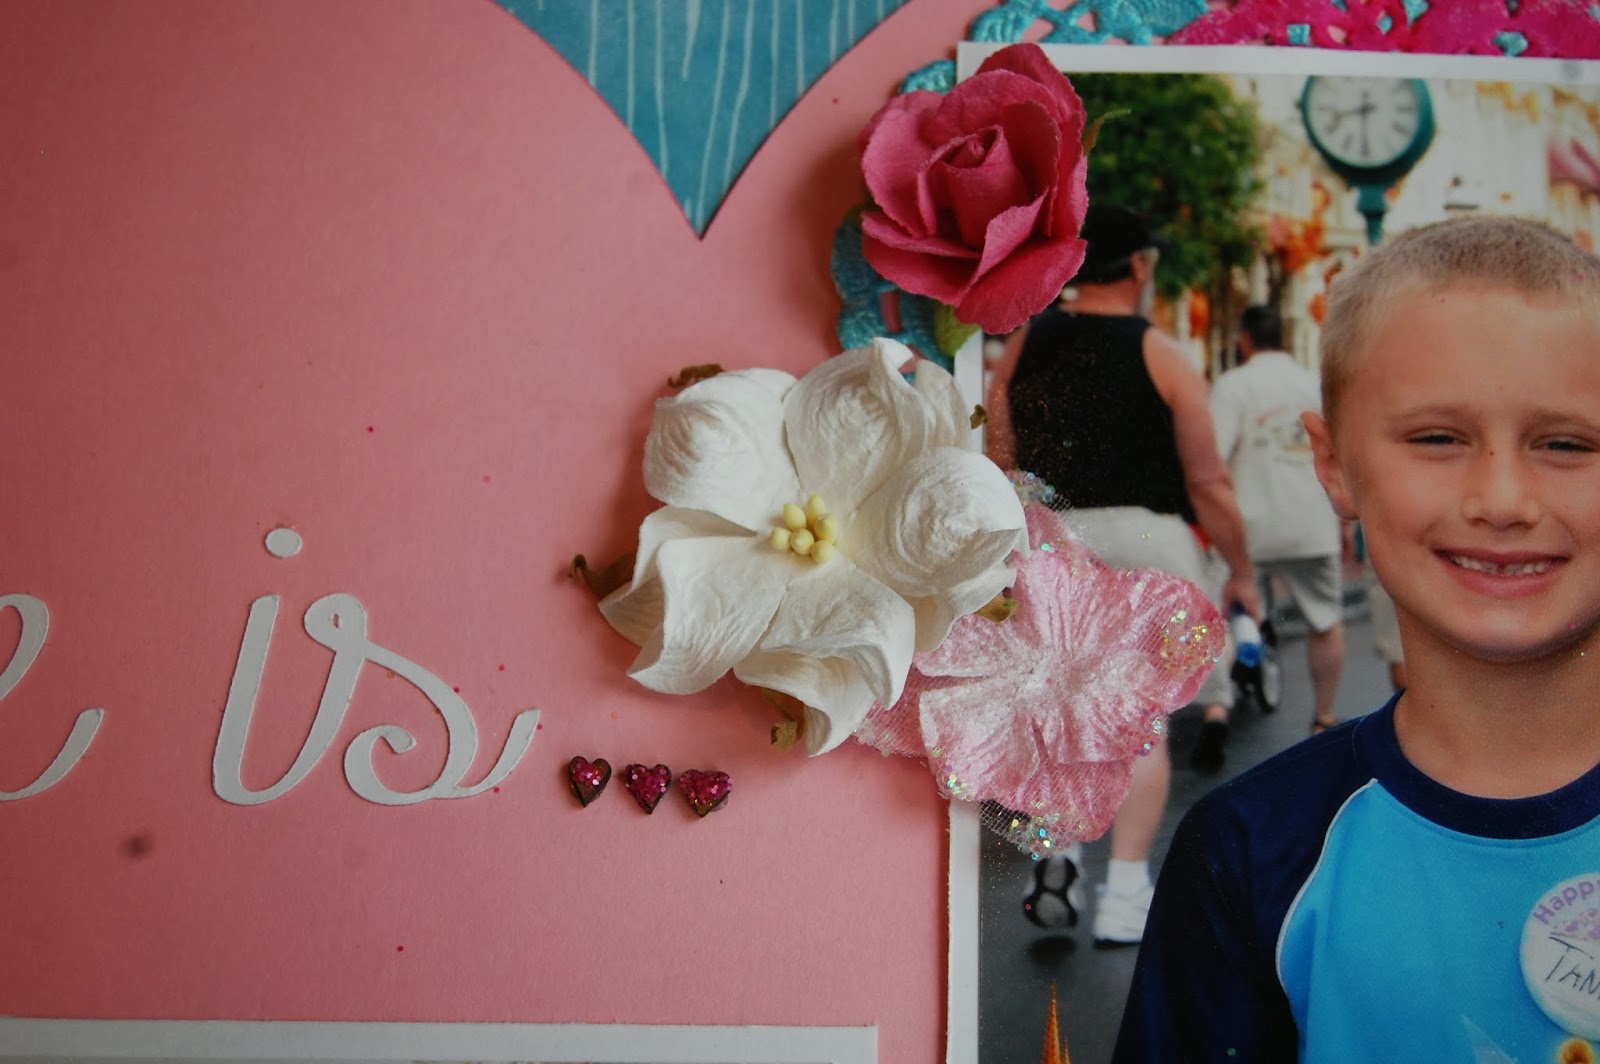
Here I am using the centering ruler to determine the center of my space.  Then I can adhere the "Love is" in place.
Once I got my words on my layout, I added the rest of my pieces.
I inked some doilies with Dylusions Ink (Bubble Gum) and Heidi Swapp mist (teal).  I added some ribbon behind the heart.
I take so many photos at Disney that I had to include this camera paper clip.  I glittered inside the heart using glossy accents and picked raspberry distressed glitter .
I added these flowers and wood hearts with some picked raspberry distressed glitter adhered on top.
Happiness to me is spending time at Disney with my family.  We are currently planning a trip next December and I am super excited!!!  We have never been to Disney at Christmastime!

I hope this tutorial helps!