Copyright Information

Thank you for stopping by my blog! I hope you enjoy the things that I create and share! I do have a copyright on my original creations (see logo on my sidebar below).
If you create and post a creations based off of mine, please refer (with a link) back to my blog. Please do not use my ideas for files, profit or for contests. Thank you!


My Craft Goals for 2015

My Goals for 2015:

1. Update my goals for 2016 in January of 2016 :)
2. Maximize my crafting time!
3. Keep plugging away at scrapbooking photos!!
4. Learn how to Heat Press!!
5. Have fun!


Showing posts with label Graphically Speaking. Show all posts

Friday, April 12, 2013

Travel Mini Album


This week at Frosted Designs, our new 2-week challenge begins.  Our theme is TRAVEL!


I covered the 6x6 chip board pages with paper from Heidi Swap - No Limits paper pack.


I used several cuts from my cricut.  Many were from Going Places.  

Enjoy life is from Graphically Speaking.

I created a pocket by adhering three sides of a 6x2 piece of paper to the bottom of the page.  I used my ATG gun.


I put a 6x6 square on my mat to represent the page.  I overlapped a 6" star from George and GROUPED (not welded) them together.  I wanted the two tips of the star cut off.  

I copied and flipped another set so I could cut out the cardstock and paper for both sides.


I love this star page!!  I used the negative piece around the Road Trip! and backed it with light blue paper and tucked a ticket behind it.


I added a tag and made another pocket.


I added the age old question to the back - Are we there yet??

I finished off the rings with some ribbons.
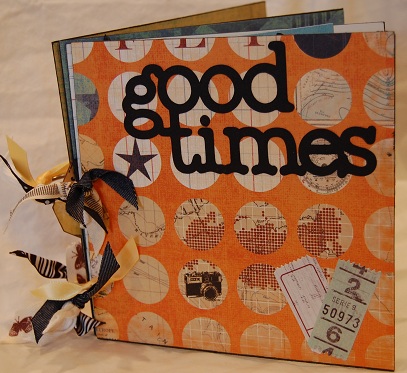

I loved this paper pack because of the orange and blue and touches of travel.  This will be a fun mini album to add photos to.

Be sure to join us at Frosted Designs for our Travel Challenge!!

Monday, September 3, 2012

Nieces Are Nice Layout

Happy Labor Day!!  Today I am the Guest Designer over at She's A Sassy Lady with a spunky layout of my nieces.

****If you are looking for the Halloween Spooktacular Banner Blog Hop, please go HERE!

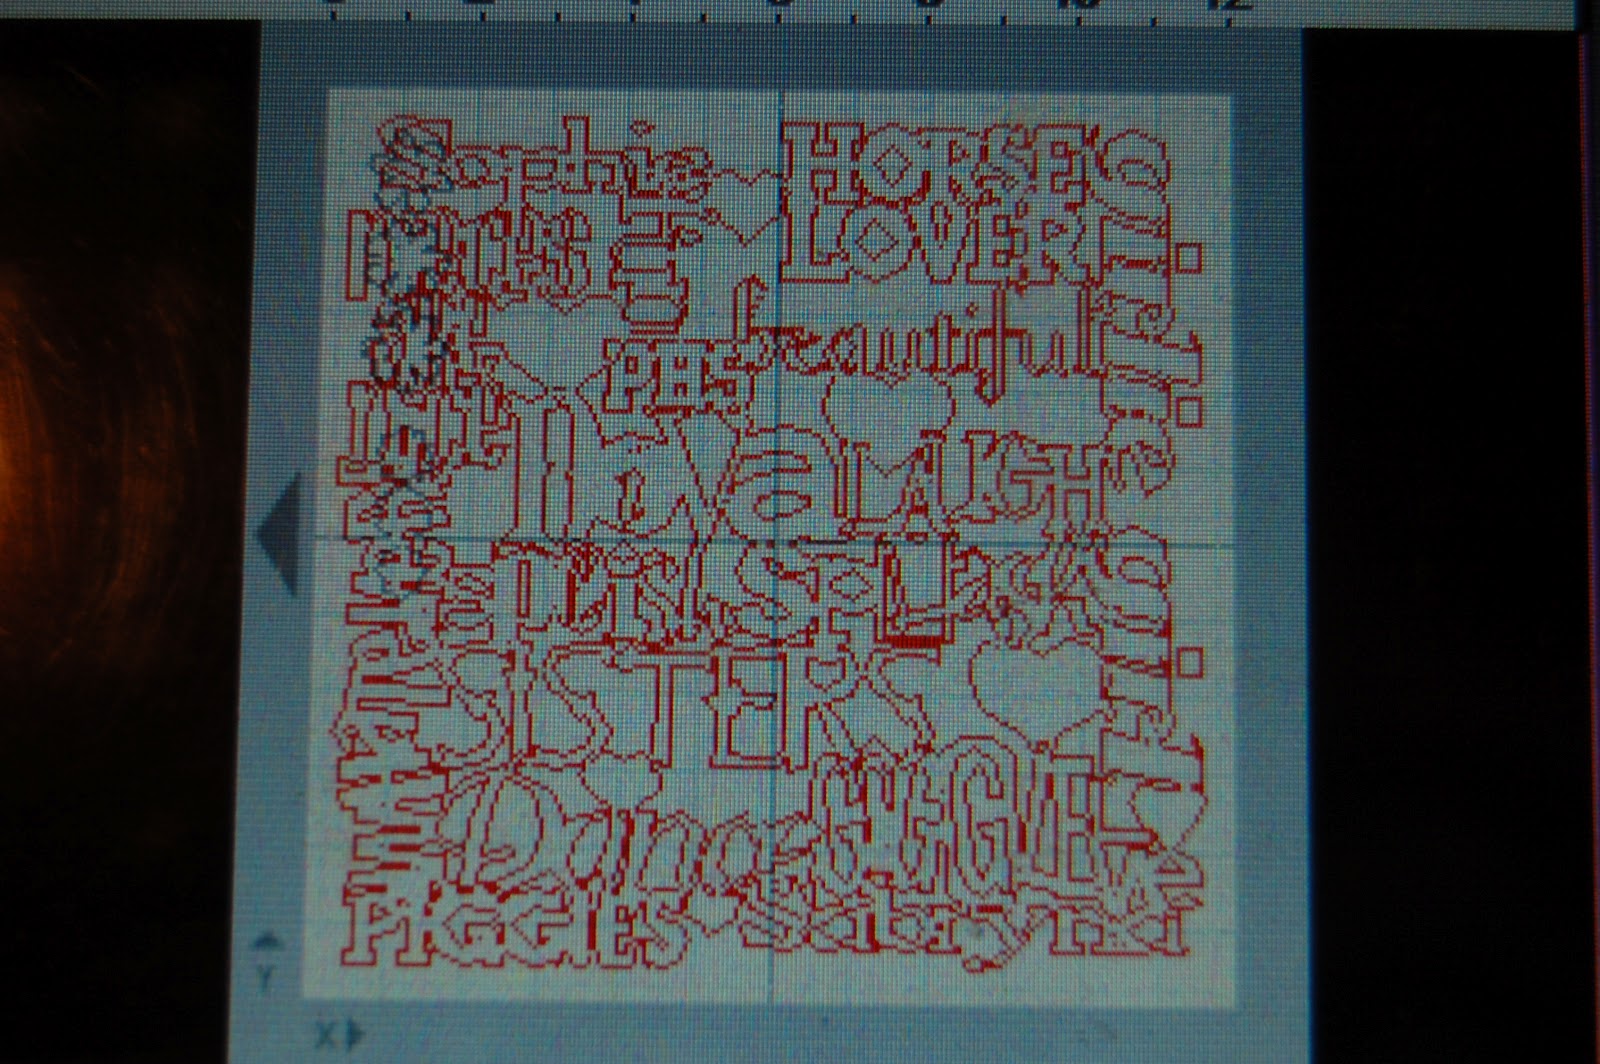
I love welding with my Gypsy and really wanted to make a unique background for this picture of Sophie and Sabryna.  I took random words that describe these two sisters and used a variety of fonts and cartridges to create my background.

I am not sure if this is subway art or not, but I have fun making backgrounds like this.  I added some hearts (George) and ready made words (Giggle, Whatever, Splish Splash, Dance and Diva) and created the rest.  Sophie shows horses and Sabryna has always loved piggies.  I think they are beautiful and made sure the picture was just under that word!

Here are the carts I used:  A Child's Year, Birthday Bash, George, Graphically Speaking, Hannah Montana, Home Accent, Home Decor, Mother's Day Bouquet, Rock Princess, Shall We Dance, Varsity Letter and Wall Decor and More.

I usually open a 12x24 mat and put all of my words on the right side initially.  I size them and place them on the left side until all the spaces are filled.  Then I re-size my mat (from the main menu) back to 12x12.  I weld everything together and cut.  I used blue cardstock and carefully mounted it to a light blue cardstock trimmed to 11.75" square.  I mounted the light blue cardstock to the same color blue cardstock I used for the word mesh.


I used Mother's Day Bouquet to make these flowers.  I sized the small ones at 0.73 inches and the bigger ones at 1.12 inches.  I cut them out of pink cardstock and added a pearl to the center.

My sister-in-law took this photo of the girls on picture day last year.  I used mostly blue to match their clothes, but if you look closely you can see the pink flowers in the bush behind them.  That was all I needed for my accent color.

What a fun layout of my nieces.  This one just might be going in a frame for a while!!

Thank you for stopping by today!!


Monday, June 18, 2012

Smash ~ All About Me

I just finished my second 2-page smashout.  I wanted a page all about me at the beginning of my smash book.

I started with a couple of my favorite photos and my 2 favorite colors:  purple and lime green!

I journaled with the help of my computer as my right hand is still in a cast.

I love taking pictures and creating scrapbooks!

I love Disney and my family :) not always in that order!!

I found this quote on facebook.
I used the following Cricut Carts:
Sophisticated for the font
MS Seasonal Art Cake for the banner
Cricut Everyday for the Scrapbook Queen and Cricut symbol
Graphically Speaking for got kids?
Art Philosophy for the doily, tag and parenthesies


Tuesday, March 6, 2012

Tanner's Kindergarten Photo

Jinger Adams and The Scpabook Queen are starting a brand  new scrapbooking product line and are having a Design Team Call on Jinger's Blog.  I really love Jinger's enthusiasm and would be very honored to be on her team.  I love The Scrapbook Queen too and have been in some blog hops with her ~ she is super talented!  

I had one of Tanner's kindergarten photos printed in black and white and took this opportunity to scrapbook  it Boy Style!


I started out with my Gypsy and put a 4x6 rectangle on the mat to represent my photo.  I added my title on another layer, a photo frame on another layer and some gears on yet another layer.

This image came from Lacy Labels and is sized to 9.82 inches.  I put this on a new layer and kept enlarging it until it framed my 4x6 photo with enough room for my title on the side.

I cut it out in burgundy cardstock.

I found the gears from Paper Lace 2.  I welded two borders together and sized them to a WIDTH of 11.50 inches.  The single gear is sized to 3.55 inches ~ I cut two so I could layer them.  I found the screw tops from Robotz and sized them to 1.47 inches.

I cut them out of metallic silver cardstock.

I welded Tanner using Varsity Letter (sized to 1.19 inches) to kindergarten using Plantin Schoolbook (sized to 1.19 inches).  I copied the screw tops to this layer and used Hide Contour to hide the "+" in the center.
I am having some issues with my Expression :(  After three attempts to cut this out and some not so nice words, I unwelded the TANNE and cut out the letters separately. 

I grabbed these sign layers from Street Sign sized at 2.41.  I wanted to make a fun journaling tag.

I grabbed the arrow and School Zone from Graphically Speaking and sized them at 1.75 inches and 1.16 inches.

I cut them out of black, burgundy, cream and blue cardstock and put them together.  I trimmed the top of the blue piece to make my sign multicolored.


I used Glossy Accents to glue down my chain.  I used some Tim Holtz paper in the background - perfect for my little boy!

I pop-dotted my arrow and interstate sign/journaling tag over the chain.

I added some staples and pop-dotted the gears border.

I really like how this turned out, well except for my non-welding!  When scrapbooking AND mothering, sometimes you have to be flexible and make things work!!  Thanks for stopping by today!

Friday, March 2, 2012

Number Challenge (Frosted Designs)

This week at Frosted Designs, our Fabulour Friday Challenge is to use numbers in your project.  I took this as a great opportunity to do Tanner's birthday pages!  He turned 6 on 11-8-11 and celebrated at Grandma and Grandpa's house and with a new bike from mom and dad.
I  used this 6 border from Graphically Speaking.  I sized the WIDTH to 11.5.  I cut this out twice in red cardstock.

I used blue cardstock for my background paper and found one piece of this Super Dude paper from my stash.   Because the paper is so busy, I justput a 5 inch section across both pages.

I wanted a banner so I grabbed these banner layers from Birthday Bash.  I sized them at 2.22 inches and 1.94 inches.  The font is from Birthday Bash and I sized the numbers to .88 and the letters to 1.0 inch.  The Half Dozen phrase came from Graphically Speaking and is sized at 1.24 inches.


The bike came from April Showers and the gears came from Paper Lace 2.  I sized the bike at 1.94 inches and the gears at 1.0, 1.08 and 1.39 inches.  I cut them out in black cardstock and silver cardstock.


I intended on cutting the banners out in two layers, one with the remaining 2 inches of my patterned paper.  I made a rookie Gypsy mistake and put the paper on wrong!  They put that arrow on the side of the Gypsy mat for a reason!!!  So this is my Plan B ~ black cardstock numbers on orange cardstock.  I used my Tim Holtz mini attacher to secure the twine onto my banner.

I tied some twine around the middle picture and pop dotted it overlapping the other two pictures.

I adhered the black gear to the page and pop dotted the silver one on top of it.


I had a lot of fun with this one and it turned out way different than I originally planned!!  Thanks for stopping by today!

Friday, January 27, 2012

Cricut Craftin Friends Blog Hop


Welcome to Cricut Craftin Friends Blog Hop!  I am a Sweet Sassy Diva Friend to Suzanne!!!  You should have arrived from Shawnee!

Here is a complete line up of wonderful blogs to visit:

Suzanne
Also posting for Cindy who does not have a blog

Fantabulous Cricut Challenge
Blog  Friends
Lasting Memories
Message Board Friends
Sweet Sassy Diva Blog Friends


I recently went to an all day crop and got my son's album caught up. It was great to get caught up, but I did not have my camera to take pictures step by step.  

He is a high school junior and I have a hard time with his pages at times.  I do a lot of baseball, bowling and tennis pages (aka boring) and try to keep them plain (also boring).  This photo was taken this year of my three boys and I just loved the colors.

I grabbed my Gypsy Girl and created my title by welding the word Brothers from the shadow font from Batman.  I sized the letters (shadow and regular letters) to 1.71inches.  The word three is from Graphically Speaking and is sized to 1.47 inches.  

I needed a little more fluff, so I added 3 amigos sized at 2.53 inches and Certified at 2.18 inches, both from Graphically Speaking.

I cut everything out of black cardstock except the regular letters.  I used a lavendar cardstock for those.  I added a purple border behind my photo and adhered it all together.

This is my end result.  A little plain and not fancy ~ perfect for a 17 year old boy!  I am surprised I got away with the purple paper (he he)!!

Thanks so much for stopping by today!!!

Your next stop is Mindy!!