Copyright Information

Thank you for stopping by my blog! I hope you enjoy the things that I create and share! I do have a copyright on my original creations (see logo on my sidebar below).
If you create and post a creations based off of mine, please refer (with a link) back to my blog. Please do not use my ideas for files, profit or for contests. Thank you!


My Craft Goals for 2015

My Goals for 2015:

1. Update my goals for 2016 in January of 2016 :)
2. Maximize my crafting time!
3. Keep plugging away at scrapbooking photos!!
4. Learn how to Heat Press!!
5. Have fun!


Showing posts with label Martha Stewart Birthday Cake Art. Show all posts

Saturday, October 6, 2012

Create!!


Welcome to Scrap Happens ~ Embellish It's 2nd Blogaversary Blog Hop!!!
I am excited to wish Jenn a Happy Blogversary!


You should have arrived from MELANIEs blog but if you have just stumbled upon my blog, click HERE to start from the beginning.
This hop is an ANYTHING GOES hop and there are so many different craft projects to see along the way.

Here is the lineup in case you get lost along the way!!


  1. Scrap Happens~Embellish It --- http://scraphappensembellishit.blogspot.com/
  2. Tara Barnes Bruening --- http://craftindesertdivas.blogspot.com
  3. Tammy Smith --- http://cuttinandstampin.blogspot.com
  4. Amber Neal-Johnson --- http://pixiperfectcreations.blogspot.com
  5. Robin Carroll --- http://cutonedesignsbyrobin.blogspot.com/
  6.  Melanie Rozwood --- http://afternoonscrapper.blogspot.com/
  7. Lori Apgar --- http://scrappinmystressaway.blogspot.com/****HERE
  8. Norma G. --- http://lilhoneybeestudios.blogspot.com/****NEXT
  9. Maria Matter --- http://JoyfulStamper.blogspot.com
  10. Angie Livingston --- http://angiescraftypad.blogspot.com
  11.  Robin Lane --- http://create-a-latte.blogspot.com/

And now onto my project:

I started with this frame.  The opening is about 7.5" x 15" and was sold "as is" at Michaels.  It was probably a custom frame that did not work for the customer who ordered it.  It was perfect for what I had in mind....

I am a visual crafter and have learned that by using Cricut Craft Room and my Imagine Cartridges together, I could see just how big (height AND width) each image is.  I can not print and cut (right now) with CCR, so I took the size that I wanted and cut the pieces out on my Imagine.

I used the banner flags from Yummy Cricut Imagine cartridge.

I cut two of each banner flags and the layers sized to 2.5 inches.
In order to fit on the banner flags, I sized theses letters from Martha Stewart Birthday Cake Art at .70 inches.


The banner flags were not filling up the space like I wanted to I went back to Gypsy.  
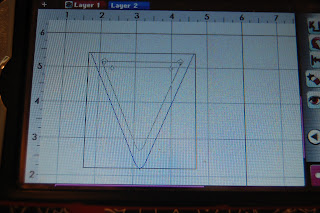
I put a banner flag from Birthday Bash on my mat about the same size as the Yummy flags.  I opened up a new Layer and copied the banner flag on it.  I enlarged the flag until the layers looked good (3.22 inches).

I cut out the banner flags in the same blue cardstock as the letters.  I embossed the flags with Stampin' Up Chevron Sixxiz embossing folder.  I tied the banner flags together with pink and blue twine.


Thank you for stopping by!!

Your next stop on the hop is NORMA.

Thursday, July 19, 2012

Lake Fun (Sweet Sassy Diva)

If you are looking for Keira's Double Digit Birthday Hop, please go HERE.

This week at Sweet Sassy Diva's Blog our theme is Vacation Anyone?  I took these pictures at my brother's cabin in May.  The kids were fishing and riding in the paddle boat and having a great time!!

I started out with my Gypsy:

I saw a layout on Pinterest that had some paper waves and wanted to make some.  I found this border from Martha Stewart Elegant Cake Art and sized it to 4.8w x 1.58h and welded two together.  I hid the inside cuts with Hide Contour.

I cut out LAKE FUN from Martha Stewart Birthday Cake Art sized to .88 inches.  

I cut out three waves and trimmed 1/4" off of one and 1/2" of a second wave in order to stack them.

I used this bright paper from Quick Quotes to layer my photos with!

I inked the waves with Opaque ink.

Next, I added some fish and fishing poles from the accessories on Everyday Paper Dolls.  I sized the fish to 2.41 inches and 2.18 inches.  I sized the fishing poles to 2.06 inches.

I added the sun and chair from Life is a Beach.  The sun is sized to 1.82 inches.  I copied another sun and hid all of the cuts except for the circle pieces to create a circle layer.  The chair is sized to 1.82.

I cut out the pieces from my cardstock scrap stash.

I inked the fish with a little pink and put them in between the waves.  I tied a knot in orange and blue twine and tucked it behind the waves.

I added the title on the water and put the chair in the corner.  The fishing pole is just above the fish.  I adhered one to the layout and pop-dotted the second one on top.

I changed the background paper to something more subdued and added a touch of orange twine.

I hope you enjoyed my layout from our mini vacation.  We usually all go to the Ozarks together every August, but this year (after 13 years) we are not able to all go.  It makes me a little sad, but I look forward to future family vacations!!!

Thanks Bobbi Jo for having me over today!!!