Copyright Information

Thank you for stopping by my blog! I hope you enjoy the things that I create and share! I do have a copyright on my original creations (see logo on my sidebar below).
If you create and post a creations based off of mine, please refer (with a link) back to my blog. Please do not use my ideas for files, profit or for contests. Thank you!


My Craft Goals for 2015

My Goals for 2015:

1. Update my goals for 2016 in January of 2016 :)
2. Maximize my crafting time!
3. Keep plugging away at scrapbooking photos!!
4. Learn how to Heat Press!!
5. Have fun!


Showing posts with label Quarter Note. Show all posts

Tuesday, September 16, 2014

Blinged Out Pumpkin

Halloween is my favorite holiday!!  I love the fall colors and decorating my house and daycare.  I found two different pumpkins on Pinterest that I loved - so I combined the two designs together.  I put my "L" on the front and gems on the top.

I purchased a 5 inch creamy white foam pumpkin from Michaels. 
My "L" was cut from a piece of gold Buckle Boutique Rhinestone Resin Self-Adhesive Sticker Sheet.  You can find these HERE (some colors are on sale right now too)!

I used my Gypsy with my cricut expression.  I got the "L" from Quarter Note.  I measured my pumpkin and determined the "L" should be around 3.5 inches.  I sized my "L" to 3.59 inches.  

I flipped the "L" to cut it out in reverse. 
The Rhinestone Sticker Sheets cut best face down on a sticky mat.  My mat is not as sticky as I would like, so I taped the edges down too.

Here are the instructions for cutting with a Cricut:

Cricut
  1. Use a deep cut blade
  2. Place your blade depth at 6
  3. Use a mulit-cut of 3 or 4 depending on how new your blade is
  4. Put your speed on slow
  5. Place the product face down on the Cricut cutting mat, making sure it is in a very sticky spot.  I usually run my hand over it to really make sure it is stuck down.
  6. Use Flip Mode on your Cricut  (since you have the product upside down, you need to flip the cut for the image to be correct when you flip it over)

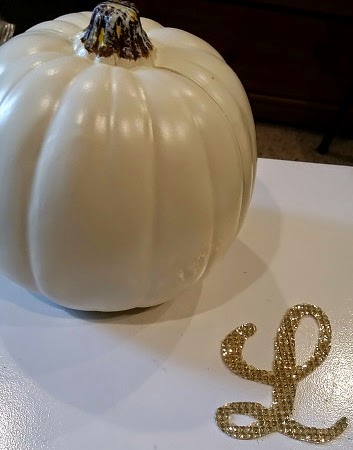
Here is the "L" cut out.  I peeled the backing off and stuck the "L" on the flattest side of the pumpkin. 
It looks pretty, but I wanted a little more sparkle!! 
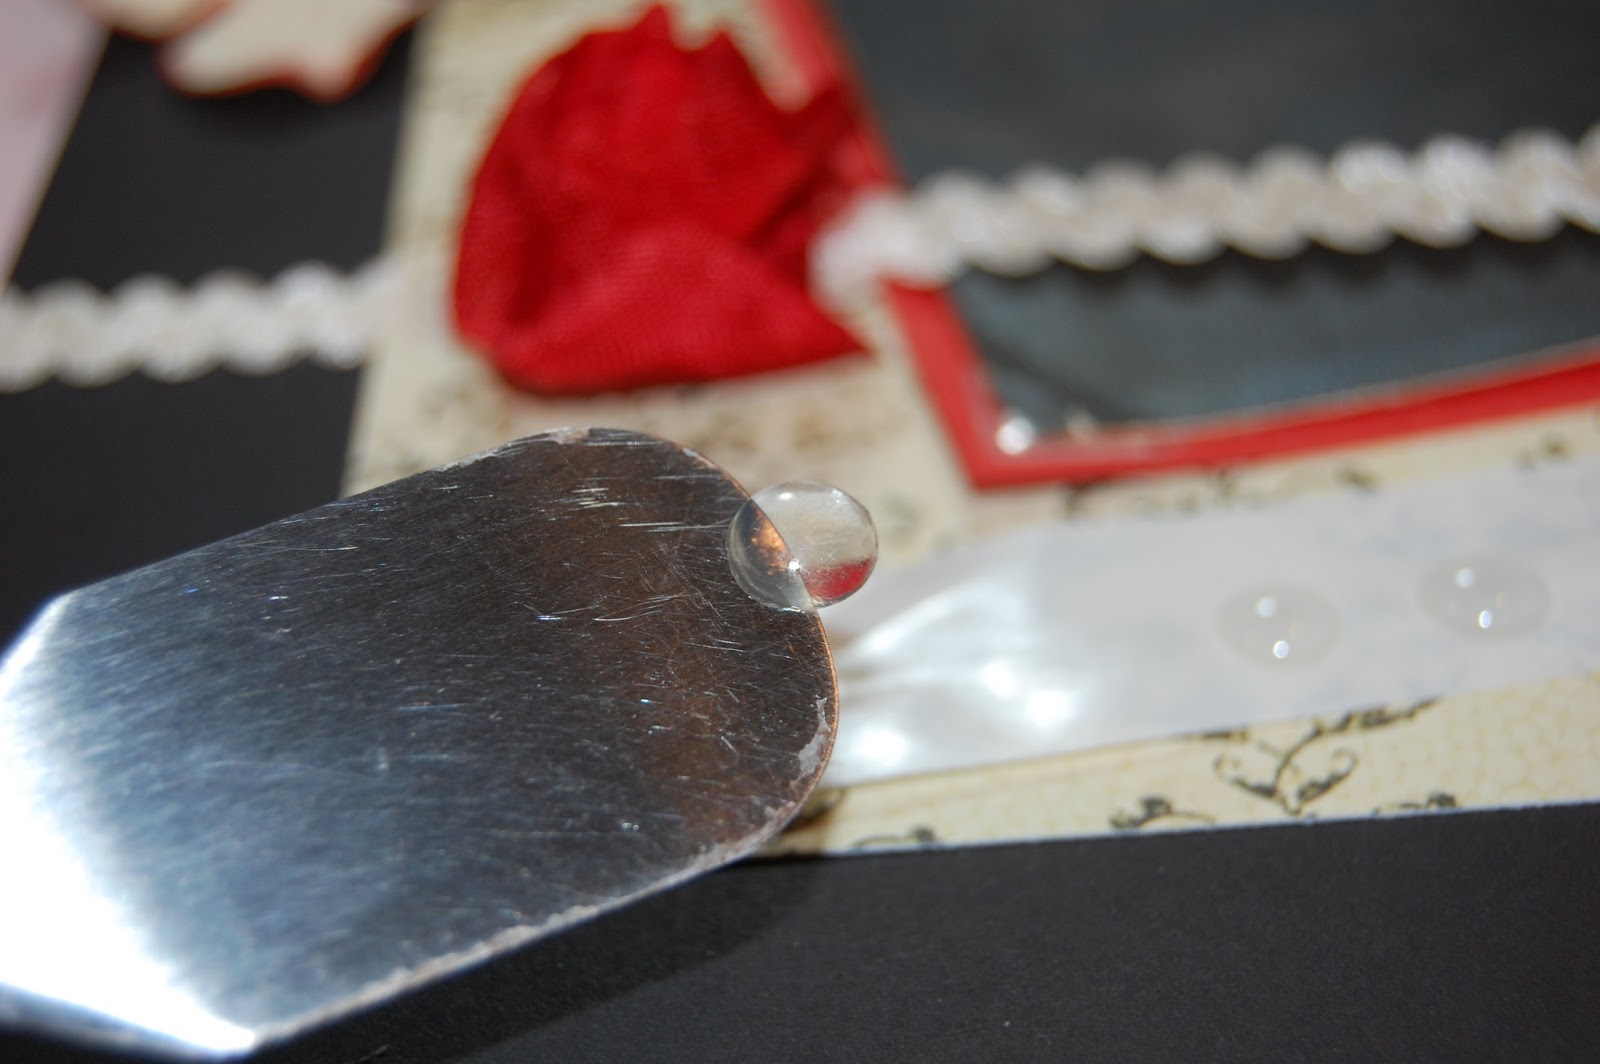
I purchased these gems from Michaels,  The pack includes clear, gold, dark grey and black crystals in 3 sizes.  I used Beacon 527 glue to adhere them to the top of the pumpkin.

I put 5 or so dots of glue on at a time and stuck the gems on. 
I am so happy with how this turned out!!

I hope you have a Blingy Fall!!


The Buckle Boutique's Link Listing
The Buckle Boutique's Website . . . click HERE
The Buckle Boutique Blog . . . . click HERE
Facebook Page . . . click HERE
Twitter Page . . . click HERE
Pinterest Page . . . clickHERE

Wednesday, April 30, 2014

Music Progarm LO (Let's Scrap)

Today is reveal day at Let's Scrap!  We have a brand new sketch challenge for you.  We have weekly sketch challenges on Wednesdays along with additional challenges and tutorials - come check us out!!!
Here is the sketch - you can use both pages or just one.  I chose to do both pages since I had several pictures of Tanner's Music Program to scrap. 
I used paper from Boys Rule and some notes from Quarter Note cut out on my Cricut.  I tucked in some music washi tape behind the photo mats. 
I used a Faber-Castell PITT artist pen to ink the edges of the papers. 
Tanner got to play the Xylophone (he is wearing the lime green shirt)!  I played flute and piccolo and Tanner is the first of my boys to try a musical instrument!!

Tuesday, November 26, 2013

The 12 Days of Christmas Blog Hop Day 2 - Wine Glasses


Welcome to Day 2 of the Honeybearz Designs 12 Days of Christmas Blog Hop!!


We are continuing on with the second day of projects!  If you missed my post yesterday, you can see it HERE.

If you arrived from Lucy, you are in the right spot.  If you found me first, head over to the BEGINNING so you can see the blog candy as well as everyone's projects!!

Welcome to the 12 Days of Christmas Blog Hop. This hop will take place November 25th through December 6th and the new postings each day will be posted by 8 am eastern standard time. This hop will be full of wonderful ideas and inspiration to get you well on your way of creating all of those beautiful Christmas project. This is an awesome way to get a lot of your Christmas cards, and scrapbook layouts finished, home decorations completed and maybe even be inspired to create something using a new technique that you have never tried. There will be a new project posted each and every day by all the wonderful amazing ladies in this hop. Also each day we will have a guest designer or two for you to visit. Lisa our hostess will be giving away some wonderful blog candy each day of the hop from the amazing sponsors that we have for this hop. Lisa will be posting all the winners from this hop on December 10th. Every one has a chance to win including the ladies participating in the hop and even the guest designers and the sponsors. At the end of each post we will have a list of all the sponsors who are sponsoring this hop all you need to do is click on their name to go to their sites and check out all the wonderful sites. We want to thank each and everyone of the sponsors for their generosity. It has been greatly appreciated.

Here is a complete list of the sponsors:

Honeybearz Designs - Yummy Crafting Candy
http://honeybearzdesigns2011.blogspot.com/

Teresa Russell - $10.00 Gift Card from
her facebook group Scrapping For Less
https://www.facebook.com/groups/372187582880346/

Pazzles - Two digital download gift cards for a Cutting Collection of choice.
http://pazzles.com/

Kathy's Cozies - A custom Cozy for an Expression, Expression 2, Cricut Create, 
Cricut Mini, or Silhouette Cameo. Whoever wins can pick their own fabric.https://www.etsy.com/shop/KathysCozies

Paper Sweeties - $10.00 Gift Card
http://www.papersweeties.com/

ScrappyDew - $20.00 Gift Card
http://www.scrappydew.com/store/

My Creative Time - Stamp Set
http://www.creativetimeforme.com/

Little Scraps of Heaven Designs - $20.00 Gift Voucher
http://www.littlescrapsofheavendesigns.com/

Paper Creations by Mindy - $15.00 Gift Certidicate
http://www.papercreationsbymindy.com/

Pretty Paper, Pretty Ribbons - $15.00 Gift Certificate
http://www.prettypapergraphics.com/

Xyron - 2 Teresa Collins Adhesive Kits
http://www.xyron.com/enUS/Home/default.html

Joys Life - "Oh Christmas Puns" stamps
http://joyslife.com/

Timeless Twine -$15.00 Gift Certificate
http://www.bellacreationz.bigcartel.com/

Too Cute by Jessica - $25.00 Giftcard
http://www.toocutebyjessica.com/

Designs on Cloud 9 - $20.00 Gift Certificate
http://designsoncloud9.com/

LoveBug Creations - $15.00 Gift Certificate
http://www.lovebugcreations.net/

The Paper Parade - $40.00 Gift Certificate
http://www.thepaperparade.com/

The Paper Nest Dolls - $25.00 Gift Certificate
http://stamps.the-papernest.com/

Jessica Douglass Wilson -$10.00 to her Close To My Heart store 

Lettering Delights -a gift valued at $10.00
http://www.letteringdelights.com/

Scrapping Bug Designs - $50.00 gift certificate the gift 
certificate excludes sale prices.
http://www.scrappingbugdesigns.com/

3 Girl Jam - $10.00 Gift Certificate
http://www.3girljam.com/

SVG Attic - $25.00 Gift Certificate
http://www.svgattic.com/

Pinque Peacock $10.00 Gift Certificate
http://pinquepeacock.blogspot.com/

SVG Cuts - $20.00 Gift Certificate
http://www.svgcuts.com/

Blue Moon Creations - 12 digital images
http://www.bluemooncreation.net/

Sherri Baldy Stamps - $15.00 Gift Certificate for digi stamps
http://sherribaldy.blogspot.com/


I used my cameo to cut the red vinyl.  I welded two different fonts to create Cheers and naughty.

The gold L is Self Adhesive Resin Rhinestone Sticker Sheet from The Buckle Boutique.  You can find them HERE.  I cut this material on my cricut and adhered it to my wine glasses.

Cutting on the cricut is not hard but you need to remember a few tips:

You need the deep cut blade and housing set to 5.  A sharp blade works best.
A sticky mat is a must (re-stick if necessary).  I usually tape the edges, but if your letter has a lot of details you want it to stick down pretty good!!
Place the sticker sheet bling side down on your mat (don't forget to reverse your image).
Cut - I only cut once.
Gently pop out your cut.

I use rubbing alcohol to clean the glass surface.  Once the glass is dry, you can adhere the vinyl or rhinestone sticker!

Thank you for stopping by!!!

Your next stop is Beth's Blog


Here is a complete list of blog addresses in case you get lost along the way:

6. Miranda - www.nanasscrapspot.com
8. Scrappin Toxic Midge- http://www.toxictreasures.com/
14.  Lucy ~ http://love2createitall.comhttp://www.love2createitall.com/
16. Beth~ http://thecraftyscrapyard.blogspot.comhttp://thecraftyscrapyard.blogspot.com/****NEXT


Tuesday, July 30, 2013

Shot Book


I recently turned 21.

Well, 21 times 2 plus 3!!

My friend Kylie has a friend who is turning 21 in August and asked for my help making her Shot Book.  Silly me, I thought she meant an immunization book or even a photo shot book at first.

When she told me about all the shots and activities they had planned and wanted scrapbook pages made - I was like YES that sounds like fun!!!  Then I felt a little tipsy just thinking about all that alcohol!!

I designed and cut out the paper and vinyl, but Kylie put everything on paper (including the gems and stickles) except for the vinyl on the cover.  I have Kylie's permission to put the pages we designed and made on my blog.

I used my Gypsy, Cricut and my Cameo!


The fireball is from the Silhouette store and is a baseball with flames.  We deleted the "laces" layer.

The font is Hannah Montana for all pages unless noted.


The hand came from A Child's Year.  I did a search on Pinterest for Spanking looking for an image of a hand to trace.....found a lot of interesting images but none were appropriate!!!


Scooby Snack was fun!  The bone is from  A Child's Year and the peace signs are from Disney/Pixar Cars.  Loved the bright colors - our inspiration was the Mystery Machine!


Kylie put individual gems on the letters!!


The lips are from Tags, Bags, Boxes and More 2.  There is a giant set of lips under the photos.  Kylie pop-dotted the smaller lips around the page.


This page was challenging.  This is the page where she will take a picture with the bouncer and her ID.  We searched for a body-builder image to represent the bouncer with no luck.  

We created a Security shirt instead - totally Kylie's idea.  We used Impact font (with the Cameo) and the shirt from the Silhouette store.  The drivers license is from Locker Talk.  


The bomb came from Indie Art (the third time I have ever used this cartridge). 


The beer mug is from the Silhouette Store.  I embossed the foam!!  The font is Blackletter.


I welded a border with a camera image from Makin' the Grade.  The cursive font is from Quarter Note.


This font is Liquidism from dafont.com and cut with my cameo.  The shot glass was purchased from the Silhouette Store.


I used vinyl to decorate the cover of the album.  The font I used is from Art Philosophy.


On each page
The F: stands for FROM
The T: stand for TIME
and the X: is for Dana's signature

Kylie created half of the album.  Dana's sister made the other 10 pages.  I am happy to hear Dana's mom will be the designated driver!!  I sure hope it is a birthday to remember!!!

My sister-in-law is turning 40 next month....I told her I would make her a Shot Book.  She politely declined, especially after I suggested 40 shots for 40 years.  Clearly I am not a drinker!!!!


Tuesday, March 12, 2013

Make Your Own Glue Dot Tutorial (Frosted Designs)


Hello Crafters!!!  Lori here from Scrappin'MyStressAway with a tutorial I have been wanting to do for a while.  My husband's grandma recently passed away at the age of 97.  When I met her, she was 75.  My mother-in-law is not a picture person (gasp!!) and I just recently saw some of grandma's photos from her youth when I was putting the picture boards together.  

She was a beautiful lady!!

I knew that this was a great opportunity for me to honor Grandma Kelly along with my tutorial!

Many of us use Glue Dots a lot for various projects.  A friend of mine shared her Glue Dot secret with me and I thought I would share it with you!! This will save you money (something Grandma Kelly loved to do) as well as give you more options than the store-bought dots do. 


You need 2 things: 

Aleene's Tack-It over and over glue.  I found mine at Michael's and used a 40% off coupon.

Wax paper or leftover sticker sheets.


I am using a leftover Glue Dots sheet.  I probably should have used something wider, but this worked!!

Simply squeeze the glue into the size dot you need.  You can also make lines of glue.

Let it dry.  

The smaller dots dry within an hour.  My large dots dried in about 24 hours.  The key is to plan ahead if you need a large dot.  

I knew I was making a flower out of ribbon, so I made my dot the size I wanted the flower to be.


The biggest dot was made on a sticker cellophane wrapper.  It is still a little white in the center a couple of days later, but dry enough to use.

These glue dots are much stickier than the Glue Dots from the store (which can be good or bad).

For my ribbon flower, I started in the center and wound the 3Girl Jam ribbon around and around.


I used my Cricut spatula to get the glue dot off the cellophane and positioned on my layout.


I like the ribbon flowers better than the 3D paper flowers I make with my cricut if I am putting the layout into an album.  The ribbon is more flexible (aka squishy when you close the page)!!

You can't see here, but I used a small glue dot to glue a pearl in the center.  I did not intend to, but the glue backing came off the pearl (hate when that happens) so it is good to have options!!


I used the medium sized glue dots to adhere the paper flowers on my layout, as well as the pearls in the centers.


I added some ribbon, metal flowers and gem flourishes.


For my smaller flower, I used my tweezers to position the glue dot on my page.  Then I wound the ribbon on it.


The tweezers also helped tuck in the end of the ribbon.


Grandma Kelly wrote on the front of a lot of her pictures!!  Yikes!!  In the corner of the photo you can see "Louise 1934" written in ink.  

I thought that would make the best title for my layout.


I used Quarter Note and my Gypsy to weld Louise.

I cut out Louise sized to 1.48 inches.  I cut out 1934 sized to 1 inch.

I used a label from Lacy Labels sized to 3.12 inches to adhere the title to.


I cut the letters and numbers and shadow tag out of red cardstock and the tag out of the reverse side of the patterned paper.


I slid the tag under the photo mat.


I love this photo of Louise, her eyes follow you!  She was 18 years old in this picture - her whole life was ahead of her.

I love creating glue dots in the perfect size for my projects.  I hope my Make Your Own Glue Dot Tutorial was helpful!

I am also linking up today at Pink Cricut!


Monday, March 11, 2013

Lucky (BugBytes)

Top 'O the Morning to You!!  I am LUCKY to be at The Bug Bytes today!

I have a fun burlap project today!  There are a ton of burlap crafts on Pinterest right now, so I had to get some!!

I started out with my Gypsy, some burlap, a piece of green glitter cardstock, and a frame.

I started out by putting a square on a Layer of my Gypsy and sizing to to 8x10 to represent the frame.

I grabbed a shamrock from Paper Doll Dress Up and made it grow bigger until it was big enough to fall off the top and side of the frame.  It ended up being 8.18 inches.

I also used Hide Contour to hide the inner cut at the bottom of the stem.

I welded the word LUCKY from Quarter Note.  The letters are 1.43 inches.  I welded the word first, then grew it to fit my space.

You will notice that the word and shamrock are flipped backwards.  I did this on purpose because when I cut the glitter cardstock, I cut it out glitter side down.


j

This is what I cut out.  Luckily I cut out Lucky twice, the first one tore a bit and some of the glitter peeled off.


I cut the paper glitter side down.  I tape the edges just in case because this paper is usually $1.99 a sheet and I don't want to ruin it!!

I use a multi cut of 2 and turn my blade one setting higher.  On this expression, I typically cut at 5 so I set it to 6.  The expression at work is set to 4 so I set it to 5.  Having a new blade helps too!

I trimmed a piece of burlap to fit my frame.  I used a piece of 8x10 chipboard that came with some pictures I had printed at 8x10 to adhere the burlap.  I used my ATG gun to stick it down.

I then used my ATG gun to adhere the shamrock and LUCKY to the burlap.  I trimmed off the edges of the shamrock and put it in the frame.

I displayed this on my entryway table!  I am a lucky girl and want to remind myself of that every time I pass by that table :)

I hope you have a wonderful St. Patrick's Day whether you are Irish or not!!