Copyright Information

Thank you for stopping by my blog! I hope you enjoy the things that I create and share! I do have a copyright on my original creations (see logo on my sidebar below).
If you create and post a creations based off of mine, please refer (with a link) back to my blog. Please do not use my ideas for files, profit or for contests. Thank you!


My Craft Goals for 2015

My Goals for 2015:

1. Update my goals for 2016 in January of 2016 :)
2. Maximize my crafting time!
3. Keep plugging away at scrapbooking photos!!
4. Learn how to Heat Press!!
5. Have fun!


Showing posts with label Everyday Paper Dolls. Show all posts

Sunday, December 23, 2012

The Bell Still Rings (and other gift items)

I was inspired by a project on Pinterest to make this.  I made this for a raffle item for my son's bowling tournament.

I bought a 12x12 canvas and painted it blue with acrylic paint.

I used Paper Lace 2 for the font.  I sized the letters to 1.59 inches and left space for the bell.  I bought the bell and ribbon at Michaels.

For my next project (also inspired from Pinterest), I used a 12x12 tile from Home Depot.
The star is from Winter Frolic.

The letters are from Lovely Floral.

The swirl is from Home Accents.
I hid the background piece of the star from Winter Frolic.  It is sized to 5.64 inches.

I sized the letters to 2 inches and centered them to form the tree shape.

I added the swirl to the bottom as the trunk at 4.99 inches.

I just love the details of these letters.  I purchased this cartridge (Lovely Floral) specifically for the font!


I cover journals a lot as gifts.  I stock up on these journals when the back to school supplies go on clearance.

I found this apple filled with "teacher" words and printed it off onto cardstock.  I covered journals with school themed papers and layered on the apple.  I used tissue tape on the binding and added a little ribbon.

These were given to Tanner's Kindergarten and First Grade teachers, the art teacher,  and one other favorite teacher.

For my next gift - I had to get creative when our spirit wear order did not come in before Christmas.

Our youngest son will be playing select baseball for the first time this spring.  We ordered Grandma a shirt, and Grandpa a shirt and hat.  I had to wrap something, so I made my own out of paper:

He is playing for the Papillion Storm Chasers and will be #2!

I used Baseball for the cap.  I cut two out at 5.82 inches, one in white and one in black cardstock.  I fussy cut the white part.

The SC is from Hannah Montana sized to 1 inch.  The 2 is from Varsity Letter sized to 1.39 inches.

I used my white gel pen to draw the line at the top of the bill.

I used a circle punch to create the button for the top of the hat and trimmed off the top.

I used Paper Dolls for Everyday for the Jersey and sized it to 18.11 inches (5.5 inches using Real Size).  I cut it out in white and black cardstock.

I used Varsity Letter for the 2.

I made two of these, one for each!

Now back to my favorite one...


I hope you still truly believe!!!

Have a very Merry Christmas!!!


Monday, December 10, 2012

A Fun Way To Give Money (card)

Happy December!!  I do not make my own Christmas cards (I use Shutterfly), but I like to make other gifts and home decor.  Today I am the Designer at The Bug Bytes today and I have a gift/card idea that can be used at the holidays, a birthday, or any special occasion.

Our son will go to college next fall.  He is going to play baseball and my husband is a very proud dad!  I want to give my husband some College spirit wear for Christmas, but Tyler has not committed to a college yet.  He has it narrowed down to 3.

Normally Mike does not like to receive gift cards or money as a gift, but I really want him to be able to purchase what he wants sooo....I came up with a fun way to package the money!!!


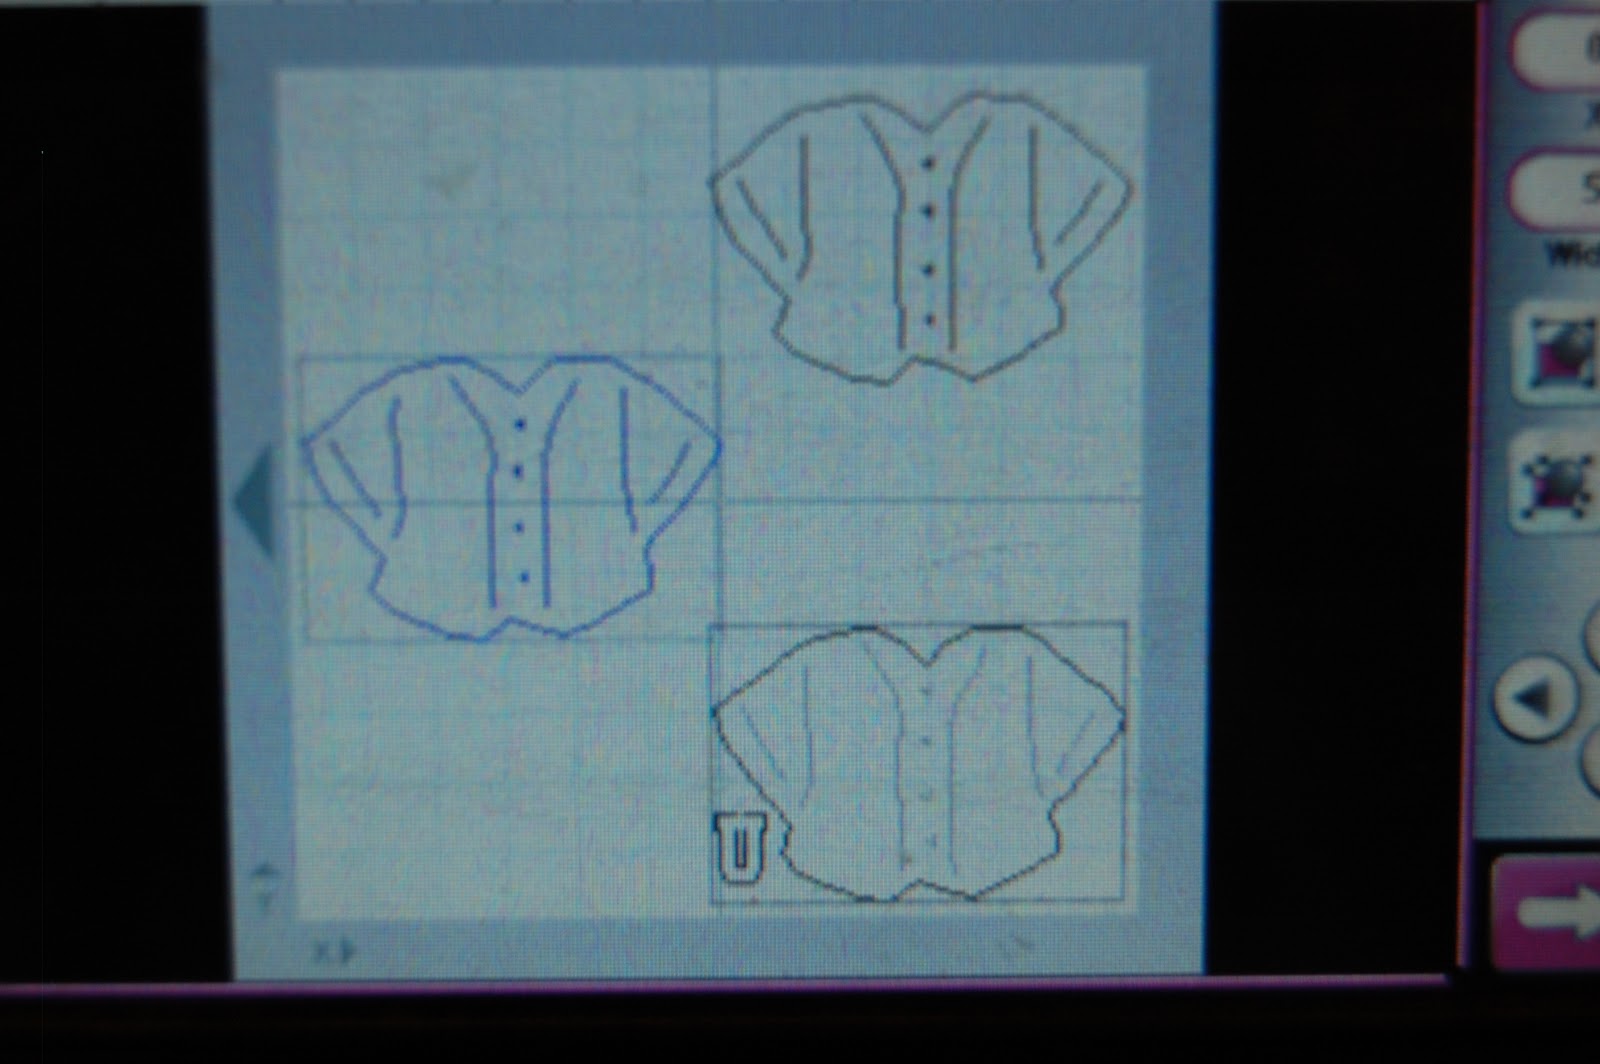
I started with this baseball jersey from Everyday Paper Dolls sized to 4 inches.

I made a copy and flipped it to mirror the jersey from the top.  I welded the two together to make my shape card base.

I wanted a slit so I found this tag on Tag, Bags, Boxes and More 2.  I used the Hide Contour function to hide the tag cut and leave just the slit.

I rotated the tag 90 degrees and put it on the card.  I grouped this cut with my welded pieces.

I cut the card base out of white cardstock.

On the next layer I put three copies of the jersey.  I hid the inner cuts on one copy so the buttons would show through.  I placed the other two jerseys as is on my mat to cut out in two different colors.

I added a "U" from Varsity Letter at 1 inch.

I cut out the bottom layer and "U" in blue cardstock.  I cut out the other two jerseys in red and white cardstock.  I wanted to go with a red-white-blue color scheme as baseball is America's pastime!!

I cut apart the red layer along the inner cuts.

I adhered the layers together to create my baseball jersey card.

I am able to tuck the cash inside the card.  I hope he likes his "spirit wear" to be!!

Thursday, July 19, 2012

Lake Fun (Sweet Sassy Diva)

If you are looking for Keira's Double Digit Birthday Hop, please go HERE.

This week at Sweet Sassy Diva's Blog our theme is Vacation Anyone?  I took these pictures at my brother's cabin in May.  The kids were fishing and riding in the paddle boat and having a great time!!

I started out with my Gypsy:

I saw a layout on Pinterest that had some paper waves and wanted to make some.  I found this border from Martha Stewart Elegant Cake Art and sized it to 4.8w x 1.58h and welded two together.  I hid the inside cuts with Hide Contour.

I cut out LAKE FUN from Martha Stewart Birthday Cake Art sized to .88 inches.  

I cut out three waves and trimmed 1/4" off of one and 1/2" of a second wave in order to stack them.

I used this bright paper from Quick Quotes to layer my photos with!

I inked the waves with Opaque ink.

Next, I added some fish and fishing poles from the accessories on Everyday Paper Dolls.  I sized the fish to 2.41 inches and 2.18 inches.  I sized the fishing poles to 2.06 inches.

I added the sun and chair from Life is a Beach.  The sun is sized to 1.82 inches.  I copied another sun and hid all of the cuts except for the circle pieces to create a circle layer.  The chair is sized to 1.82.

I cut out the pieces from my cardstock scrap stash.

I inked the fish with a little pink and put them in between the waves.  I tied a knot in orange and blue twine and tucked it behind the waves.

I added the title on the water and put the chair in the corner.  The fishing pole is just above the fish.  I adhered one to the layout and pop-dotted the second one on top.

I changed the background paper to something more subdued and added a touch of orange twine.

I hope you enjoyed my layout from our mini vacation.  We usually all go to the Ozarks together every August, but this year (after 13 years) we are not able to all go.  It makes me a little sad, but I look forward to future family vacations!!!

Thanks Bobbi Jo for having me over today!!!

Monday, March 5, 2012

Look Mom....No Worms LO

Lori here from ScrappinMyStressAway.  I am scrapping Tanner's pictures from our annual Ozark vacation.  One of his favorite activities is fishing.  Mike and I are not big into fishing, but my brothers are and Tanner loves spending time with them.  He was very proud that he caught two fish without a "worm" on his hook.  He was using a rubber worm.
When I work on several pages that all go together, I will sketch them out.  Once my sketch is complete, I grab my Gypsy and get to work!!

I started out with this circle frame from Doodletype and sized it to 10.65w x 10.18h.

I cut it out of blue cardstock and placed it on a piece of Kraft Brown cardstock.

Here are my photos. 

I opened another Layer on my Gypsy and put my title on the mat.  I used Batman font and shadow.  The capital letters are sized to 1 inch and the lower case letters are sized to .76 inch.  

I added the waves from Going Places.  The image is a waterskiier on the waves, but I used Hide Contour to hide the skiier.  I sized the waves to 6.23w x 4.99h.  I copied and welded the waves to create a border (total size is 11.5w x 5.84h).  I copied a second border.

I used black cardstock for the shadow letters.  I used red cardstock for LOOK MOM and orange cardstock for no worms!  I went back later and added three more exclamation points so I could use the periods in red in the title.

I cut out the waves in silver metallic cardstock.  I have a hard time matching the color of the water so lately I have been using silver and really like the look.

I inked the edge of the paper and the edge of the photo mats with Vintage Photo Distress Ink.

I saved the cut out piece from my shadow letters and used it as a template to line up my words.  I ran my letters through my 1 inch Xyron and stuck them down.

I gently pulled up my "template" and my title was perfect!  This is one of my favorite things about using my Gypsy!!

I grabbed some worms from Boys Will Be Boys and sized them to 1.35 inches.  I found the fish from Paper Dolls for Everyday, Life is a Beach and Boys Will Be Boys.  I sized them at 2.29 - 2.65.

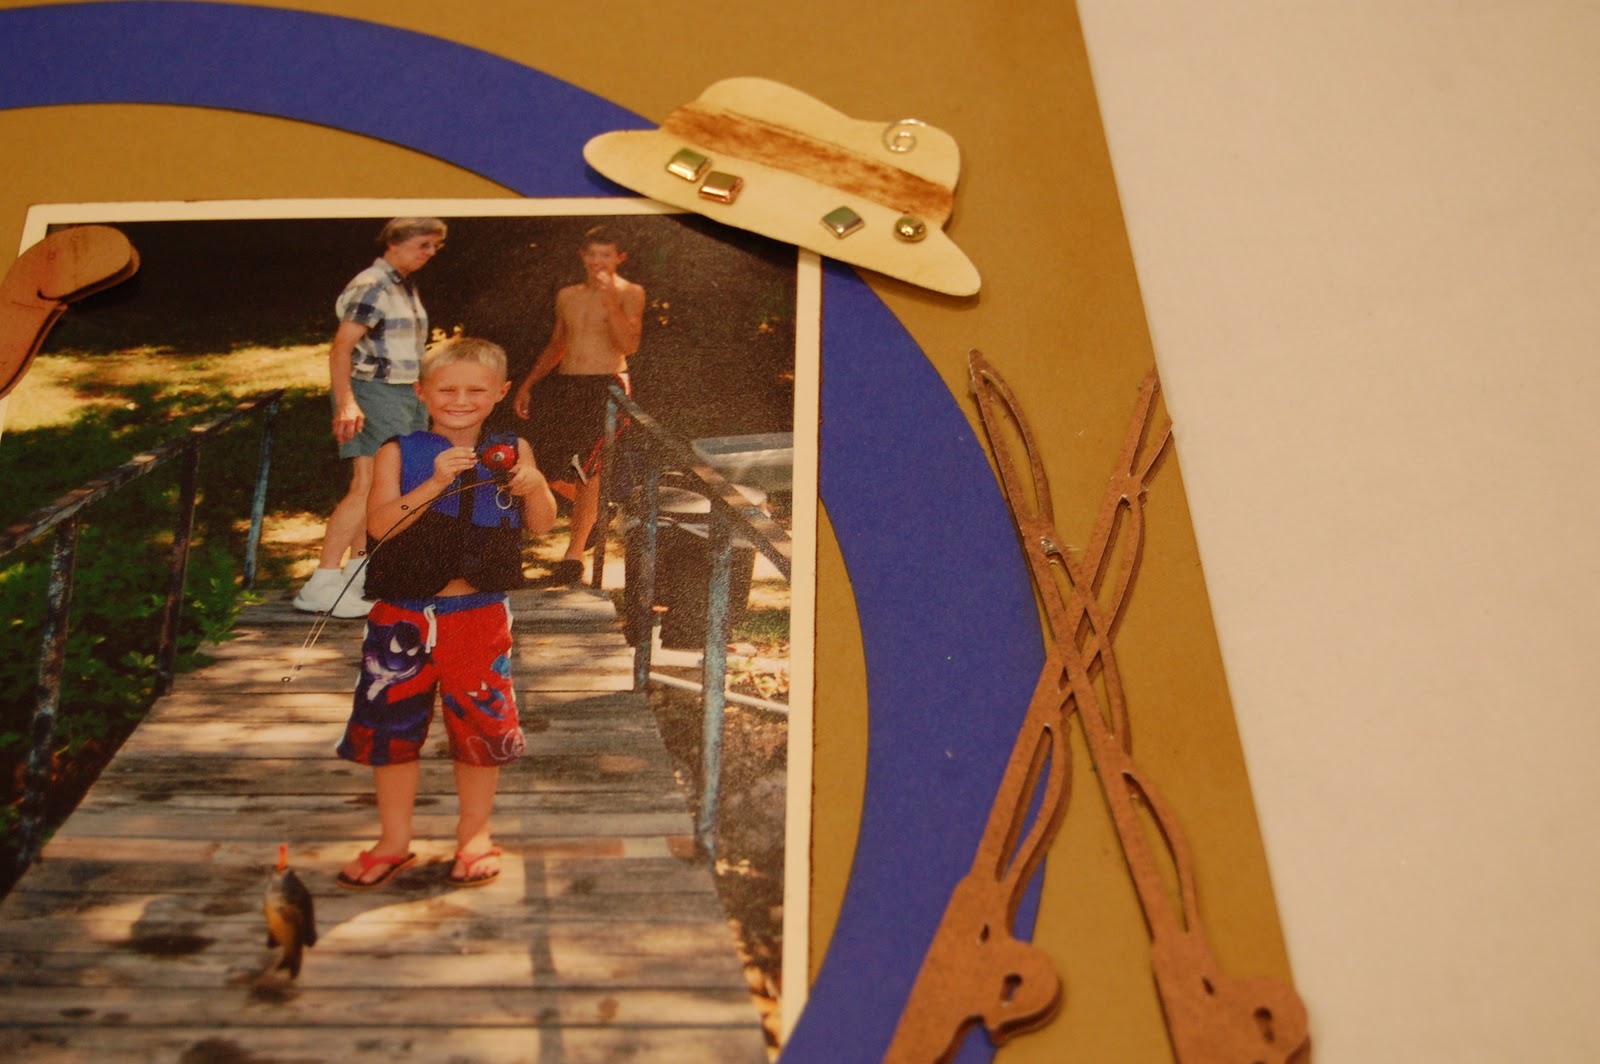
I found fishing poles from Boys Will Be Boys and Paper Dolls for Everyday.  I ended up using the ones from Paper Dolls for Everyday sized to 4.99w x 4.37h.  I thought the fishing vest from Paper Dolls for Everyday would look like Tanner's life jacket, but it did not so I did not use it.  I did use the fishing hat from Paper Dolls for Everyday sized to 2.48w x 4.86h.

I used inks and makeup sponges to color my cardstock.


Here you can see the green, blue and pink in the fish.  They are cut out of the same paper as the waves but look different.  I pop dotted some of them on my page and adhered the rest flat.  This gives dimension.

I added some metal brads and a clip to the hat to resemble pins and a fish hook.  I inked and cris crossed the fishing poles.

I love to handwrite my journaling so I cut out a larger worm (4.04w x 2.53h) in cream cardstock and journaled on it.  I tucked it behind my photo.

The other worms are peeking out from behind the photos too!  I tied knots in some twine and ran it across my page.

Here is my completed layout.


I included a shot of the layout that will go on the page next to it.  Thanks so much Sheila for having me over today!

Thursday, September 1, 2011

Labor of Love Halloween Banner Blog Hop

Welcome to the first half of the Labor of Love Halloween Banner Blog Hop!!  My project will be up September 2 and 3, but you can qualify for my blog candy until the 5th!! 

If you are looking for my Frosted  Designs Flourish Canvas project, go HERE.

If you are looking for my Witchy Banner for Sweet Sassy Diva, go HERE.


If you found me first, please go see ELLEN at the beginning.  If you are here on the 4th or 5th, go HERE to start the second half of the hop!

We made these awesome Halloween banners to hang in the rooms of the medically-fragile children who live at Pediatric Specialty Care, Bucks County, PA. (http://www.pediatricspecialty.com/).

Here is the line up in case you get lost along the way!
Ellen @ http://www.cardmonkey-business.blogspot.com/
Madison @ http://www.funkycards.blogspot.com/
Jess @ http://www.kinderstampo.com/
Nicolette @ http://www.beyondscrapin.blogspot.com/
Jenny @ http://www.crazyaboutcricut.blogspot.com/
Nikki @ http://www.theglamoroussideofscrapping.blogspot.com/
Jennifer @ http://www.craftycardgallery.blogspot.com/
Dee @ http://www.vintageheartfeltdesigns.blogspot.com/
Sue @ http://www.susanascorner.blogspot.com/
Amy @ http://www.belovedscrapbookdesigns.blogspot.com/
Lori @ http://www.scrappinmystressaway.blogspot.com/ ***HERE
Bobbi Jo @ http://www.sweetsassydiva.com/
Jessica @ http://www.thecreativestamperspot.blogspot.com/
Shawnee @ http://www.quiverofangels.blogspot.com/
Jamie @ http://www.craftygirl21.blogspot.com/
Robyn @ http://www.happyhouseofhaas.blogspot.com/
Lisa @ http://bitbythecricutbug.blogspot.com/
Sandra @ http://365daysofcricut.blogspot.com/
Tonya @ http://creativeaddictiontopaper.blogspot.com/
Debbie @ http://debbiescrafttime.blogspot.com/


Blog Hop Sponsors and Blog Candy:
***This blog hop and all the fantastic prizes we are offering would not be possible without our awesome sponsors***


CardMonkey (http://www.cardmonkey-business.blogspot.com)/
KinderStampO (http://www.kinderstampo.com/)
My Pink Stamper (http://www.mypinkstamper.com/)
Pink Cricut
My Creative time (http://www.creativetimeforme.com/)
Karber Design (http://karbers.blogspot.com/2011/07/karber-designers.html)
Scrappy Moms Stamps (http://scrappymoms-stamps.blogspot.com/)

To be eligible for a prize:

**Leave a comment on Day 1 or Day 2. (Fri./Sat.)

**Leave a comment on Day 3 or Day 4. (Sun./Mon.)

**Thank a sponsor/s for sponsoring our hop by clicking on the icons listed above and leaving a message on our sponsor/s blog saying "What a good GHOUL you are for sponsoring the Labor of Love Halloween Hop, happening today."

**Link a Halloween card to Funky Cards at the link provided at the end of the hop and donate it to the children at Pediatric Specialty Care.  You can link your card HERE!

We will be using Random Organizer to match our prizes to our winners. You can enter all of the categories 1-4 and be eligible to win every prize:) There may be more than one winner in some categories and the more comments you leave the better your chances!!

Now on to my banner.....


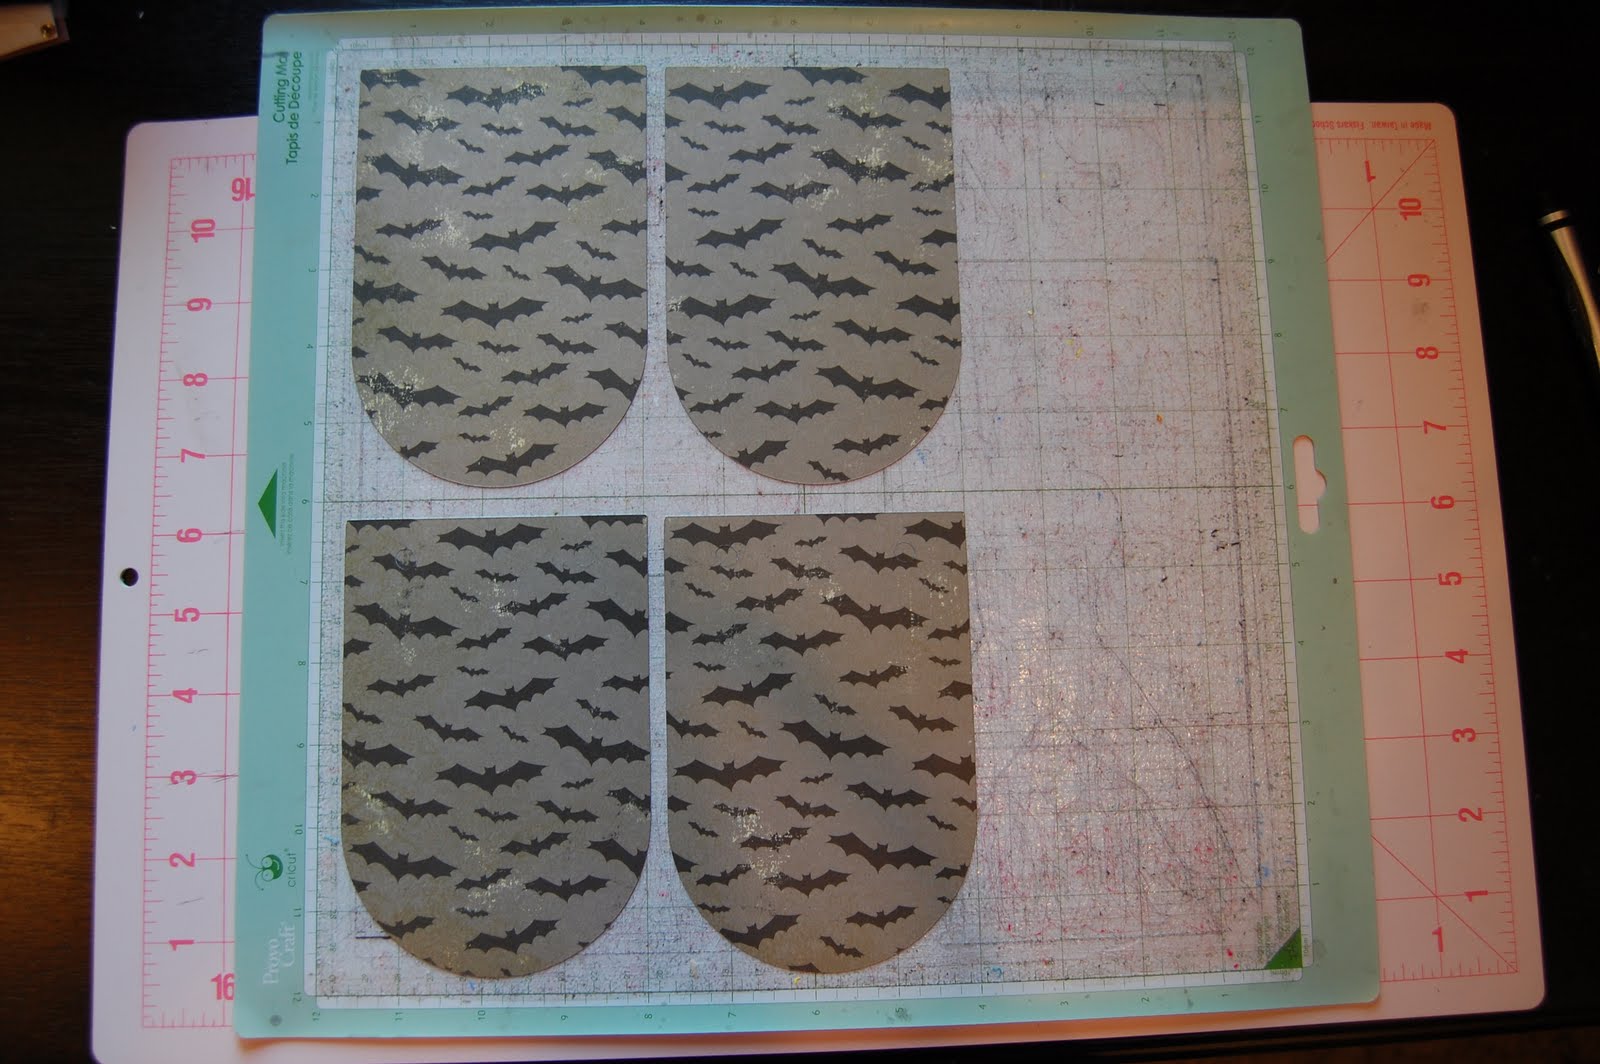
I started with this banner shape from Birthday Bash sized at 3.98w x 5.50h.

I cut the pieces out with this batty paper.

I cut out some pumpkins at 3.35 inches tall from Pumpkin Carving with this orange checked paper.

 
Then I had some fun!  I cut out some hats from several cartridges so the pumpkins could wear costumes!!  I found them on Everyday Paper Dolls, Paper Doll Dress Up and Happy Hauntings.  I used the pumpkins as my guide to size them.
I put some scraps on my mat to cut out the hats.

Here are my hats!

I snazzed them up with stickles.

I put green stems on my pumpkins with stickles.

I took purple acrylic paint and painted the edges of my banner.
I added these circles from Elegant Edges (cut at 4.79w x 4.57h) behind the pumpkins.  I cut out the letters from Happy Hauntings at 1.5 inches.

Here you can see some of the hats!


I hope the kids and their families like my banner!  I wanted it to be more cute than scary!
I have a little of my own Blog Candy to share with you also!!  In order to be eligible to win, you need to "trick or treat"!  Leave a comment and tell me about a Halloween or Fall  memory.  If you like my work become a follower.  It is helpful if you provide me a way to contact you if you win the treat!!

Thank you for stopping by and supporting a great cause!!!  Your next stop is my good friend Bobbi Jo at SweetSassyDiva!