Copyright Information

Thank you for stopping by my blog! I hope you enjoy the things that I create and share! I do have a copyright on my original creations (see logo on my sidebar below).
If you create and post a creations based off of mine, please refer (with a link) back to my blog. Please do not use my ideas for files, profit or for contests. Thank you!


My Craft Goals for 2015

My Goals for 2015:

1. Update my goals for 2016 in January of 2016 :)
2. Maximize my crafting time!
3. Keep plugging away at scrapbooking photos!!
4. Learn how to Heat Press!!
5. Have fun!


Showing posts with label Nursery Tails. Show all posts

Tuesday, November 12, 2013

Baby Mini Album


I am so excited to be featured at The Buckle Boutique Blog today!!!

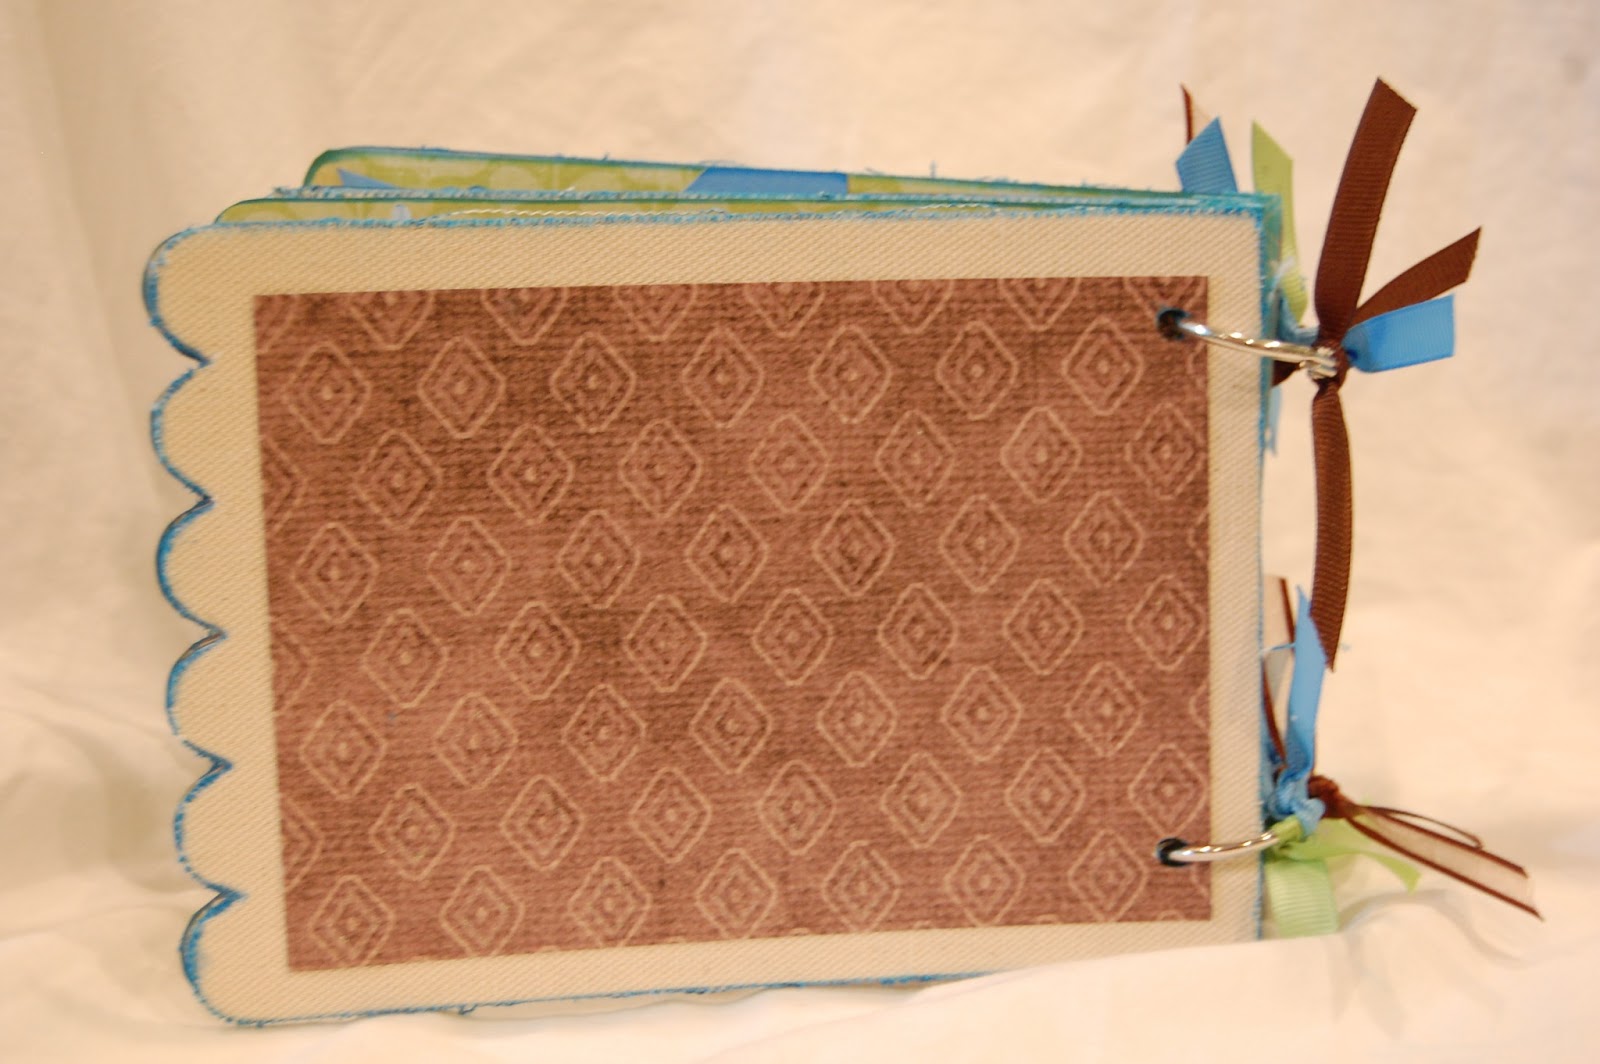
I made a baby mini album to give as a gift.  I cut 4 pieces of chipboard into 5x7 rectangles for my pages.  I covered each page with scrapbook paper and adhered them with ATG tape.

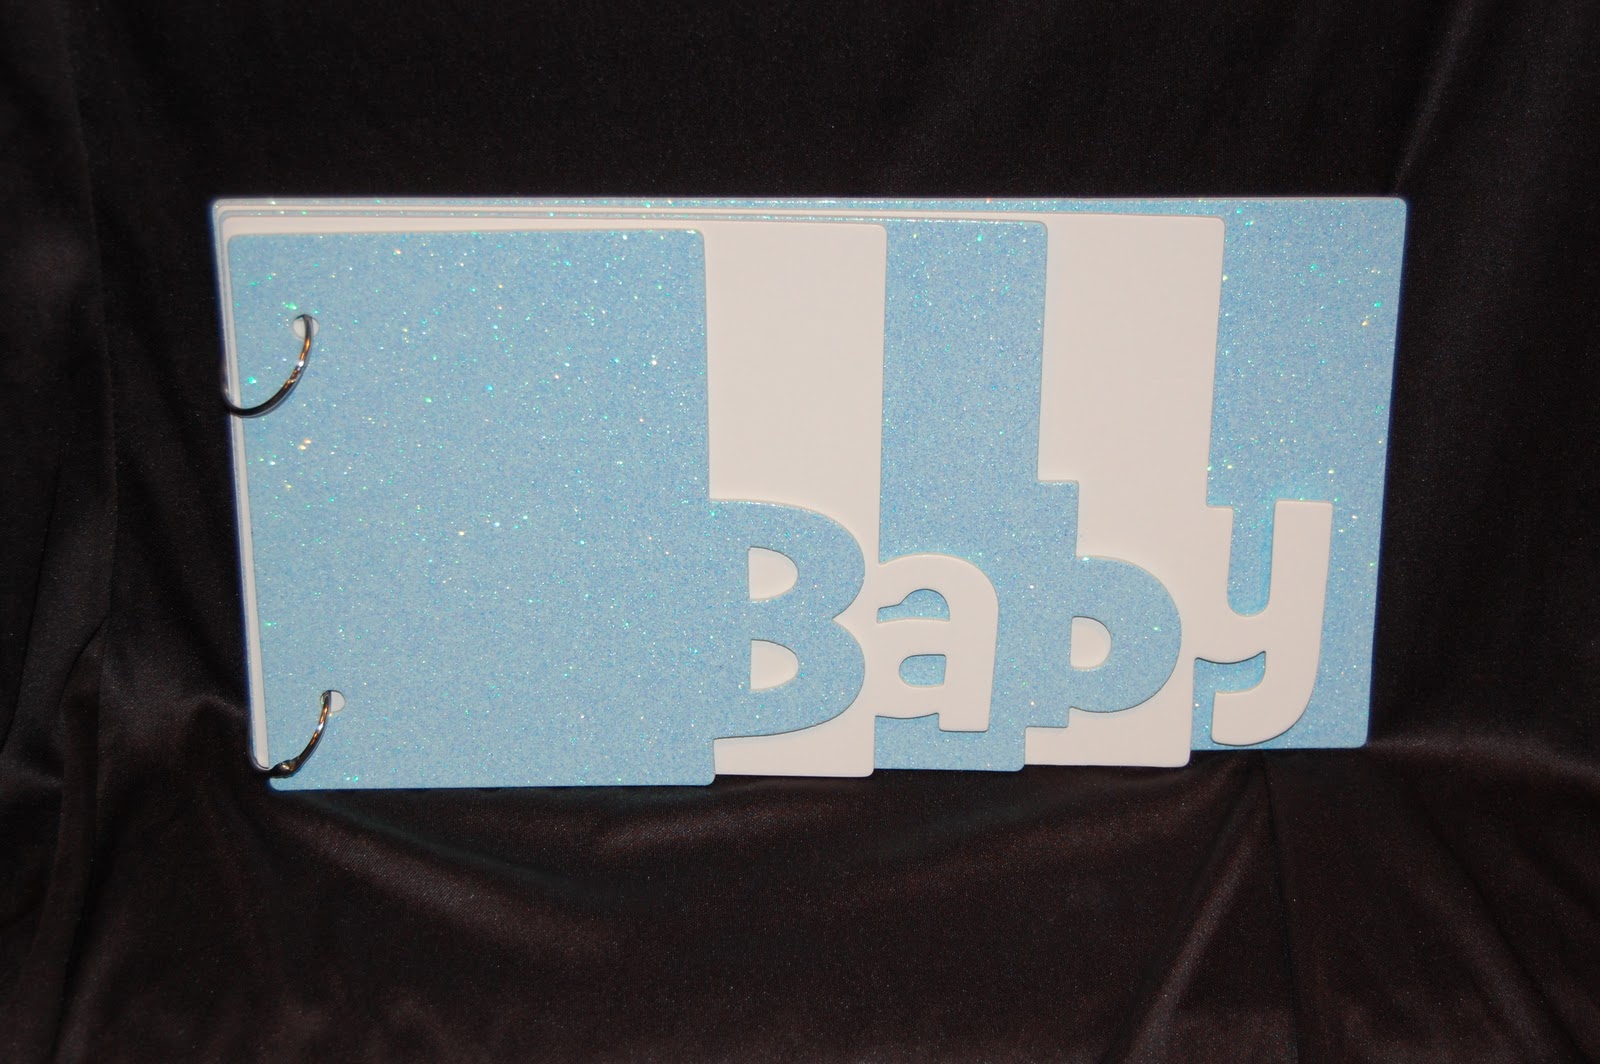
I used Rhinestone Adhesive Sticker Sheets from The Buckle Boutique for "baby" on the cover.  You can get more information (or purchase some) HERE.

These are awesome - you can cut them in your Cricut Machine, Pazzles, Big Shot, Cuttle Bug and more!  The crystals are gel so you can totally cut on a curve!!

I use my Cricut to cut my letters.  I used my Gypsy to reverse the letters (you want to cut the paper backing side not the gel crystal side) and used my Deep Cut blade set to 5.  I just popped them out of the cuts and peeled off the paper backing!


I used images from the Nursery Tail cartridge and my Cricut Imagine for the embellishments.

I cut my photo mats to either 4.25 x 4.25 or 4.25 x 6.25 to fit photos.  I pop dot the embellishments in the corners to mom can slide the corner of the photo under.


More from Nursery Tail.


These cuts came from the Online Silhouette Store.  I put a pocket in my mini albums so mom can journal and add extra photos inside.


I used my Bind-It-All to bind the album.

I just love the sparkly title of my album!!!

The Buckle Boutique's Link Listing
The Buckle Boutique's Website . . . click HERE
The Buckle Boutique Blog . . . . clickHERE
Facebook Page . . . click HERE
Twitter Page . . . click HERE
Pinterest Page . . . clickHERE


Monday, July 22, 2013

Froggie Gift Bag (Cricut DIVA)


Cricut DIVA Lori here with a fun gift bag.  I used my Cricut Imagine and Nursery Tail cartridge to make this cute gift bag for my friend's baby boy!

I print and cut out the image at 5.5 inches and 2.5 inches.  I inked the edges with Vintage Photo distress ink.


I cut a brown mat and used some washi tape to make a side border.  I put two pieces of tape side by side.

I adhered the brown paper to a kraft gift bag.  I then adhered the frog image to the brown paper.


I cut a piece of kraft cardstock to 3x6 inches and folded it in half to make a gift tag.  I trimmed the brown paper to 2.75x2.75 inches and put one piece of washi tape on the side.  I adhered the paper to the front of the card, and the frog image on the paper.  

I punched a hole at the top corner of the card (by the fold) and tied the gift card to the handle with some hemp cord.


Here is a super cute gift bag with matching gift tag!

Come over to CricutDIVA to see my and my DT Sister's cricut creations!!


Monday, May 13, 2013

Baby Boy Mini


I hope all of my mom and grandma friends had a wonderful Mother's Day yesterday!!!

A friend recently had a baby boy and I made this mini for her.

I started out with a chipboard album from Michaels that was burlap on one side of each page.  I flipped every other page over to have a burlap cover and back, as well as the middle two pages both burlap.

I cut out the boy pieces from my Cricut Imagine Nursery Tails cart at 2-3 inches each.

I painted the edges of the book pages with a bright blue and inked the images with the same color blue ink pad.


I covered these pages with a green leaf paper from my stash.  I cut out a star from George and trimmed off the pieces that hung a little over.  I included a photo mat on the next page for a crib photo right next to the key information (height, weight, length and date).  I included a little twine.


I used a brown patterned paper for photo mats and pop dotted these baby boy images to the edges.


I like to make a pocket in all of my mini albums and add tags and small pieces of matching papers for additional photos and notes.  I used my ATG gun to adhere the sides and bottom of the pocket to the page.

I added another photo mat and image to the last page.


I put some brown paper on the back of the album and tied ribbons to the rings.


This mini album can be used as a brag book for mom or grandma!!

I am sharing this project over at The Bug Bytes today also!!


Saturday, April 27, 2013

Beautiful Bling Blog Hop Baby Girl Mini


Hello and Welcome to the Beautiful Bling Blog Hop!!

If you are looking for the Felicity's Be A Blessing Blog Hop, please go HERE.


Welcome to the Beautiful Bling Blog Hop!!  April's birthstone is a diamond, so we added some bling to our projects!  In this hop, you will see some BLINGY projects with rhinestones, stickles, glitter and more!!!

You should have arrived from Tricia's blog.  If you found me first, hop over to the beginning and see Melanie so you don't miss anything!!

Here is the complete line up in case you get lost!


And now on to my project:


I used Nursery Tails and my Cricut Imagine to print and cut out the baby girl pieces.

I bought this chipboard album at Michaels.  One side of each page is covered in canvas, the other side is blank chipboard.  I flipped every other page so the canvas was next to canvas.


The blank pages were covered with a pink cardstock.  I used some patterned paper to create photo mats and a pocket.

The bib and bottle are pop-dotted on the corners of the 4.25 x 4.25 inch square.  I did not stick down the pieces that overlap the mat so a photo can go under them.


You can see that I inked the edges of the pages in bright blue. 


I added a butterfly from my stash on the back.  The Baby is from Cricut Alphabet.


I added my bling to the cover.  I put gems on the bodies of the butterfly and dragonfly as well as BABY.


Thank you for stopping by!!

Your next stop is Pamela!


Tuesday, October 16, 2012

Hope Breast Cancer Awareness Card (Sweet Sassy Diva)

This week at Sweet Sassy Diva's Blog, we are celebrating Breast Cancer Awareness.  I wanted to make a fun window card with my Gypsy.  As a mom of all boys, I have a very limited supply of pink paper...thank goodness I have a Cricut Imagine!!

I found this paper pattern on Nursery Tails.  It reminds me of boobies!!!  That is what we are celebrating here ~ healthy boobies!!!  We are running, racing, praying, sharing and pledging money all for boobies!  Now where was I??  Oh yes, paper.  I used this paper for my card base.

I used two frames from Gypsy Wandering sized at 4 inches each.  I hid the inside cut on one of the frames with Hide Contour.

I used the bra from Forever Young.  I hid the panties as I just wanted the bra.  I sized the bra to 3 inches.  I put one bottom layer of the bra on the same mat as the card base and hid all of the inside cuts.  I centered the bra in the oval window and welded the three pieces all together to create my card base.

Here it is all cut out of my boobie paper!

On a separate Gypsy layer, I put the two layers of the bra.

I cut out the pieces in pink and white cardstock.

I added some sparkle (stickles) and a flower.  Every girl needs a little bling!

I am mainly a scrapbooker, so I don't have many stamps.  I did find one that would work with my card on PinkByDesign Just My Ticket that said Hope.


It is my hope that we find a cure for breast cancer very soon.  It is also my hope that every person (men get breast cancer too) who has breast cancer or who will get breast cancer will kick it's butt!!!

Wednesday, January 11, 2012

Butterfly Kisses Card


For my project today, I made this card for my friend who just had a baby girl.  She is not a girly girl and did not want the nursery in girly colors, so I added brown ribbon and mushrooms. 


I dusted off my Cricut Imagine for this project!   I took some plain vellum and printed a pink mushroom pattern on it.  


I used Nursery Tails for the mushroom border and the butterfly kisses image.  My Gypsy and Imagine do not play nice and I have not really mastered Cricut Craft Room, so I had to guess on the sizes of the images.  I felt like I was crafting blind!

I also try to print and cut out several items so I don't waste paper.  The duck scene is for my kid's bathroom!


Next I selected a 5x7 rectangle and flood filled it with the pink mushroom paper background.  This worked as I did not know the exact size card base I would need.  I could not use the Print Paper option as it will print a 12x12 paper and my vellum is 8 1/2 x 11.


I printed the vellum and let it dry, then trimmed it to fit my card.


I adhered the brown crinkle ribbon on the front of the card.  Next I covered the ribbon with the mushroom border.

I put a strip of adhesive on the top of the border (where the tied ribbon would cover) and put adhesive where the butterfly kisses image would cover and glued the vellum on.  

I put a tiny bit of adhesive on the top corners as well.  I adhered the butterfly kisses on the vellum.  I tied the bow and used a glue dot to hold the bow in place.


I have not used vellum in a long time as I have (still) not found an adhesive that doesn't show through.   I would love to know if you have found an adhesive that doesn't show through!!


Saturday, December 25, 2010

Imagine ~ A Baby Book

I love making gifts for my friends for Christmas.  I made two of these books for two new baby boys in my life!!!  One is starting in my daycare next month with his older brother and sister.  The other is being born on Tuesday to my niece's "Aunty Dawn" (my SIL's sister).  So excited to have two new babies in my life!!!! 
I went to CKC Kansas City this October and picked up two of these chipboard books.  The blue pages are glittery.

I cut out some baby boy images from my Nursery Tails cartridge on my Imagine.  I added some stickles because even little boys need some fairy dust!!!

I added in some ribbon and buttons and Martha Stewart felt stickers.  I left some spots for photos so all mom has to due is glue them in the book!


Here is another glance at the completed book from the front.  I had so much fun making these albums!!!

I hope you had a wonderful Christmas!!!!