Copyright Information

Thank you for stopping by my blog! I hope you enjoy the things that I create and share! I do have a copyright on my original creations (see logo on my sidebar below).
If you create and post a creations based off of mine, please refer (with a link) back to my blog. Please do not use my ideas for files, profit or for contests. Thank you!


My Craft Goals for 2015

My Goals for 2015:

1. Update my goals for 2016 in January of 2016 :)
2. Maximize my crafting time!
3. Keep plugging away at scrapbooking photos!!
4. Learn how to Heat Press!!
5. Have fun!


Showing posts with label Square 1 Masterpiece. Show all posts

Monday, November 11, 2013

Shadow Box Gift (Sewing)

Hello and Happy Veteran's Day!  I want to say thank you to the vets and their families who fight (and support those who fight) for the freedoms that we enjoy!!

This is Lori from Scrappin' My Stress Away and I am excited to be on The Bug Bytes blog today!!

I have been working on some Christmas gifts for family and friends.  I saw an idea on facebook that was perfect for my step-mom who loves to quilt.
I purchased this phrase from the Online Silhouette Store.  Using the vinyl settings, I cut it out in red vinyl.

I purchased an 8x10 shadow box at Michaels.  I transferred the vinyl to the glass of the shadow box.

I found this image online:
I printed it on a piece of Square 1 Masterpiece 8 1/2 x 11 printable adhesive back fabric.  I trimmed it to 8x10 and adhered it to the back of the shadow box.  Good thing it is repositionable since I put it on upside down (so the hooks on the back would not work if she wanted to hang it).  I was able to peel it off and put it on the right way!!

This product is a safe alternative to vinyl and easy to work with.  If you want more information on it or want to order some, just go HERE.
I used glue dots to adhere some spools of thread from my grandmother's sewing kit on the inside. 
I included a card of buttons and a green wrapper from a needle along with another spool.  Since this gift is staying in the family, I did not mind using my grandmother's pieces.  Similar items can be found at flea markets.
I was really happy with the way it turned out.  I like the red because it will match her sewing room.

Thanks for stopping by today and I hope I have inspired you a little!


Monday, October 28, 2013

Trunk or Treat

Happy Halloween Week!!!!  Halloween is my very favorite holiday!!!!

My son's elementary school hosted a Trunk or Treat Event on Friday.  It was super fun and I decorated my car with a Pirate theme.  

I used Square 1 Masterpiece Glow in the Dark Repositionable Adhesive Backed Fabric for the pumpkins.  I did not want to carve them yet so they don't get "yucky" before Halloween night!!


Here is my car right after I set it up.  I made a treasure box and added some pirate things from Tanner's room.  I purchased the banner at Hobby Lobby.


Here is my car lit up!!  I had so much fun!!!

Friday, October 18, 2013

It's All About ME!!!


Hello -  I am so excited to host my very first Challenge at Let's Scrap!!!  I am a new Design Team Member and my challenge is All About ME!

For this challenge, I want you to scrap YOU!!!  We always seem to scrap everyone else!!!  You can use a photo of yourself, or something (not another person though) that is super important to you.  This can be coffee, diet pop, gardening, crafting - something that represents YOU!!!  You can use this or another sketch from Let's Scrap found HERE.

If you have never been to Let's Scrap - it is a wonderful ning group of talented crafters from all over the world!!  Consider stopping in and checking it out!  I have created 7 layouts in 3 weeks!  It is a great motivator to get caught up!!


I chose this sketch because I wanted to use one large picture and several small ones.


I used these images from the Silhouette Online Store for my layout.  I switched the butterflies for flowers that I had on hand.


I started with this awesome Graphic 45 paper!

I printed my photo on Square 1 Masterpiece repositional adhesive fabric.  I love the way it prints photos from my computer!!

The 2x2 photos were printed from my Zink hAppy!

I have mini pictures of Diet Dr. Pepper, Pedicures with a friend, scrapbook convention with a friend, my two favorite vacations:  Mexico and Disney, and sitting at the pool!


I added these black flowers with clear gems.  A little washi tape shows my love of music and polka dots!


My name is my title - of course!

You can also see the tiny black and crystal flowers I used!


I had a lot of fun with this layout.  I did not have a lot of time (we were packing for Disney) and used my computer and Zink to help me with my photos!  I love the way it turned out!!

Thanks for joining me today ~ I hope you have a scrappy day!!!

Tuesday, September 17, 2013

Pals - First Day of School


Today my project is being featured at Frosted Designs!!


I created a layout of Tanner and his best Pal Jadon on the first day of school.  Members of the High School Band (who went to our elementary school) perform a few songs the first day of school each year.  It is kind of a pep rally for the kids!


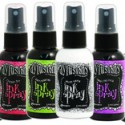
I added a little flair button, some chipboard (with an arrow sticker) and I used dylusions ink (Cherry Pie) on a punched circle as well as the chipboard.


I tucked a lime green arrow at the bottom corner of the picture of the boys.  I love how it matched the background paper!


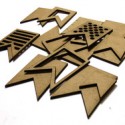
I added some chipboard banner flags under the band photo - it is hard to see in the photo but there was a member from the flag core performing too!


I used my cameo and Square 1 Masterpiece for my title.


I almost missed this photo opportunity as Jadon was in a different area before school.  Right before the bell rang, he and his mom braved the crowd and joined Tanner!  I try to take a photo of them every year!

For more information on the products used from the Frosted Design Store:


Monday, September 9, 2013

Halloween Decor


I know I am a wee bit early for Halloween, but Halloween is my very favorite holiday!!  I love to decorate - well everything Halloween!!!

Today I am excited and honored to be featured at The Bug Bytes!!!


I found these 8x8 metal tiles at Michaels in the Dollar Bin for $2.  They were 40% off and I was prepared to sand and paint over them.  To my great surprise, the design was a sticker that was super easy to remove!!!  I went back and picked up a couple more...well maybe more than a couple!!


I designed this myself on my Cameo.  I saw something similar on Pinterest, but I downloaded the font and stretched an image from the Silhouette store.  I always feel like I am cheating using someone else's designs from the Silhouette store as I love creating my own things.  I am just not as savvy yet on the cameo as I am on the Gypsy!!


I cut out my design in vinyl (for some reason I have a TON of lavender vinyl) using the vinyl settings on my cameo.  I also keep a separate blade for vinyl set to 2.  My cardstock blade is set to 3.  This extends the life of my vinyl blade.


After burnishing the vinyl, I peeled it up using transfer tape.


I did not take enough pictures of each project so excuse me as I jump back and forth with designs to keep the tutorial making sense.  My second project was made using an image I purchased from the Silhouette store (above) and I cut it in Square 1 Masterpiece (instead of vinyl this time but used the same settings and blade).


So, after burnishing and getting the vinyl (or square 1) on the transfer tape, I burnished it down onto the metal tile.


I painted over the vinyl with white acrylic paint.  I painted 2 light coats.  I wanted a streaky chalkboard look.


I peeled the square 1...


and vinyl off the metal.


I painted a bit of black on the edges.


I added some black dots to give movement to the witch.

I spray sealed them so the paint would not chip off and they are ready to go!!

Thanks Pam for having me over today!!!   I hope you have a wonderful fall!!!


Wednesday, August 28, 2013

Splitsville Layout (Square 1 Masterpiece)


I am finishing up my Disney 8x8 album.  Before we go to Disney, I make an autograph album.  As Tanner gets older, he is less interested in standing in line for Character autographs and more interested in riding rides and doing activities.

We also try to do one new activity each time we go and this year we are doing two!!  Riding in a hot air balloon (you can see my Hot Air Balloon page HERE) and going bowling in Downtown Disney at Splitsville.

I used a great product for my titles - Square 1 Masterpiece Repositionable Adhesive Backed Fabric.  This is a very safe alternative to Vinyl (which is full of PVC) and can be printed on, painted, punched and cut!!


You can find out more information or order some of this HERE.


I googled Splitsville and found a photo of the outside of the bowling alley.

I printed it out onto Square 1 Masterpiece Repositionable Adhesive Backed Fabric.  I let the ink dry for a minute or two and trimmed it with my paper cutter.


Here is a close up of the printed photo - it is very vibrant.  I am low on black ink and was worried it would not come out.


I stuck the photo down onto a piece of red carstock.


I used Nifty Fify and my Gypsy to weld the word Splitsville and cut it out with Square 1 (the same sheet that I cut the photo out of).  

I used the same settings as when cutting vinyl (speed 3, pressure 3 and blade 3).


I weeded the extra pieces with my fingers.


I used transfer tape since I wanted the title to be straight.  The "S" was not welded to the rest of the word and I wanted it lined up properly.


I burnished the image and peeled away the transfer tape.


I wanted to add something next to the photo, so I used the Split from Nifty Fifty.  Again, I cut it out of Square 1. 


This time I did not use transfer tape since it was all one piece.


I stuck it down like a sticker.


I did not cut the additional layers....


I used Stickles instead!!


Here is a sneak peek of the photo and dried stickles.


I love this layout!!  I had one piece of this bowling paper left over and I am really a 2-page scrapper.  I cut the paper to two 6x8 pieces and mounted on and 8x8 piece with a black border.  I added the red mats (4.25 x 6.25) for the photos I am sure I will take!!

It will probably be hard to select just two!!

Thanks for stopping by today!!