Copyright Information

Thank you for stopping by my blog! I hope you enjoy the things that I create and share! I do have a copyright on my original creations (see logo on my sidebar below).
If you create and post a creations based off of mine, please refer (with a link) back to my blog. Please do not use my ideas for files, profit or for contests. Thank you!


My Craft Goals for 2015

My Goals for 2015:

1. Update my goals for 2016 in January of 2016 :)
2. Maximize my crafting time!
3. Keep plugging away at scrapbooking photos!!
4. Learn how to Heat Press!!
5. Have fun!


Showing posts with label Disney/Pixar Cars. Show all posts

Tuesday, October 15, 2013

Peace Bling Clipboard (The Buckle Boutique)


Today I am a Designer at The Buckle Boutique BLOG!  I have a fun little project that I hope inspires you!!!


I really like clipboards.  I am not sure why, as I don't typically use them but when I saw this mini clipboard at Michaels I had to get it!!


I added some blue Dazzling Diamonds to the metal.  The blue was a perfect match!  I tied a tulle bow to one side.


The front was pretty jazzed up, but the back was plain white.  I can fix that with my Gypsy and Cricut!!


I used the Peace Sign from Disney/Pixar Cars and sized it to 4.58 x 4.41 inches. 

I used my deep cut blade set to 6.  I did not multi cut.  I put the Dazzling Diamonds face down on my mat.  Note - I did not reverse the image as it is symmetrical.


Now the back is as pretty as the front!

My daycare kids love using little clipboards and the girls were drooling over this one!!!

The Buckle Boutique's Website . . . click HERE
The Buckle Boutique Blog . . . . clickHERE
Facebook Page . . . click HERE
Twitter Page . . . click HERE
Pinterest Page . . . clickHERE

Friday, September 20, 2013

Peace Love Mickey Clipboard

Welcome to the Day of Peace Blog Hop with Connie Can Crop and friends


Today we invite you to come check out this great group of crafters who will be showcasing cards, layouts, or projects all about today, the International Day of Peace.

The United Nations' (UN) International Day of Peace is celebrated on September 21 each year to recognize the efforts of those who have worked hard to end conflict and promote peace. The International Day of Peace is also a day of ceasefire – personal or political. . 

Connie Can Crop is the  first stop on this very important Blog Hop.

This is a one day blog hop and we appreciate your leaving a comment to encourage all my fabulous crafty friends to continue sharing their ideas and creations.  

We have an awesome sponsor and giveaway for this hop!


LoveBug Creations is giving away a $10 gift certificate to one lucky winner!! Woo hoo!
You can visit their store here.
Check out what the CT is up to on their blog.
And even like them on facebook for more fun.

  So what do you need to do to win? Easy... become  a follower of each of the fabulous blogs in this hop and leave each of us a  comment letting us know what you like best about our projects. 
Then come back to Connie Can Crop and post that you followed the rules.
You will have until 9:00 pm Sunday to finish the  hop and leave your comments. Winner will be announced on Wednesday at Connie Can Crop.

Be sure to follow everyone and leave a comment  along the way!

 Are you ready to spread the love?


We are celebrating at Walt Disney World today so it is only fitting that I have a Disney project!

Peace, Love and Mickey!!

I make a Disney Autograph album every time we go - this is the album for this trip:


 This 8x8 album has page protectors in the album, so I have to slide out the pages for autographs.  I am bringing a clipboard along to make it easier for the characters to sign the page.

I originally cut out the Disney 2013 in black vinyl, but thought the white would look better on the album cover.  I used the black vinyl on the back of the mini clipboard.


I used a tiny bit of black vinyl to mark the center of the clipboard. 


I put the vinyl on the back, leaving space in the center.


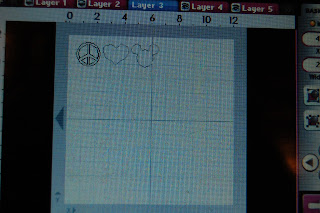
I put a peace sign from Disney/Pixar Cars, a heart from George, and a Mickey head from Disney/Mickey Font on my Gypsy.


I put some scrap vinyl on my mat and cut them out.


I put Peace, Love and Mickey in the center of the clipboard.


I painted the edges of the clipboard with red paint.  I added some Disney Washi Tape and tied some red and black ribbons to the clip.


I hope you have peace in your life today!

 Up next is ALICIA!

Here is our complete line up in case you get lost along the way.

7. Miranda - www.nanasscrapspot.com 
8. Sarah - itswhatkeepsmesane.blogspot.com

Tuesday, July 30, 2013

Shot Book


I recently turned 21.

Well, 21 times 2 plus 3!!

My friend Kylie has a friend who is turning 21 in August and asked for my help making her Shot Book.  Silly me, I thought she meant an immunization book or even a photo shot book at first.

When she told me about all the shots and activities they had planned and wanted scrapbook pages made - I was like YES that sounds like fun!!!  Then I felt a little tipsy just thinking about all that alcohol!!

I designed and cut out the paper and vinyl, but Kylie put everything on paper (including the gems and stickles) except for the vinyl on the cover.  I have Kylie's permission to put the pages we designed and made on my blog.

I used my Gypsy, Cricut and my Cameo!


The fireball is from the Silhouette store and is a baseball with flames.  We deleted the "laces" layer.

The font is Hannah Montana for all pages unless noted.


The hand came from A Child's Year.  I did a search on Pinterest for Spanking looking for an image of a hand to trace.....found a lot of interesting images but none were appropriate!!!


Scooby Snack was fun!  The bone is from  A Child's Year and the peace signs are from Disney/Pixar Cars.  Loved the bright colors - our inspiration was the Mystery Machine!


Kylie put individual gems on the letters!!


The lips are from Tags, Bags, Boxes and More 2.  There is a giant set of lips under the photos.  Kylie pop-dotted the smaller lips around the page.


This page was challenging.  This is the page where she will take a picture with the bouncer and her ID.  We searched for a body-builder image to represent the bouncer with no luck.  

We created a Security shirt instead - totally Kylie's idea.  We used Impact font (with the Cameo) and the shirt from the Silhouette store.  The drivers license is from Locker Talk.  


The bomb came from Indie Art (the third time I have ever used this cartridge). 


The beer mug is from the Silhouette Store.  I embossed the foam!!  The font is Blackletter.


I welded a border with a camera image from Makin' the Grade.  The cursive font is from Quarter Note.


This font is Liquidism from dafont.com and cut with my cameo.  The shot glass was purchased from the Silhouette Store.


I used vinyl to decorate the cover of the album.  The font I used is from Art Philosophy.


On each page
The F: stands for FROM
The T: stand for TIME
and the X: is for Dana's signature

Kylie created half of the album.  Dana's sister made the other 10 pages.  I am happy to hear Dana's mom will be the designated driver!!  I sure hope it is a birthday to remember!!!

My sister-in-law is turning 40 next month....I told her I would make her a Shot Book.  She politely declined, especially after I suggested 40 shots for 40 years.  Clearly I am not a drinker!!!!


Monday, March 14, 2011

Car Games


This year, my son Tanner goes to PreK every afternoon.  I spend a lot of time in the car!!  We started out the school year by playing a lot of car games.  We played Juicy Fruit (yellow cars) and PT Cruisers and slugbugs at first.  Then the boys created some of their own versions.  Ford, Green Car, Mazda and other random car words frequently came from the back seat.  Also, I was not allowed to play :(
I wanted to create a scrapbook page dedicated to the Car Games.  I started with Don Juan and Paper Doll Dress Up and welded words and cars into a border.  I used Hide Contour to erase the inner cuts on the cars on the border.
I separated my pieces by color on my mat and cut out the shapes.
As you can see, my yellow paper slipped (darn Imagine mat is not very sticky) so I copied the two cars onto a new layer and re-cut just the yellow ones.


I was going to put black circles for wheels on the cars.  The PDDU car does not have layers, so I used George and Basic Shapes for a circle.  Once I cut the circles out, I realized they did not fit perfectly (not to mention that I lost one of them) so I scrapped the wheel idea.

I had this picture of Tanner and Jadon that perfectly fit in this 5.35" tall car.  I used Glossy Accents to make windows.  Once the windows dried, I used stickles to outline the wheel wells and door.

When I use Glossy Accents, I outline my shape and then fill it in.

It looks milky when wet.....
and clear when dry.  I did forget to come back downstairs as it was drying to pop the air bubbles.  The boys look like they have chicken pox!!

Here is a close up of the border.  I flipped some of the cars so they were driving in opposite direction.
I added a road from Disney/Pixar Cars in grey.  I cut out a second road out of yellow (I hid the dotted lines) to put behind the road.  I journaled on the road.

Thanks for visiting!  What kind of car games do you play?

Thursday, December 30, 2010

Speed Street

Here is my take on the Sketches In Thyme Challenge this week:

As you can see, I "boy-ed it down" quite a bit!  No pretty scallops or flowers over here!  I used some photos from the boys at an indoor race track in Arizona.  To make my tires and racing flags, I used the Cars cartridge.  In place of the pretty scallops, I ripped black card stock and used silver Tim Holtz alcohol ink to ink the edges.  I used Blackletter for the font.

It is hard to see in these pics, but I also used mycuttle bug with my tread embossing plate for my silver photo mats.

I saw the sketch challenge today and was instantly motivated to create this layout!!  Thanks Sketches in Thyme!!!