Copyright Information

Thank you for stopping by my blog! I hope you enjoy the things that I create and share! I do have a copyright on my original creations (see logo on my sidebar below).
If you create and post a creations based off of mine, please refer (with a link) back to my blog. Please do not use my ideas for files, profit or for contests. Thank you!


My Craft Goals for 2015

My Goals for 2015:

1. Update my goals for 2016 in January of 2016 :)
2. Maximize my crafting time!
3. Keep plugging away at scrapbooking photos!!
4. Learn how to Heat Press!!
5. Have fun!


Showing posts with label Calligraphy Collection. Show all posts

Monday, July 2, 2012

Baseball Glove Window Card


I am so excited to be the Guest Designer today at ShesASassyLady!!  Lori here from ScrappinMyStressAway with a fun window card.

Tanner's Coach Pitch Baseball season ended Friday night.  He got to play in the All-Star game which he called The All-Star World Serious!  Yes, serious ~ he has called the world series the world serious for years!!  This is the title of a near future layout!!!

***Side note:  we live near Omaha, Nebraska and get to visit the College World Series every year even if it is just to see the tents and shop.  We usually have baseball our own boys' baseball games to go to and can't always get tickets.  This year, we got to watch South Carolina's batting practice and Tanner got a baseball!*** 

  Back to Tanner:  He had a great year thanks to our two wonderful coaches.  He enjoyed playing catcher, first base, short stop and outfield the most!

I wanted to make a card for the coaches to say thanks.


I got out my Gypsy and got to work!
I found this window card base from Calligraphy Collection and sized it to 7.55w x 4.76h.

The glove is from Boys Will Be Boys and sized to 1.97w x 1.86h.  I hid the inside cuts and welded it inside the window. 

In another layer, I copied the glove and ball.  I added the baseball bat border (also from Boys Will Be Boys) sized to 3.39w x 1.16h.

I used the font from Varsity Letter and sized them to .88 inches.

I used cardstock to cut out all of the pieces.  I cut out the letters in red since we were the Reds!
I inked the glove, ball and bats with Vintage Photo ink.

I added a touch of red with the twine to finish it off.

This card is modified from a file I created last year.  My wrist is getting better - I can now cut simple cuts with a scissors YAY!!!  I have 5 more weeks of PT!!!  So grateful I can do some crafting, and so grateful that Sheila has me over today!!!


Monday, February 6, 2012

All Because Two People Fell In Love LO


Hi! Today is my day to Guest Design over at She's A Sassy Lady!!

I am so happy that my mojo came back!!!  January was a rough month for me.  We made the decision not to go on our annual family vacation with my two brothers and their families.  My brother has a work conflict.  We have been going for 13 years and this year was going to be our last one.  Not meant to be.  

Then my Uncle passed away.  He lives alone and was home by himself when he passed.  His good friends went looking for him a few days later.  Uncle Howie was the black sheep of our family ~ different from us.  He lived by himself on the river.  He had a simple life and as we went through his things it seemed to me that he had a great life.  I never really felt that way when he was alive because I kept comparing him to his siblings.

My mom (his oldest sister) died 23 years ago next month.  I was 20.  It was awful and I was angry for a long time.  She would have been an awesome grandma, but it was not meant to be.....  I grieved for over 5 years before it seemed to get better.  That scab was ripped open a bit when we went through Uncle Howie's photos and momentos.  I put together a board for his memorial which was held Saturday at his favorite watering hole ~ perfect place if you ask me!  

As I went through the photos, I came across one of a young couple and thought the man was my Uncle Mark (mom's other brother).  It was my grandpa and grandma.  They were sitting at a picnic table with a music box (their version of an ipod with speakers) and it looks like my grandma is playfully biting my grandpa's ear.  Not at all how she acted when I was around!!!  This got me thinking that if they had never met at the cafe where she worked as a waitress, I would not be here!!!  And just like that my mojo came back and the scab started to heal once again!

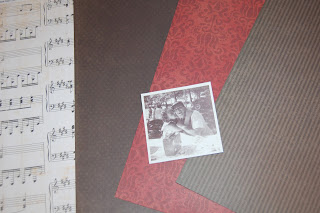
I started with the photo and some paper.


I saw a card on Pinterest that had the word LOVE on a mini banner and liked that idea.  I made a 2 Layer banner from Birthday Bash sized at 1.77 inches.  I got the font for "all because" from Art Philosophy and sized the letters to .85 inches.  I got the font for "two people fell in" from Nursery Rhyme and sized it to 1.15 inches.  I got the font for "Love" from Calligraphy Collection and sized it to 1.35 inches.

I cut out the scalloped flag in burgundy patterned cardstock, the top flag layer and "all because" in gold metallic paper, and the rest in black cardstock.


I used this shape from Lacy Labels at 10.38 inches.  I cut this out with sheet music paper that I found at Michaels.  This shape can also be found on many other cartridges.


I cut out a lacy mat for my photo that I found on Sophie (my grandma's name) at 4 inches.  The lace border is from Sophisticated.  I welded two together and sized them to .88 inches.  The swirls are from Heritage sized at .88.

Here is one of the mats with the cuts on it.

In order to make my title look straight and evenly spaced, I use the negative piece from my cuts as a template.

I adhere the letters and then slowly peel back the template ~ perfect every time!

Here is a close up of the burgundy patterned cardstock.  I punched out three circles, crinkled and inked them up and created a flower.  

I stuck a pearl to the center and used some black glittered chipboard flowers to accent it.

Here is my Love Banner all put together.

I curved the "all because" around the burgundy circle I added to the background.

Here is my completed layout of my Grandparents when they were young and first in love.  I am grateful they were!!  I am also grateful they jump started my mojo!!


Friday, January 27, 2012

Scrapbooking SOS 1st Anniversary Blog Hop


Welcome to Scrapbooking SOS's 1st Anniversary Blog Hop!  

If you are looking for the Cricut Craftin Friends Blog Hop, please go HERE.

You should have arrived from MARY.  If you stopped here first, please go to the BEGINNING so you don't miss anything!!


1. Michelle O'Driscoll  - ScrapbookingSOS.blogspot.com
4. Lori Apgar - http://www.scrappinmystressaway.blogspot.com ***HERE***
5. Pattie Beach - http://paperplates-pjbeach.blogspot.com/  ***NEXT***
8. Cindy deRosier - http://www.cindyderosier.com
9. Jean - http://pagesintime.blogspot.com
10. Marianne - http://mylifeincraft.blogspot.com/
11. Joyce (with a great sketch and challenge) - 1ashjoy.blogspot.com
12. Emily Kincke - http://emily.kincke.com/
13. Back to Michelle - ScrapbookingSOS.blogspot.com    

On to my project.....

I made a Magic of Winter 8x8 shadow box for my project today.  I used vinyl for the the phrase and cardstock for the snowman and banner.  I found my shadow box at Michaels.

When I use vinyl, I like to make the most of my cuts.  I have vinyl for a total of 5 projects on my Gypsy Mat.  

When I cut vinyl, I set my Expression to 3-3-3 (blade depth, speed and pressure) for a kiss cut.  This means I don't cut through the paper backing.  I use clear contact paper as my transfer tape.  Just make sure to de-stick it a bit on your pants first!

Here are my cuts.  For this project, I used "the Magic of Winter" phrase from Winter Woodland sized at 5.27w x 3.47h.

If you want to see some of the other projects with these vinyl cuts, you can go HERE.

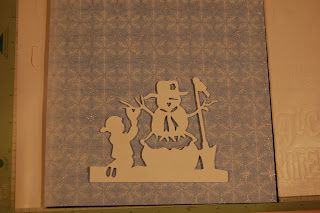
I placed the phrase up high so the snowman would be seen.  I used a piece of glittery snowflake paper as my background.
I cut out this snowman from A Child's Year in white cardstock.  I cut it out at 4.88w x 3.71h and pop dotted it on my cardstock.

I wanted a little something in the corner and decided to hang a mini banner.  I used Birthday Bash for my banner pieces and cut out the pieces at 1.35 inches.  I used Calligraphy Collection for the font and cut the letters at .92 inches.


I adhered the twine on the shadow banner flags and sandwiched them in between the layers.

I adhered the top banner flags on and my banner was complete. 

 I added some stickles on the bottom of the paper to make the snow sparkle.  I also added some red stickles to the snowman and little boy.

I pinned the banner in the corner and added some gems to the flags. 

I added some white tulle inside the shadow box to mimic snow.  I tied a sheer white bow on the top and used glue dots to hold it in place.

Thanks for stopping by today!!  Your next stop is Pattie!


Wednesday, January 4, 2012

Happy 2 Years and some Thank You Note Cards

Today is my 2 Year Blogversary.  I almost forgot about it to be honest.  I love so many things about blogging, but some of the details (number of followers, number of posts, anniversary dates) are not as much fun for me as the CREATING and SHARING my projects.  I want to thank all of my followers, subscribers and cyber friends for the motivation, comments, links and friendships over the past 2 years!!!!  When I began this journey it was simply a way to upload photos to the Cricut Message Board (the only way I could figure out how to that is).  Within one year, I was Guest Designing on three blogs and my readership steadily increased.  I have met several wonderful friends that I sincerely hope to see in person one of these days!!!

Thank you!!!

I made this Thank You/Notecard set for Toni who was my Cricut Circle Stocking Sister.  She sent me an amazing box jam packed with tons of scrappy things!!!  Instead of sending her just a Thank You card, I sent her a set!!


I was inspired by this lovely set that Sheila sent me!  I am linking my thank you cards up at Sheila's BLOG this week for her Thank You Linky Party!

To make the folder, I took a piece of kraft brown 8 1/2 x 11 cardstock and folded it in half (5 1/2) and then turned it and folded the bottom 2 inches.  This was configured to fit the envelopes which are 4 3/4 x 6 1/2.  You could easily adjust the bottom fold to fit a smaller envelope.

I cut a piece of purple cardstock (5 1/2 x 6) and used my Martha Stewart edge punch to punch the edges.  I cut a piece of patterned paper (5 1/2 x 4) to adhere on top of the purple cardstock.

I cut the circle with flourish from Home Decor at 1.94 inches.  I cut the letter T (for Toni) from Calligraphy (shadow) at 1.67 inches and "Thanks" from Calligraphy (shadow) at 1 inch.  I punched a 1 1/2 inch circle out of kraft brown cardstock with my Fiskars punch.

Here is the cover put together and the Thanks card.

\
I punched two holes in the folder with my Crop-A-Dile and strung some crinkle ribbon through.  I ran a line of glue across the front of the folder to hold the ribbon down.

Here is the folder all closed up.  Toni, your package is on its way ~ thank you for the wonderful gift!!!

To my followers ~ thank your for your kind and encouraging words these past two years!!!

Thursday, October 13, 2011

Fall Decor Blog Hop (Frosted Design Fancy Trim) 10-14


Welcome to the Fall Home Decor Blog Hop!!  This is also my project for this week at Frosted Designs Fancy Trim Challenge.  You should have arrived from NANCY.  If you found me first, please go to the BEGINNING so you don't miss anything!

I started with an 8x10 canvas and some fall scrapbook paper.  I adhered the paper to my canvas then painted the edges with brown acrylic paint.
I inked the edges of the paper with the brown paint as well.
I found this border strip from Elegant Edges cut it out at .88 inches.
I cut it out in orange cardstock.

I cut out this "So Grateful" from Calligraphy Collection last fall and ended up not using it.  I did not save the file, but I believe it was cut at 3 inches.  I cut it out in a brown shimmer cardstock.
I folded the brown ribbon and used glue dots to hold it in place.
I tied knots in my gold sheer ribbon to add some texture.
I added some gems to the bottom of the canvas.
The sunflower adds the perfect touch to my fall wall decor!  I have this hanging in my entryway.

I have a little blog candy today.  In order to qualify you just need to be or become a follower or subscriber, and leave me a comment with your favorite thing about fall.  Mine is the changing leaves and the smell of a bonfire.

Your next stop in the hop is MARIA Gonescraphappy!