This week the Fabulous Friday Challenge at Frosted Designs is to use flourishes. I have 3 posts for Friday, so I am sneaking this one in on Thursday!! I am not a girly girl and I have all boys so I was a little stumped at first, but I had a lot of fun with this one!!
I cut out this flourish from Creative Memories Reminisce Accents at 8.57w x 3.82h. I cut this out of stencil film that I found at Michaels. I cut with my normal settings and multi cut it 3 times.
My intent was to mask off the flourish, so I set it on my canvas.
I spritzed Glimmer Mist on the canvas.
I made some of my own Glimmer Mist. To see how I made my own Glimmer Mist, go HERE.
I kept adding more mist a little at a time.
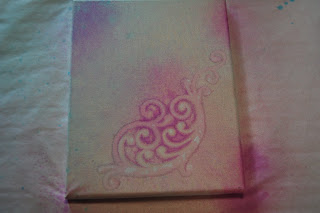
When I took my flourish off, I saw that the mist seeped under my mask a bit, but I still really liked the look so I kept going.
Here is my cavnas after it dried.
I cut out Adore from Home Decor at 6.09w x 3.04h in purple vinyl. In order to cut out vinyl, set your cricut on 3-3-3 (speed, pressure, blade depth) to just cut through the vinyl not the backing.
I take my "Dental Tool" to weed out the extra vinyl. It helps to roll up the vinyl as you peel it away so it doesn't stick to your project
Then I poke the inside pieces with my tool and pull them off the backing.
Here it is ~ now to get it off the backing.
I use Clear Contact paper. I cut a piece of it the same size as my project and then peel it off the backing. ****DIRTY IT UP A BIT ON YOUR JEANS so it doesn't still too well to the vinyl!! Rub the project so it clings to the contact paper.
Start at a corner and peel the contact paper up.
Place the contact paper on your project (easel) and rub it.
Start at the corner again and slowly peel the contact paper off. If the vinyl doesn't stick at first, just put it back and rub some more.
Vinyl is very forgiving if you are patient!!
Here is my canvas with the vinyl on it.
To finish it off, I added some flowers, pearls, tulle and a charm.
I "adore" my canvas and hope you do too!!


5 comments:
What a beautiful canvas. I love the sheen to it so sparkly. And I love flourishes. TFS
Lori, your canvas turned out gorgeous!!! Guess you have a little "girly-girl" in you after all!!! LOL!
ooooh, isn't THAT pretty!!!
Meanwhile, my reason for stopping by:
I'm just running through tomorrow's LABOR OF LOVE HALLOWEEN HOP hop line-up, sending reminders that we'll look for your posting tomorrow (Friday, 9/2) at 6 a.m. EST.
Kisses to you for the love you've shown to the children at Pediatric Specialty Care. Please let me know quickly if you have any issues with posting on time; this is a fantastic hop and we're looking forward to TONS of people enjoying it!
You can check out my sample posting at www.cardmonkey-business.blogspot.com. If you need anything, have any concerns, etc., please don't hesitate to contact me at cardmonkey@comcast.net. xoxoxo
Ellen
how VERY pretty!!!
parkernana5@cox.net
Lori your canvas is beautiful!!! Love the masking with the flourish!!
Post a Comment